- Getting Started
- Admin Panel
- Home Dashboard
- Account Check-up
- CRM
- Community
- Operations
- Customers
- Managing Customers
- Editing Customer Details
- Switch Customer Profile
- Granting Members Portal Access to Customers
- Revoking Members Portal Access to Customers
- Managing Customer Pin Codes
- Adding Files to Customers
- Messaging Customers
- Managing Customer Location Access
- Exporting Customers
- Customer Suspension
- Archiving Customers
- Restoring Customers
- Multiple Customer Accounts
- Company Structures
- Managing Members
- Managing Contacts
- Managing Customers
- Visitors
- Bookings
- Teams
- Check-ins
- Access Tokens
- Deliveries
- Help-desk
- Customers
- Finance
- Accounting
- Deposits
- Contracts
- Discounts
- Invoices
- Invoice Activity
- Ledgers
- Payment Methods
- Inventory
- Equipment
- Products
- Passes
- Resources
- Resource Types
- Pricing Resources
- Managing Resources
- Resource Categories
- Floor Plans
- Managing Floor Plans
- Nexudus Floor Plan Editor
- Floor Plan Items
- Managing Floor Plan Items
- Adding Floor Plan Items
- Editing Floor Plan Items
- Connecting Floor Plan Items to Resources
- Renaming Floor Plan Items
- Including Floor Plan Items in Proposals
- Assigning Floor Plan Items to Contracts
- Assigning Floor Plan Items to Customers
- Exporting Floor Plan Items
- Finding Floor Plan Item IDs
- Deleting Floor Plan Items
- Floor Plans
- Credits
- Plans
- Reporting & Analytics
- Reports
- Using Reports
- Reports Categories
- KPI Reports
- Churn Reports
- Occupancy Reports
- Checkins Reports
- Bookings Reports
- Events Reports
- Time Passes Reports
- Visitors Reports
- Desks Reports
- MRM Reports
- Members & Contacts Reports
- Surveys Reports
- Tasks Reports
- Products (invoiced) Reports
- Discounts Reports
- Finance Reports
- Finance - Liable Reports
- Deferred Revenue Reports
- Invoicing Reports
- Revenue Reports
- Revenue Exchange Reports
- Form Pages
- Nexudus Explore
- Revenue Forecasts
- Trends
- Reports
- Settings
- General Settings
- Website Settings
- Users & Security
- Billing & Payment Settings
- Features Settings
- Automation Tiles
- Communications Settings
- Embedded Pages
- Sensors
- Add-ons
- Security Options Settings
- Bulk Edits
- Members Portal
- Upgrading to the Latest Version of the Members Portal
- Members Portal Customization
- Understanding Members Portal Customization
- Recommended Image Dimensions for the Members Portal
- Members Portal Basic Customization
- Changing Your Members Portal Banner
- Members Portal Languages
- Using Your Own Domain or Subdomain
- Prevent Images Crop on the Members Portal
- Changing Your Members Portal Font
- Expand the product units drop-down on the Members Portal
- Redirecting customers to their home location when they try to log in via the network
- Changing Your Logo URL Redirect
- About us Page
- Members Portal Advanced Customization
- Members Portal Sections
- Managing Plans on the Members Portal
- Adding Visitors from the Members Portal
- Bookings on the Members Portal
- Accessing Bookings on the Members Portal
- Tracking Available Benefits on the Members Portal
- Teams on the Members Portal
- Managing Teams on the Members Portal
- Purchasing Products on the Members Portal
- My Building
- Team Attendance
- Members Onsite
- Desk Availability
- Tours
- Integrations
- Door Access Control
- Accounting
- Analytics
- Building Management
- Calendar
- Dropbox Sign
- Printing
- Wi-Fi Network
- Video Conferencing
- Single Sign-On (SSO)
- Room Displays
- Validation Rules
- Creating Validation Rules
- Validation Rule Formula Functions
- Validation Rules Examples
- Prevent plan signups if the plan is from a different location
- Bookings must have notes
- Prevent members from booking if they don't have booking credits
- Making Sure a Phone Number is Valid
- Visitors Can Only Be Members or Contacts
- Customers cannot sign up to the same plan twice
- Customer home location cannot be a network or subnetwork location
- Customers must buy a product to book a resource
- Customers Must be Over 18 to Sign up
- Preventing product sales in a location
- Preventing Plan Sales in a Location
- Access Cards Must Have Set Number of Digits
- Prevent bookings without an assigned customer on the Admin Panel
- Prevent new contracts in network locations
- Prevent product purchases if a booking is shorter than a set amount of time
- Prevent the creation of draft invoices
- Non-members must purchase a pass to book a resource
- Product can only be purchased by a team paying customer or a team admin
- Invoices cannot be issued from a network location
- Sensor Integrations
- Other
- Salto Gantner Lockers
- Nexudus Apps
- Nexudus Subscription
- Nexudus Reseller Program
- Tutorials & Webinars
- Navigating the Admin Panel
- Webinars
- Workspace Insights Made Easy: Mastering Nexudus Home Dashboards
- Sensory Overload: Maximizing your office potential with sensors
- Supercharge your help-desk using OpenAI x Nexudus ⚡
- Boost your customer retention with AI with Nexudus' Churn & Engagement dashboard
- Nexudus and HubSpot: Seamlessly synced, always
- Protecting your Nexudus account with Roles and 2FA
- Passport by Nexudus Version 3 - New features and white-label options
- Paving the way towards a contactless future
- Coworking: the Survivor of the Pandemic
- Automate Workflows Using the Zapier Integration
- API
- Legal
- ✨ Product Updates
- 28 Feb 2023
- 1 minute to read
- DarkLight
Managing Product Stock
- Updated on 28 Feb 2023
- 1 minute to read
- DarkLight
All products you create on the Admin Panel have no stock limit by default. This default setting works well for benefits and services you sell without hard limtations.
For example, daily access that you sell via a products that includes a day pass.
Stock limit can help you avoid overselling some products that have a definite stock, such as drinks or even parking spots. You can adjust the stock of any product from the Inventory section on the Admin Panel.
For example, you cannot have 10.5 or 30.25 units of a products.
Log in to dashboard.nexudus.com if you aren't already.
Click Inventory > Product.
Click the three dots icon to the left of the product you want to edit.
Click Adjust stock.
Add the number of units you want to add or remove from your stock.
You can only use whole numbers (without decimals).
Click Yes, do it to confirm.
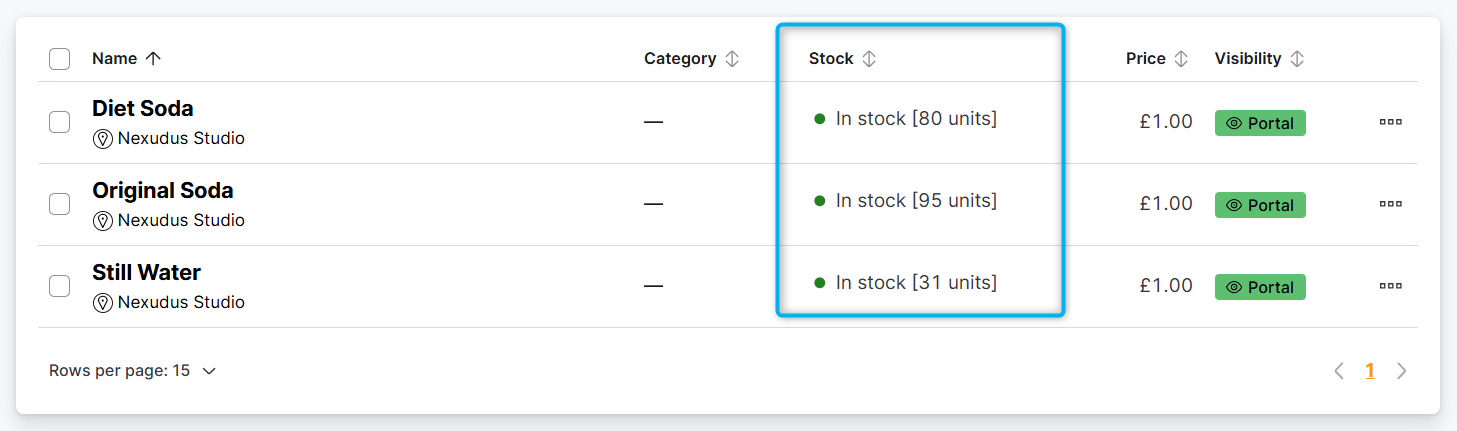
You've successfully edited your product's stock. You can check the product's total stock by clicking on the product and then on the Availability tab.