Defining individual resource rules lets you apply limits to specific resources if certain conditions are met, such as the type of customer making the booking.
For example, you can define a rule that only lets members book your conference room.
You can add any number of rules to your resources. If multiple rules apply to your resource, you can also define an evaluation order.
You can also check out our specific guidance on adding multiple late cancellation fees.
Log in to dashboard.nexudus.com if you aren't already.
- Click Inventory > Resources.
- Click on the relevant resource.
- Click on the Rules tab.
- Click on Add rule.
- Select Manual entry.
- Name your rule.
This will help you easily differentiate global and individual resource rules when determining evaluation order.
- Toggle on This rule is active.
- Define the Evaluation order.
Global resource rules can't have different evaluation orders for specific resources.
- Toggle on Stop the evaluation of other rules if this one is met if you want to ignore rules with a lower evaluation order than this one.
For example, a resource has three rules, and you enable this toggle for Rule 2. If Rule 1 is passed, Rule 2 is evaluated. If Rule 2 is passed, Rule 3 is ignored because the toggle blocks it from being evaluated.
You generally shouldn't enable this toggle for the first-ranked rule, as it will block all other rules from being evaluated.
- Click on the Conditions tab.
- Define the rule's conditions.
- Customer type
- Days and times
- Booking price
- Events
- Courses
Not sure which conditions you want to apply? Check out Resource Rule Conditions.
- Click on the Limits tab.
- Define the rule's limits.
- Custom message
- Available times and days
- Requests and cancellations
- Duration
- Members
- No-return policies
Not sure which limits you want to apply? Check out Resource Rule Limits.
Click the Save Changes button.
All set! Your resource rule is now active. Repeat the process for every rule you'd like to implement.
You can easily disable a rule you no longer use by clicking and disabling the This rule is active toggle. Disabling instead of deleting the rule lets you use it again at a later date without creating the same rule from scratch.
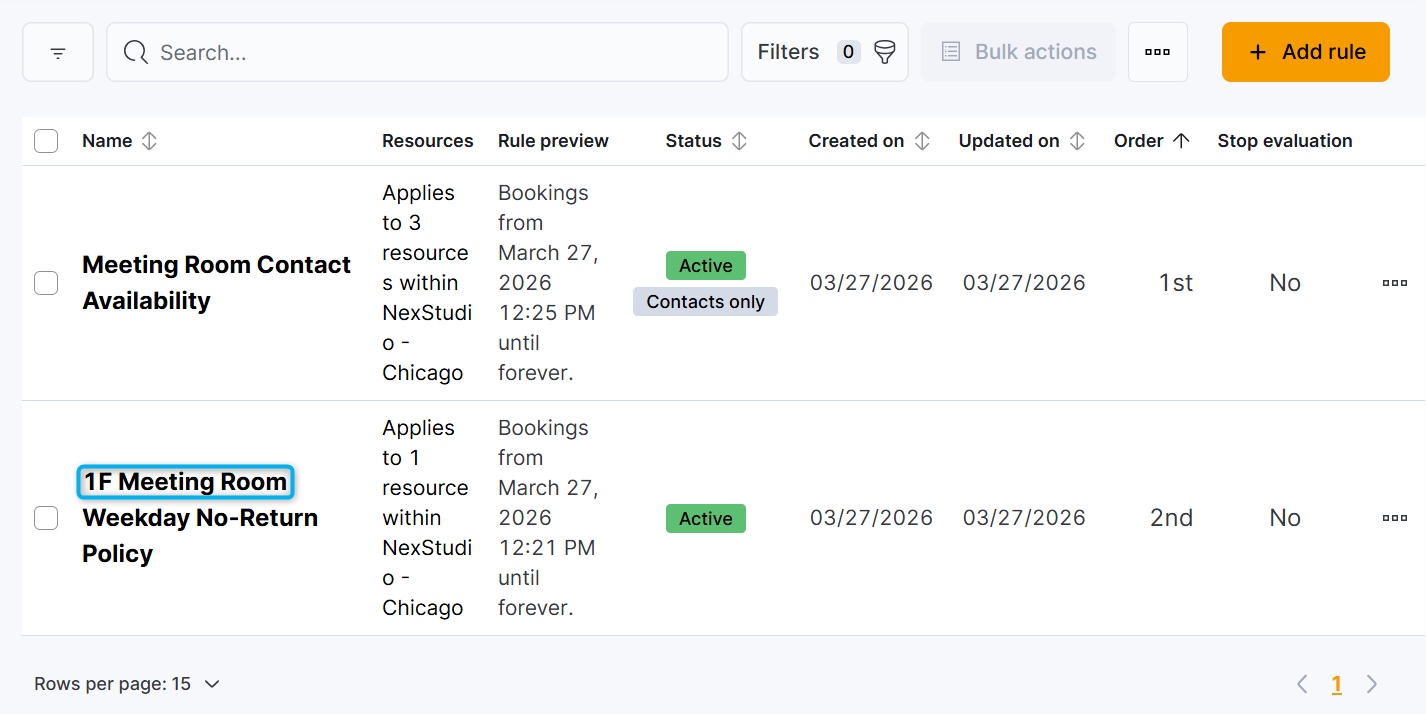
You can view a list of all the rules that apply to this resource by clicking on the Rules tab in the resource record.
All of your resource rules are listed under Inventory > Resource rules.
Resource Rule Conditions
You can define the following conditions for your resource rules.
| Condition | Details |
|---|---|
| Customer types | Lets you apply this rule to customers. You can apply rules to All customers, Only contacts, Only members, Members with specific plans, Specific teams, and Specific customers. |
| Days and times | Lets you define the time period when this rule applies. This can be certain days of the week, a specific date range, or an amount of time before the booking starts. |
| Booking price | Lets you apply this rule when the booking price is over or under a set amount. |
| Events | Lets you apply this rule to specific event attendees. You'll need Event Categories to use this condition. |
| Courses | Lets you apply your rule to customers who've completed specific courses. |
Resource Rule Limits
You can add the following limits to your resource rules.
| Limit | Details |
|---|---|
| Custom message | Lets you add a custom message for customers when their booking doesn't meet the condition. You can't combine custom messages with other limits in the same rule. |
| Available times and days | Lets you define when the resource is available to book. |
| Requests and cancellations | Lets you prevent bookings too far in advance or at the last minute. You can also prevent late cancellations or charge a late cancellation fee. |
| Duration | Lets you define a minimum and maximum booking length and only allows bookings of a certain length. |
| Members | Lets you restrict the resource to members with specific plans and specific teams. |
| No-return policies | Lets you define a minimum time gap between bookings to avoid back-to-back bookings. You can apply this limit to all customers or the same customers booking the resource multiple times in a row. |