What You Need to Integrate Azure AD
All you need is a Microsoft Azure account.
Step 1. Get Your Redirect URL
The first step of the integration process is to find and copy your redirect URL on the Admin Panel.
-
Log in to dashboard.nexudus.com if you aren't already.
-
Enable the Azure Active Directory toggle.
-
Copy the Redirect URI and save it somewhere.

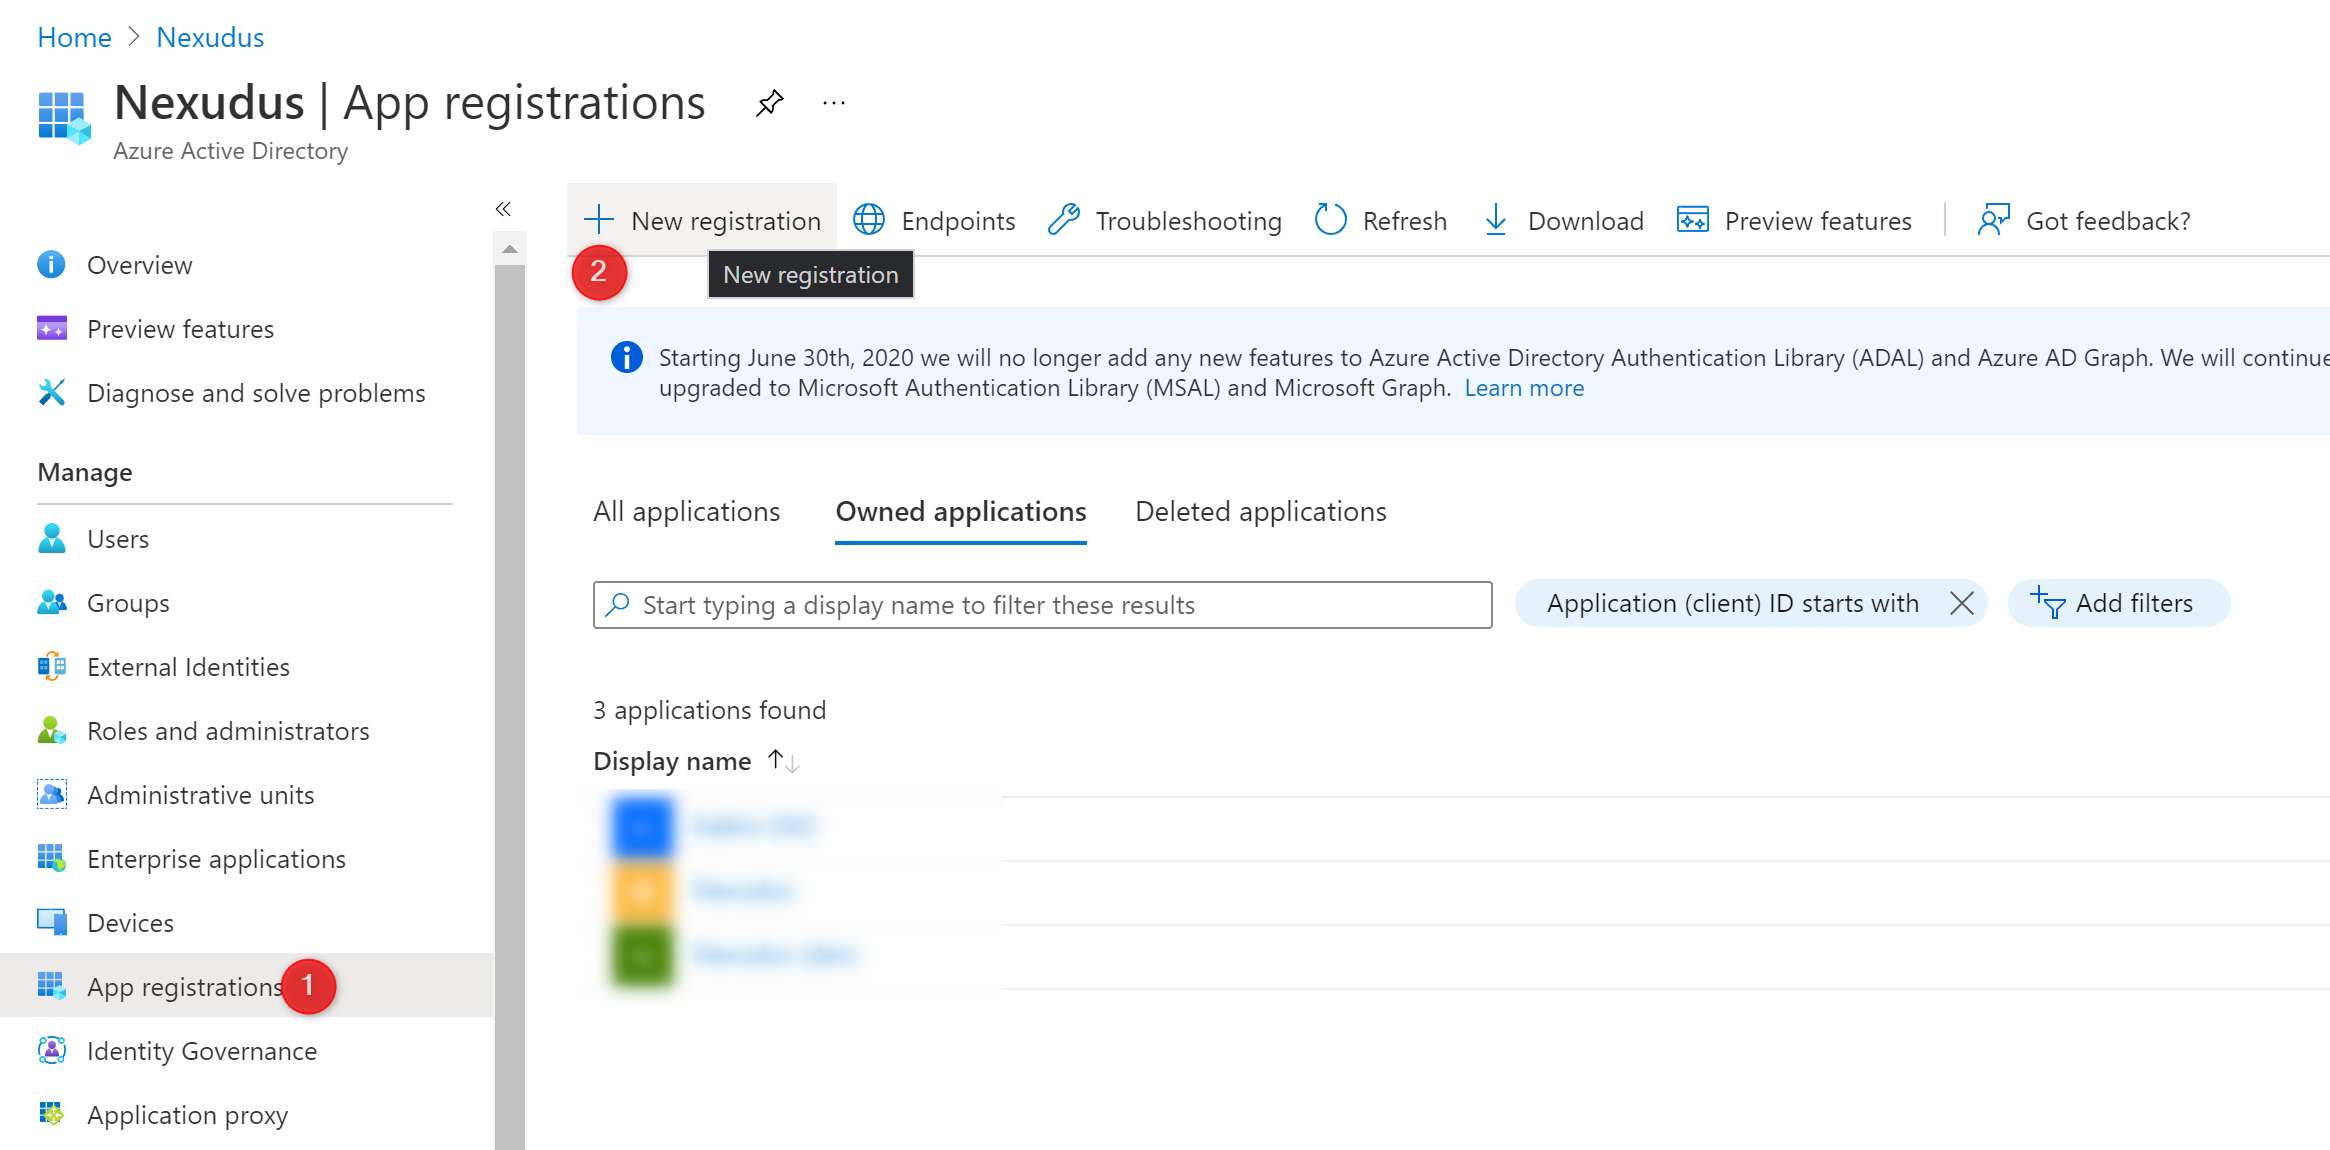
Step 2. Register your Application in Azure AD
The second step of the integration process is to create an application dedicated to Nexudus user login in your Azure account.
-
Open your Azure portal at portal.azure.com.
-
Select the Azure Active Directory module.

- Click ** App registrations** in the navigation menu and then click + New Registration.
- Name your application.
We recommend using a clear name such as Nexudus Login + Your location/network name. For example, Nexudus Login Kalkio Spaces.
You only need to create one application for your network as long as all your users log in against the same Azure Directory.
- Add the Return URL you've saved during Step 1 and complete the registration form as follows:

- Once you've created the application, copy the Application (client) ID and the Directory (tenant) ID and save them somewhere.

- Click Certificates and Secrets in the navigation menu and then click on the Client Secret tab.

-
Click New client secret.
-
Name your secret and set an expiration period.
Azure will send you a reminder before the secret expires, but we strongly recommend you to also set your own reminder in your calendar.
If the secret expires before your update, your users won't be able to log in to the Members Portal.
- Copy Value of your client secret (not the ID) and save it somewhere.
You will need this value in the next step.
Step 3. Enabling the Azure AD Integration in Nexudus
The last step of the integration is enabling Azure AD on the Admin Panel. Make sure you have the following details from previous steps handy to complete the process:
- Your Azure AD Directory (tenant) and Application (client) IDs
- Your Azure AD client secret
-
Log in to dashboard.nexudus.com if you aren't already.
-
Enable the Azure Active Directory integration toggle.
-
Enable the Create new users in Nexudus if they don't exist toggle if you want to automatically register users without an existing customer account as contacts in Nexudus.
-
Enable the Prevent users from using their Nexudus password to log in if you want customers to only be able to use Azure AD to log in to their account.
-
Add your Azure AD Directory (tenant) ID in the Tenant ID field.
-
Add your Azure AD Application (client) ID in the Client ID field.
-
Add your Azure AD application's client secret in the Client Secret field.
-
Add the text you want to display to customers on the Members Portal in the Sign in button label.
The default text is Sign in with Corporate Account.
Click the Save Changes button.
All set! You've completed your Azure AD integration. We recommend testing the integration with a dummy customer account to ensure everything is working properly.