You can create course groups to divide your courses into smaller sections. It's a great way to structure courses and group lessons that cover the same topics
-
Log in to dashboard.nexudus.com if you aren't already.
-
Click Community > Courses.
-
Click on the course you want to edit.
-
Click on the Lessons tab.
-
Click Add new group.
-
Name your course group.
-
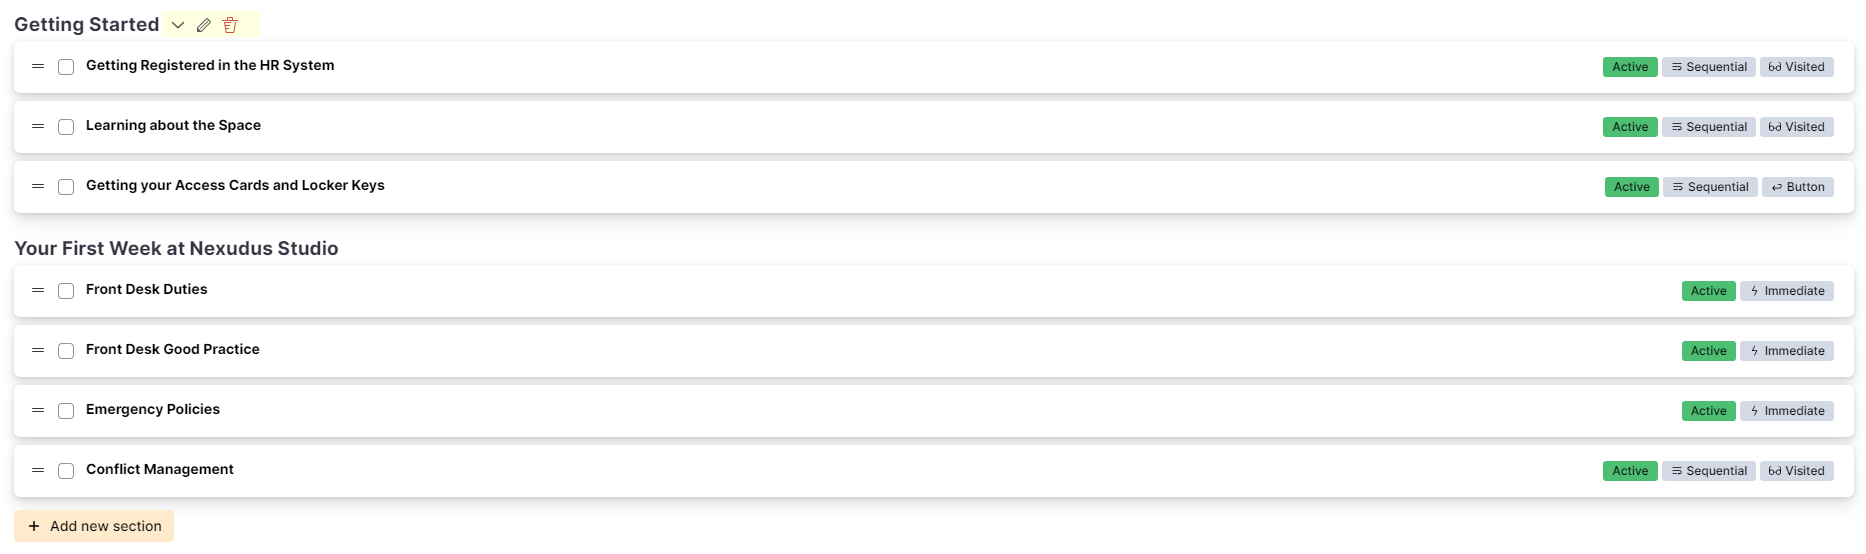
Drag and drop the relevant lessons under the new group.
Repeat the process for every other group you want to add to your course.
Move your mouse cursor over the group's name and click on the arrows to move it up or down the list. You can also edit details by clicking on the pencil icon.
The group's record lets you add a summary and an image that occupiers will see before tackling the lessons within the group.
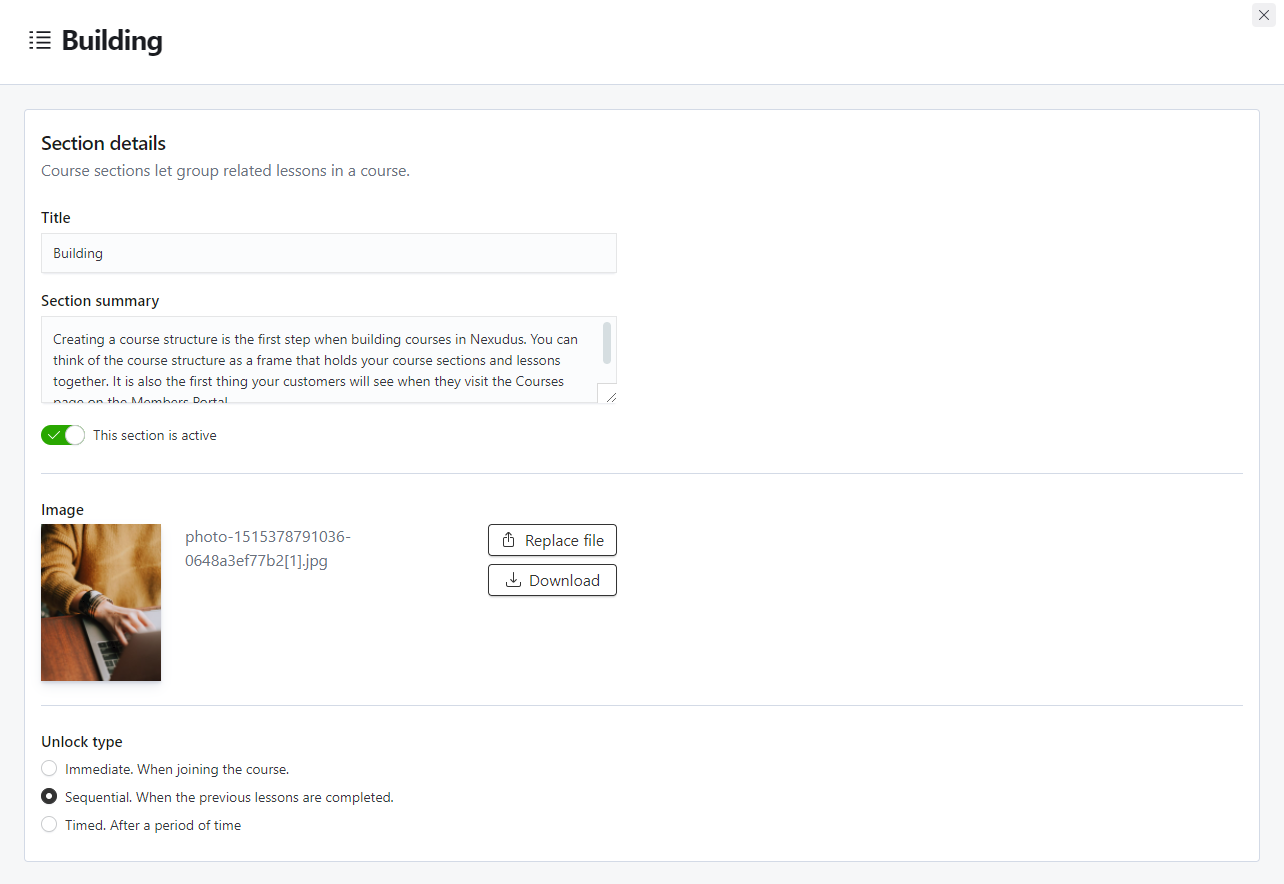
This record also lets disable all the lessons within the group by making it inactive.