Domain Setup Process
Setting up your own domain in Nexudus is a four-step process:
1. Setting up an SSL Proxy for Your Domain in CloudFlare
2. Changing the Nameservers in Your Domain's DNS
3. Configuring the SSL Proxy Settings in CloudFlare
4. Adding Your Domain in Nexudus
Step 1. Setting up an SSL Proxy for Your Domain in CloudFlare
-
Log in to your CloudFlare account.
-
Click Add Site in the top right corner of the page.
-
Add your domain and click Add Site.
Cloudflare will automatically detect DNS records for your domain. You now need to add two CNAME records to your DNS.
-
Click Add record.
-
Select CNAME in the Type drop-down list.
-
Add www in the Name field
-
Add spaces.nexudus.com in theTarget field.
-
Click the Save button.
Repeat the same process or the second CNAME record.
-
Click Add record.
-
Select CNAME in the Type drop-down list.
-
Add @ in the Name field
-
Add spaces.nexudus.com in theTarget field.
-
Click the Save button.
Once you've added both CNAME records, your DNS records should look similar to the one shown below, with your own domain instead of nexudustudio.com appearing in the Name column.

Just add another CNAME record for each subdomain.
For example, if your subdomain is members.yourdomain.com, add a CNAME record with members in the Name field and spaces.nexudus.com in the Content field.
Click Continue.
You should be redirected to a new page to move to the next step: changing your nameservers.
Step 2. Changing the Nameservers in Your Domain's DNS
Cloudflare will provide all the instructions you need to change your nameservers based on your domain host.
The main three steps are:
-
Logging in to your domain host's account.
-
Locate the nameservers on your domain host platform.
-
Replace the default nameservers with the ones provided by CloudFlare.
Once you've replaced the namerservers, click Done, check nameservers in CloudFlare. You'll be redirected to the Quick Start Guide page to configure your SSL proxy.
Step 3. Configuring the SSL Proxy Settings in CloudFlare
You now need to make sure your SSL proxy settings are correct in CloudFlare.
-
Log in to your CloudFlare account if you aren't already logged in.
-
Select your site.
-
Click the SSL/TLS icon at the top of the page.
-
Make sure the SSL/TLS Encryption is set to Full.

-
Click the Edge Certificate tab.
-
Make sure the Always Use HTTPS rule is active.

- Scroll down the page and make sure the Automatic HTTPS Rewrites rule is also active.

- Click on the Rules icon and then click Create Page Rule.
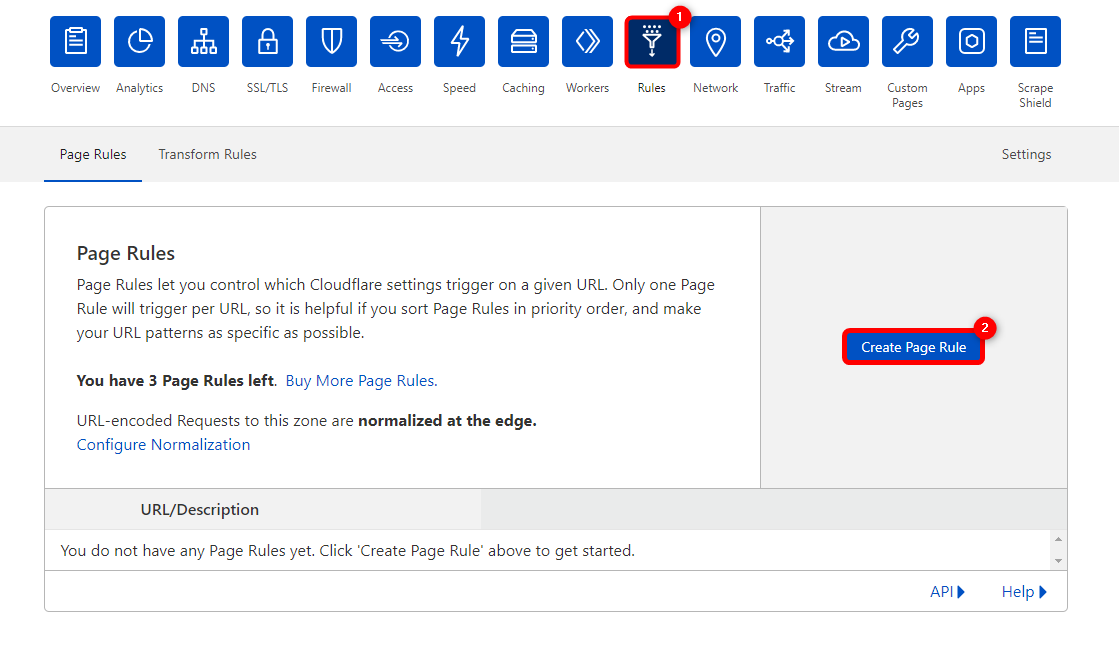
- Define the page rule as shown below, replacing example.com with your own domain.
Initial URL
http://www.example.com
Page Settings
Forwarding URL
301 Permanent Redirect
https://www.example.com/*

- Click Save and Deploy.
You've successfully configured your SSL proxy and can move to the last step of the setup process.
Step 4. Adding Your Domain in Nexudus
The last step of the process is to create a record for your domain on the Admin Panel.
-
Log in to dashboard.nexudus.com if you aren't already.
-
Click Settings > Website > Domain.
-
Click Add domain.
-
Add your domain in the Domain field.
-
Enable the This domain is active toggle.
-
Click the Save Changes button.
Once you've created your record in Nexudus, your domain is fully set up.
Simply type the new web address in any browser and see if the Members Portal home page loads. You'll know the SSL proxy is working properly if you can see a lock icon before the URL.
Update the integration to avoid reCAPTCHA error messages on your Members Portal forms.
If your domain doesn't replace the Members Portal default web address within three days, contact support to check your setup.