If your space uses Members Portal Version 4 or an earlier version of the portal, there are a few key differences to how customers will make bookings and other purchases when they're on the portal versus when they're using the app.
The following guide can help you understand these differences and adjust your settings if necessary.
Visibility and Access Settings
Visibility settings control which sections you make available on the Passport app.
For example, you can disable the Events section, and customers won't see it on the Members Portal or Passport app.
Access settings control which customer groups can acccess these sections.
For example, you can make the Events section only visible to members.
| Section | Passport Visibility Settings | Passport Access Settings | Members Portal 4 Settings |
|---|---|---|---|
| Bookings | Available by default. The Bookings section can't be disabled. | Available to members and contacts by default. | Members Portal 4 access is still controlled through your Access Settings on the Admin Panel. |
| Memberships | Available as long as you have at least one published plan. To disable this section, you need to unpublish all of your plans from the portal and app. | Available to members and contacts by default. | Members Portal 4 access is still controlled through your Access Settings on the Admin Panel. |
| The Store | Available as long as you have at least one published product. To disable this section, you need to unpublish all of your products from the portal and app. | Available to members and contacts by default. | Members Portal 4 access is still controlled through your Access Settings on the Admin Panel. |
| Events | You can enable and disable this section in your Features Settings on the Admin Panel. | Can be restricted to members, contacts, or both. If you have it as public for your portal, it'll be restricted to logged-in users on the app. | Changing these settings will affect visibility and access on both your portal and the app. |
Kinds and Categories
Resources, plans, and products are sorted by kinds in the Passport app navigation menu. They were previously sorted by categories in portal and app versions prior to Version 5.
You can easily assign kinds to each of your resources, plans, and products. Simply navigate to each item's record in the Inventory section of the Admin Panel. Under the Details section, select a kind from the drop-down menu and click Save changes.
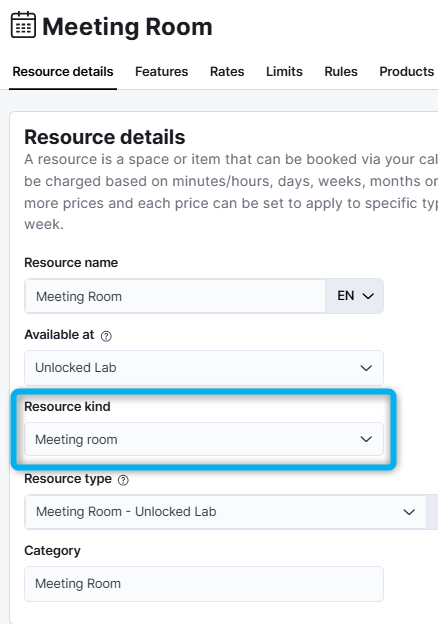
Resources, Plans, and Products will continue to be sorted by categories in Members Portal Versions 4 and earlier.
Checkout Forms
In Members Portal Version 5 and Passport Version 5, extended forms can only be used to collect additional information from customers completing specific checkout flows during sign-up. Customers will not see these fields during the relevant checkout flow on Passport Version 5 if they already have an account.
For example, let's say you use extended forms to collect a phone number from everyone purchasing an event ticket.
If you're on Members Portal 4 or a previous version, all customers will need to add their phone number to purchase an event ticket on the portal.
On the Passport app, customers will not see this field unless they're making the purchase as part of a sign-up flow.