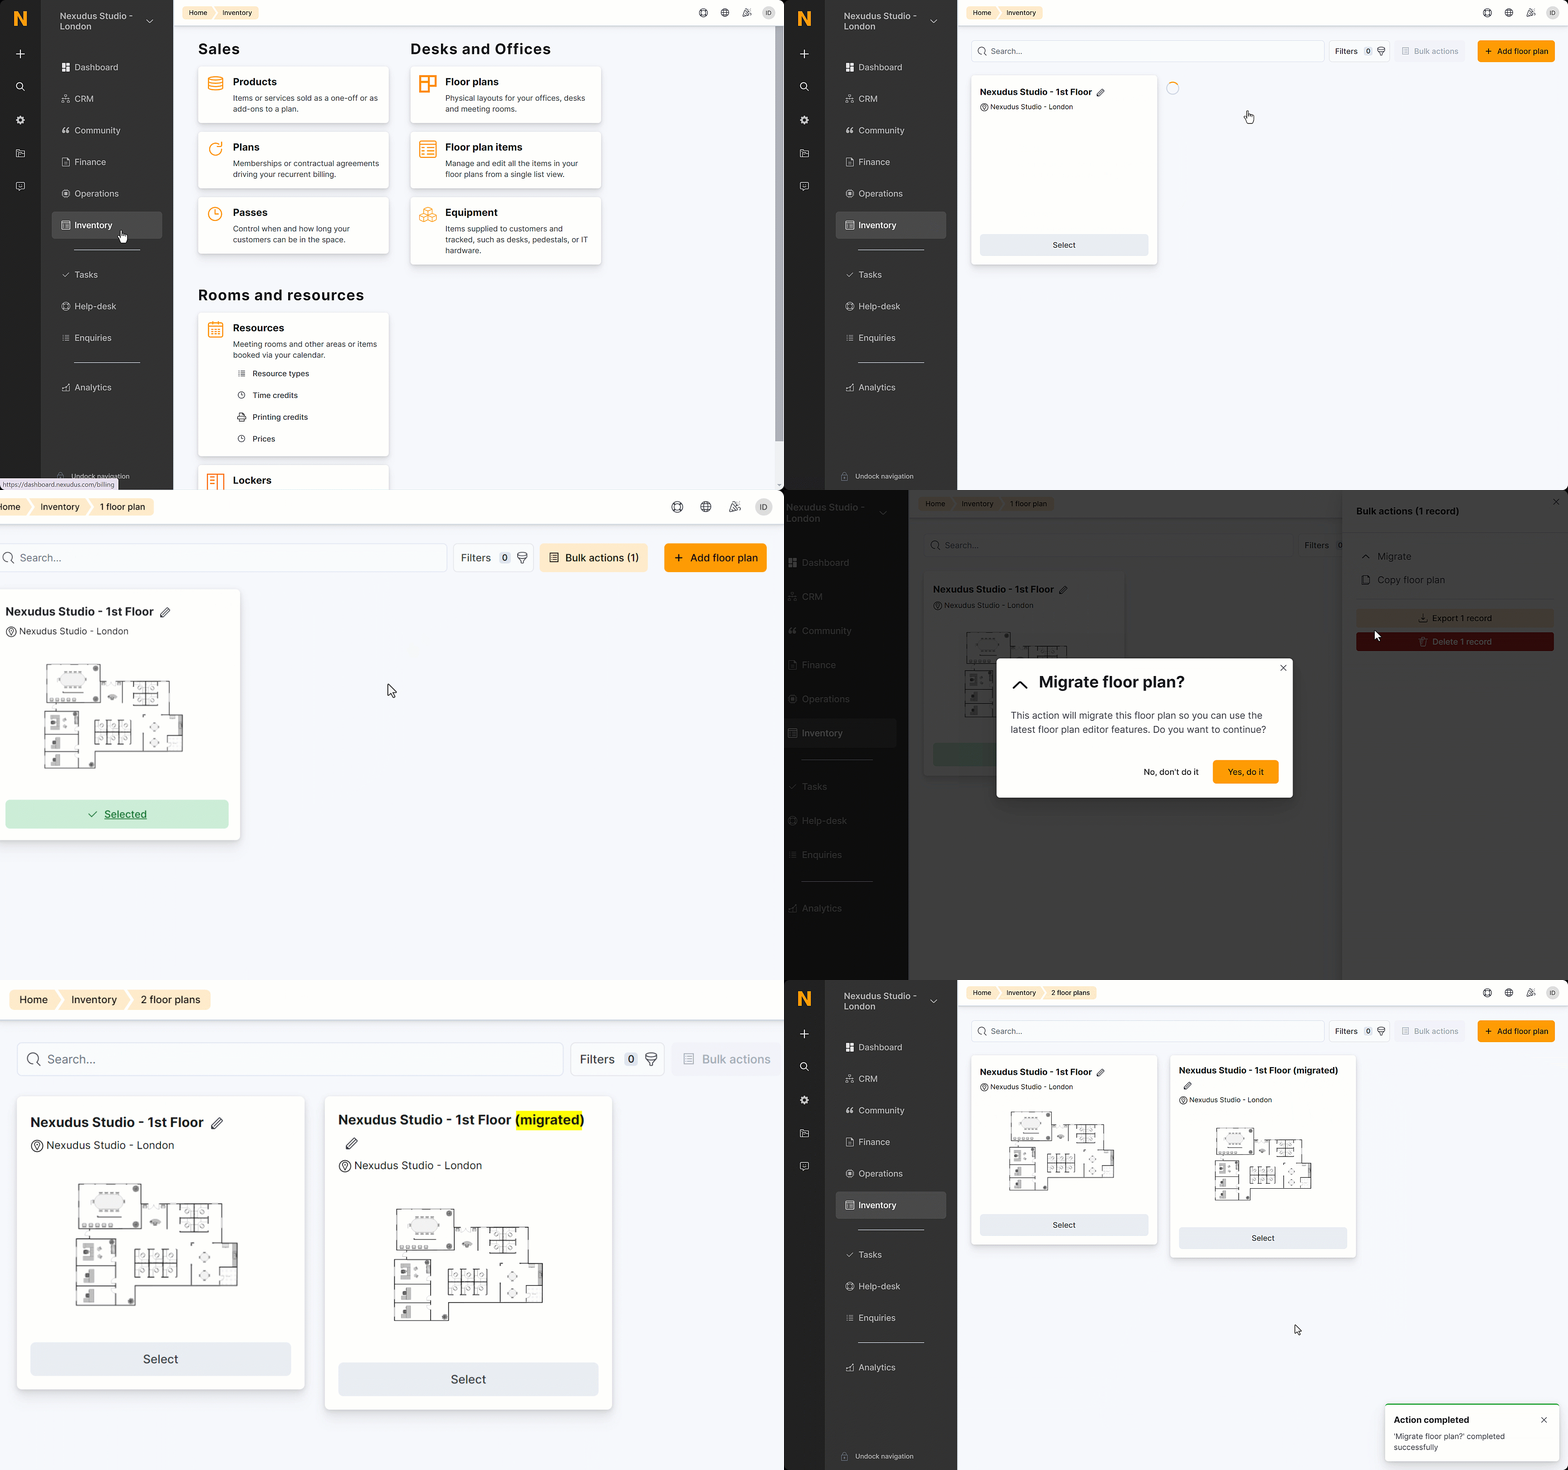
You can migrate any of your exisitng floor plans in a couple of easy steps.
Step 1. Migrate your floor plan and background image
The first step of the process creates a copy of old floor plan, including its background image and floor plan items in the new editor.

Log in to dashboard.nexudus.com if you aren't already.
- Click Inventory > Floor plans.
- Click on the Select button of the floor plan you want to migrate.
- Click on the Bulk actions menu.
- Click on Migrate.
Click Yes, do it to confirm.
Your new floor plan should appear in your floor plan list, with a (migrated) mention. Keep both your old floor plan and the new one until the end of the migration process.
Step 2. Scale your floor plan and draw a frame
The second step of the process is to scale your floor plan and add walls and windows. You must create walls to manage your floor plan items.

- Open your migrated floor plan.
- Click on the scaling
 icon.
icon. - Click on one end of a wall on your floor plan image.
- Move your cursor to the other end of that wall and click again.
- Add the length of the wall in meters.
- Click on Confirm.
- Click on the building component icon
 and select Walls.
 - Draw the main walls of your floor plan image using the tool.
Don't forget to click on Save floor plan regularly to avoid losing your edits!
Make sure the walls are as close as possible to the actual borders of the image so they look aligned on the Members Portal.
Now that you have your floor plan scaled and drawn, all that's left to do is reposition your floor plan items and reassign them to the relevant units from your old floor plan.
Step 3. Reposition and reassign your floor plan items
Once you've scaled your floor plan and created your walls, you can easily reposition the migrated items. You can then click on each item to assign them an existing unit from your floor plan item list.
