NexEvents has 2 modes:
➡️ Self-service to easily let attendees check in to events on their own.
➡️ Hosted by an admin for a more guided check-in experience.
Self-service mode
This mode is designed to let attendees check themselves in using the QR code or PIN provided in the email confirmation they receive after purchasing a ticket.
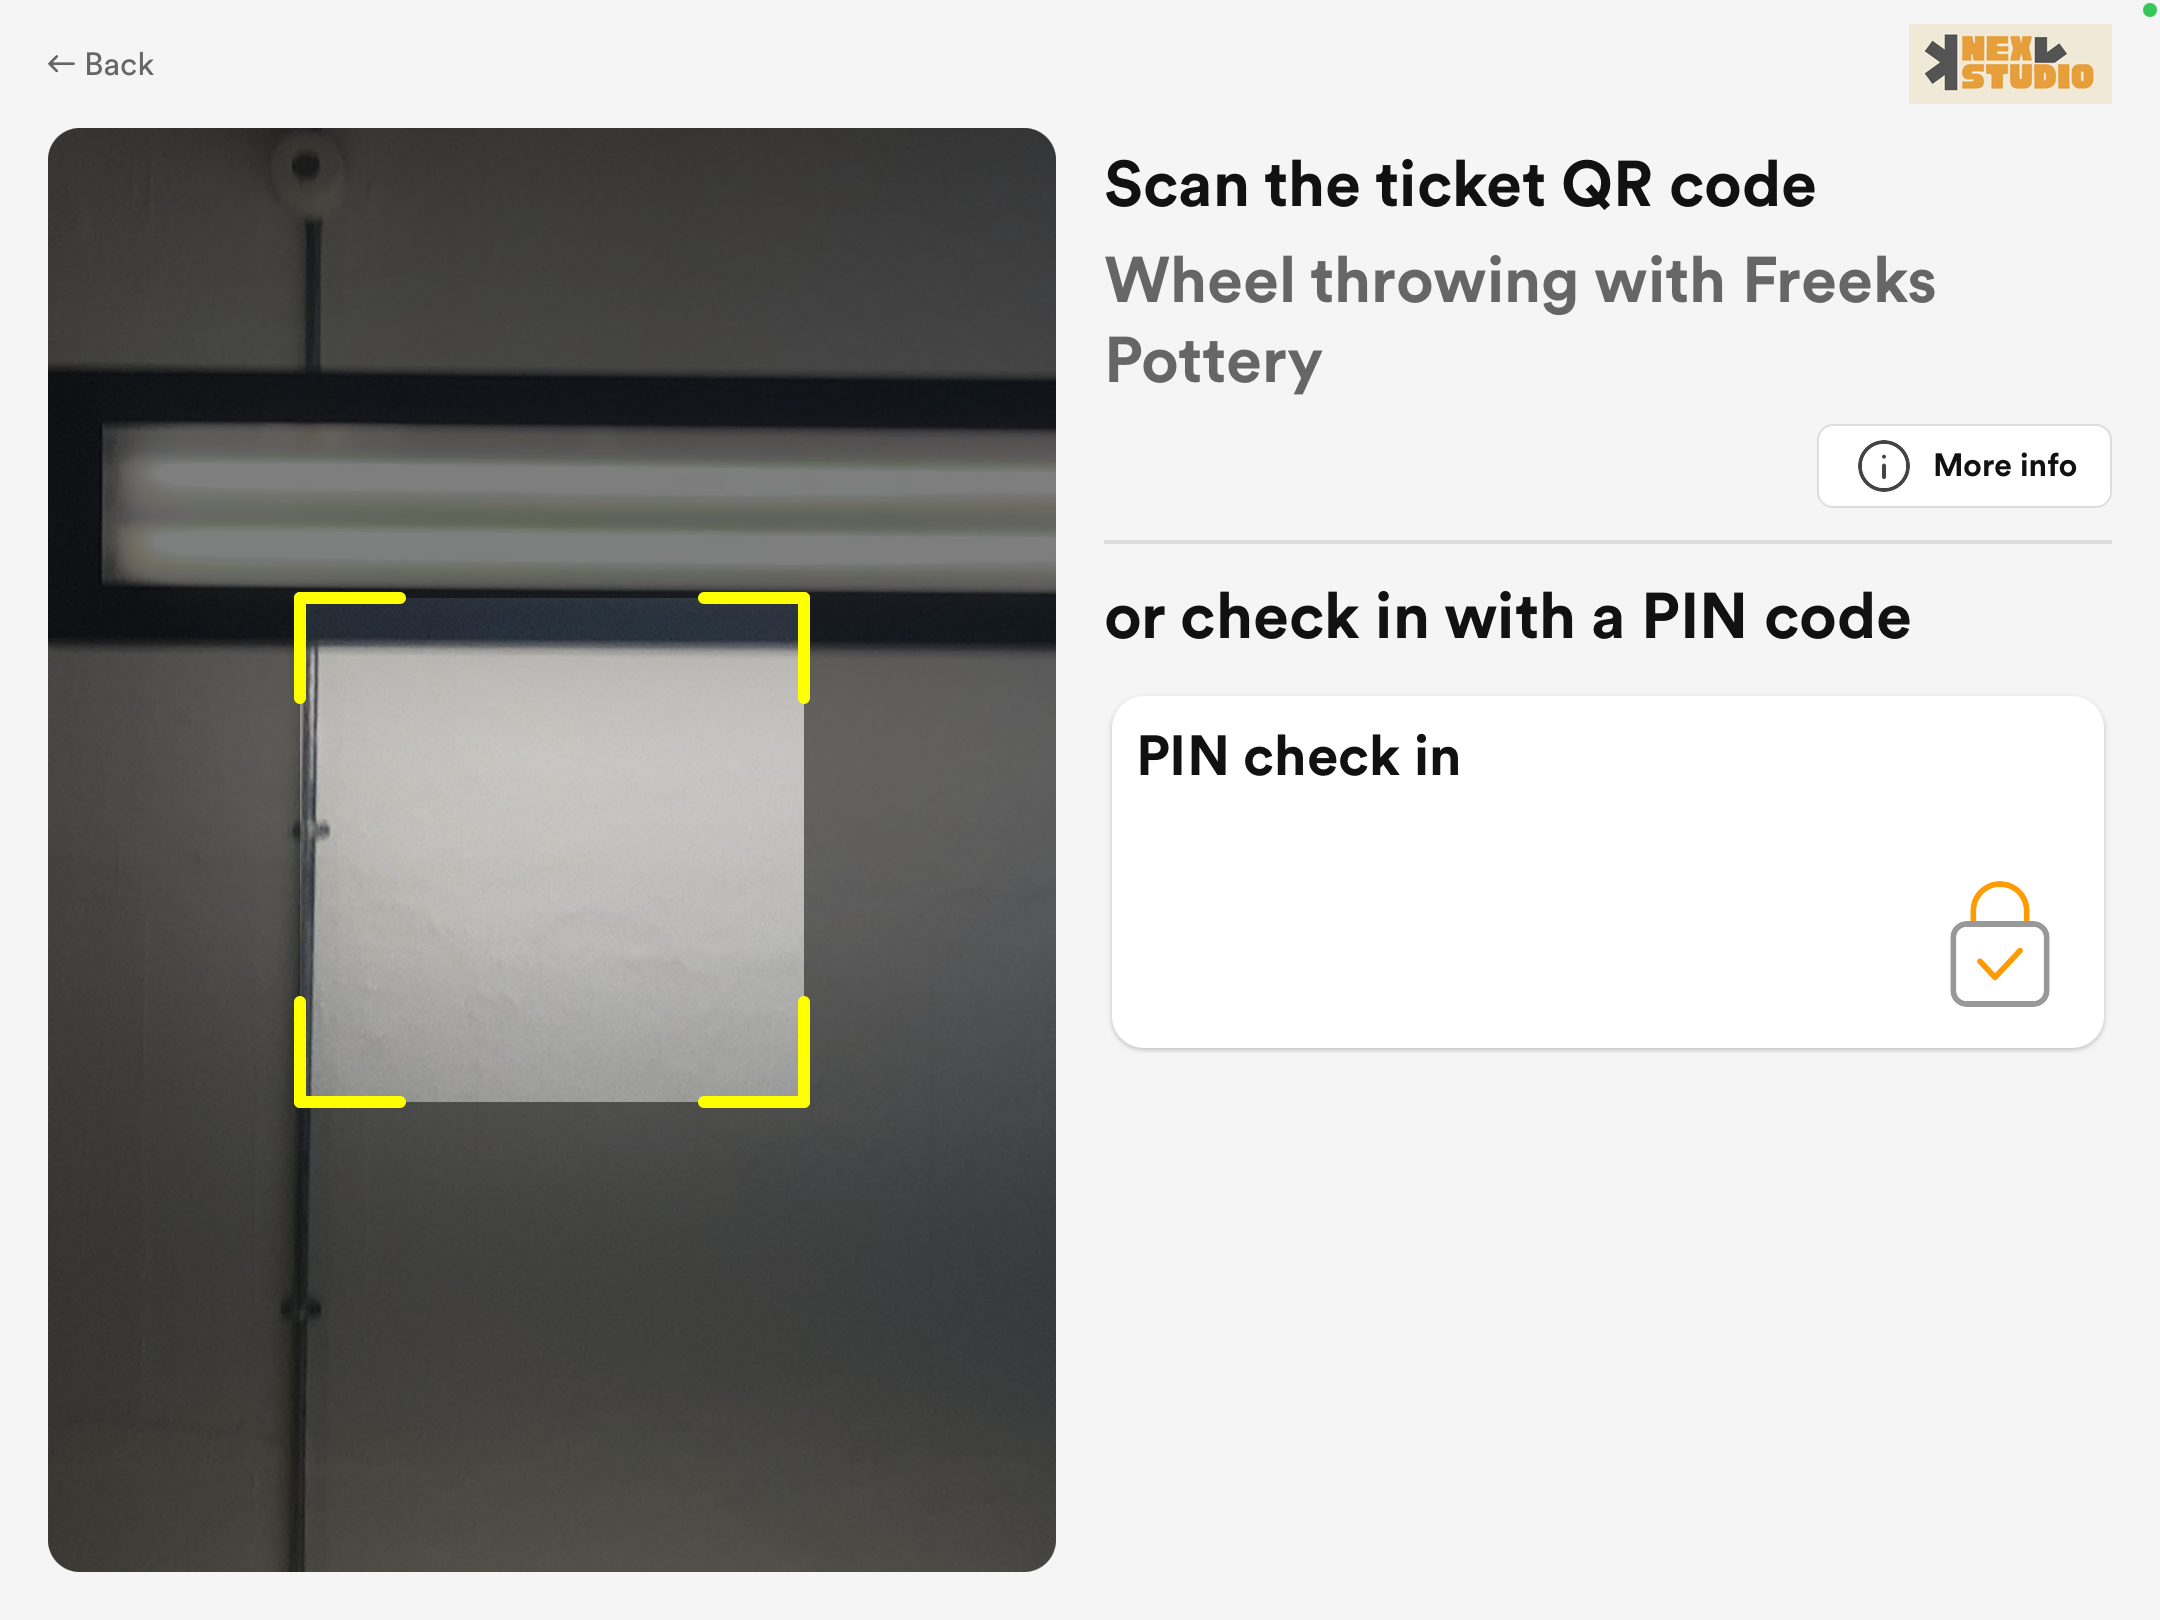
QR
- Tap on the event you're attending.
- Open your ticket confirmation email and hold the QR code close to the tablet's camera.
You'll be checked within a few seconds.
PIN
- Tap on the event you're attending.
- Tap on the PIN check in tile.
- Open your ticket confirmation email and add your ticket's code using the PIN pad.
You'll be checked in within a few seconds.
Hosted mode
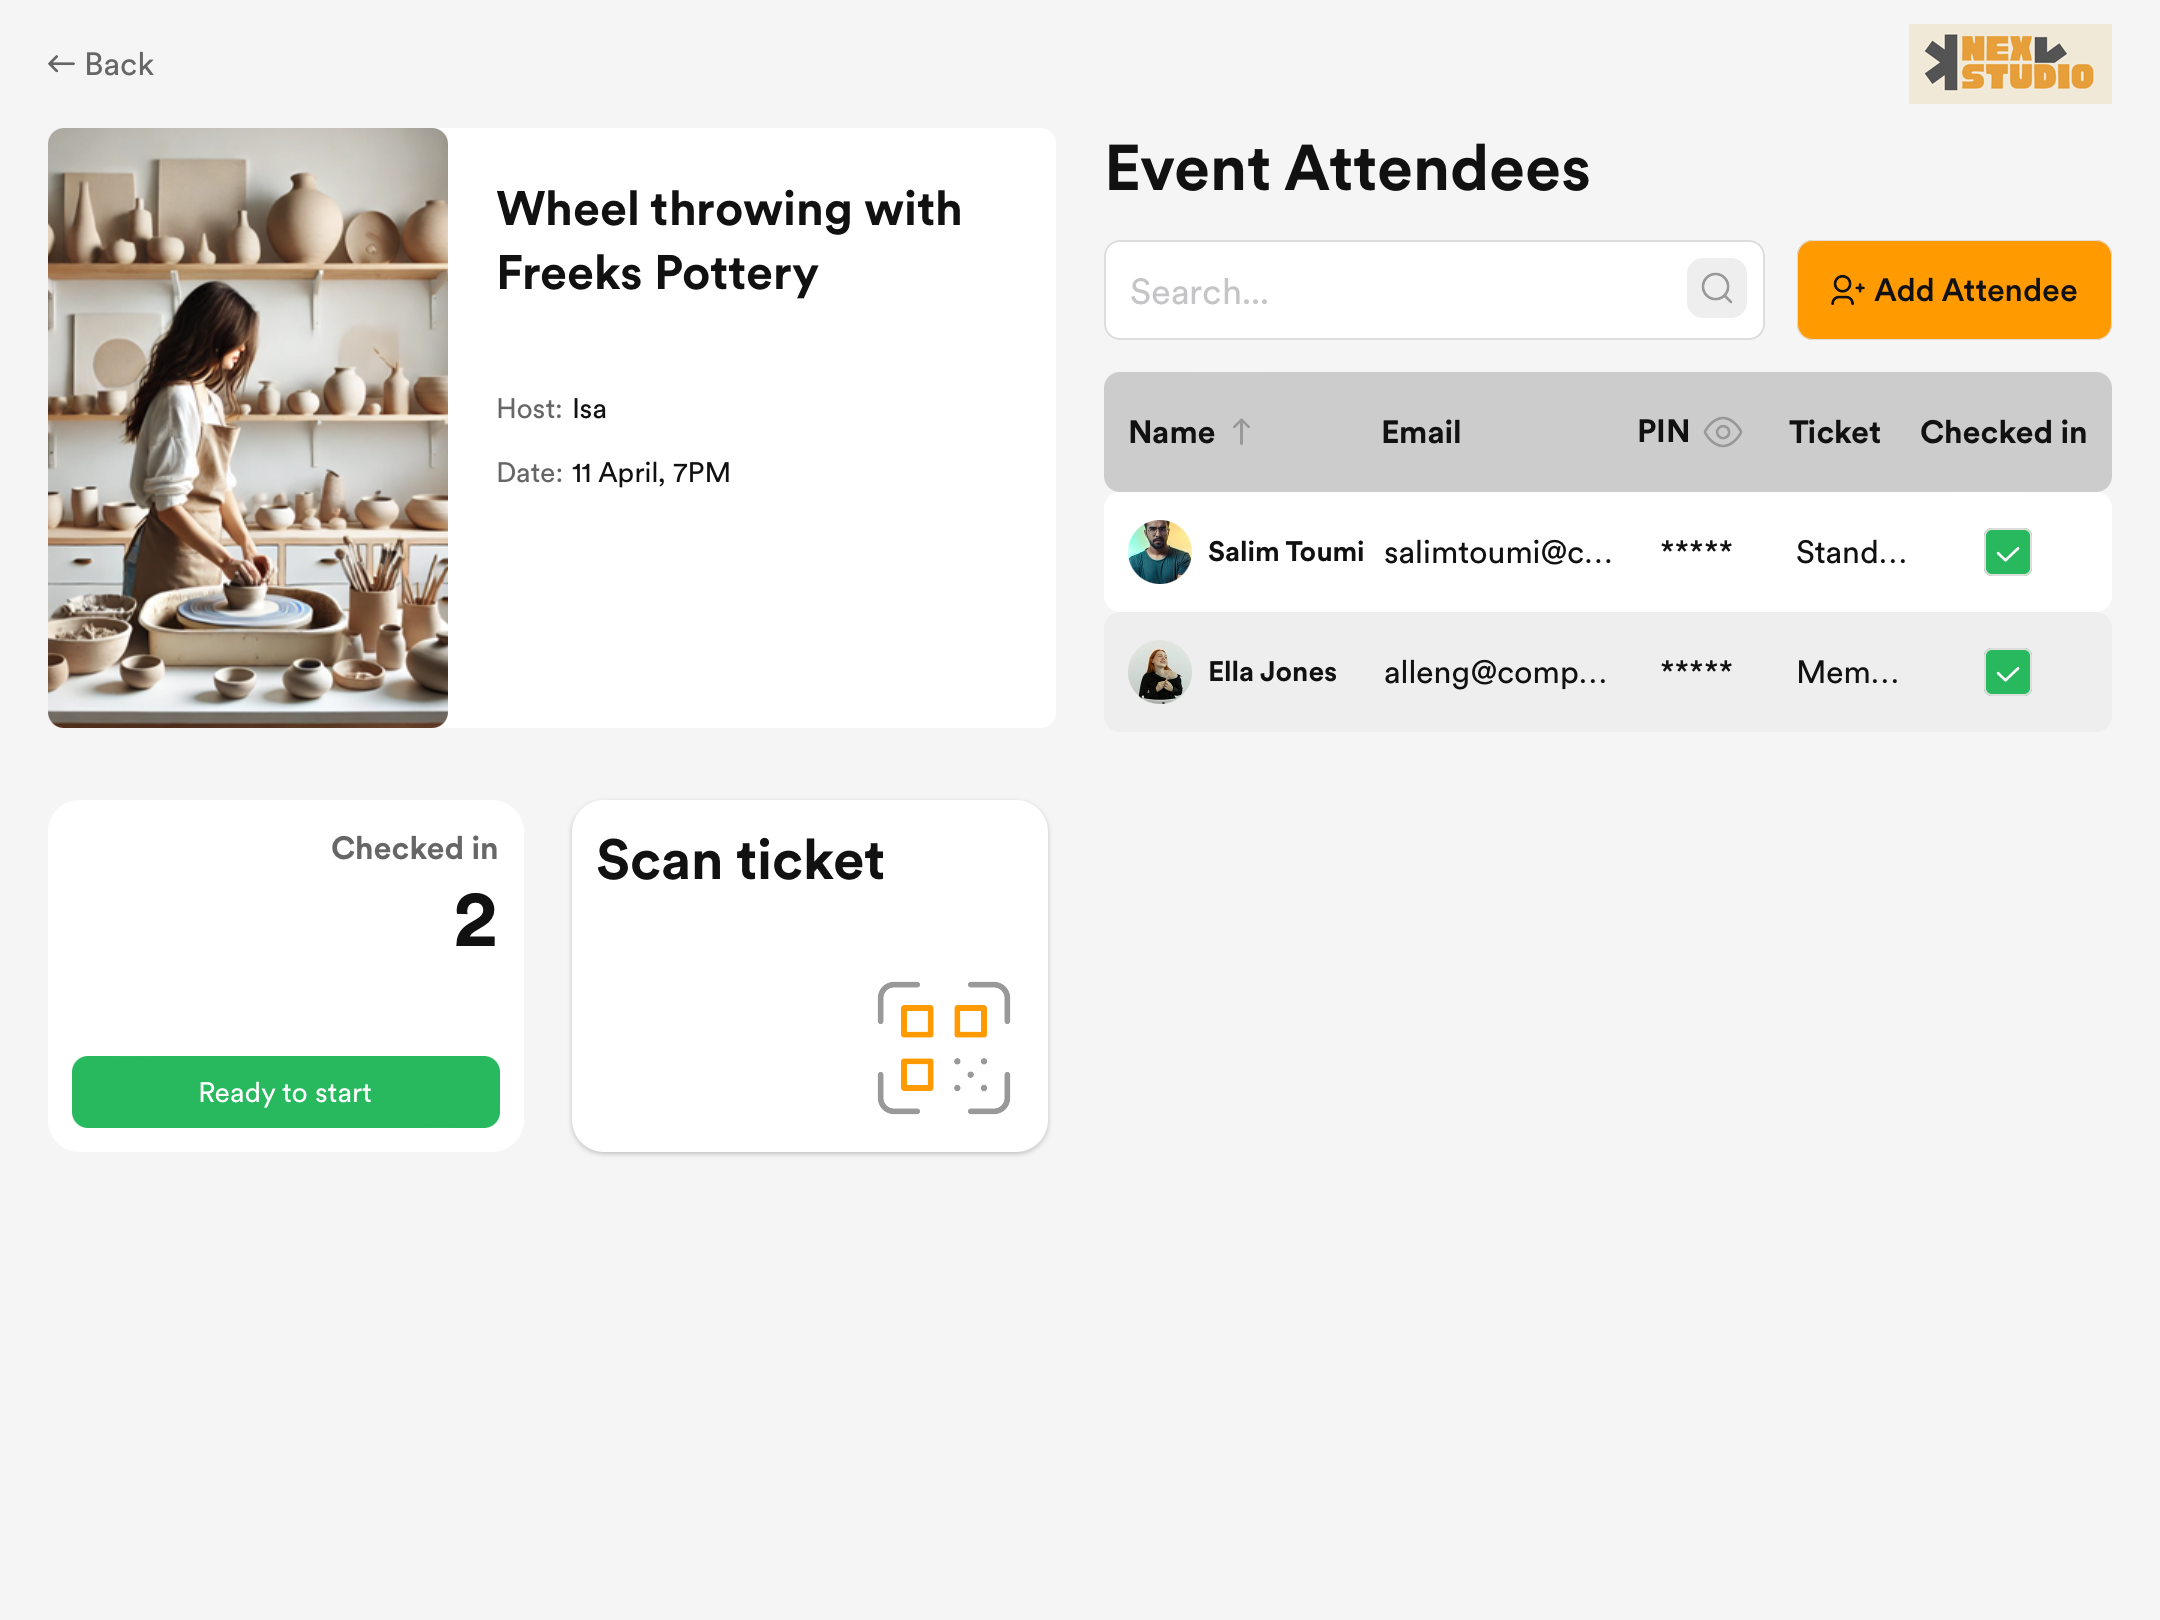
This mode is designed to let an admin handle the app and check attendees in by either ticking a checkbox next to their name or by scanning their QR code.
The method you use usually depends on the size of your event and how strictly you want to track check-ins.
For example, if you are hosting a small creative workshop where you already know most of the attendees, ticking the checkbox next to their name is the easiest way to handle their arrival.
If you're hosting a large conference with attendees that may not be regular customers, using QR codes is a great way to ensure compliance and keep track of all the attendee check-ins.
QR
- Tap the Scan ticket tile.
- Ask the attendee to open their ticket confirmation email and hold the QR code close to the tablet's camera.
They should be checked in within a few seconds. They will show as ticked under the Checked-in list as well.
Manual
- Ask the attendee for their name.
- Tick the checkbox next to their record.
They should be checked in within a few seconds.
Add new attendees
Hosted mode also lets admins manually register attendees on the fly.
For example, a customer walks past a yoga session that is about to start and would like to join.
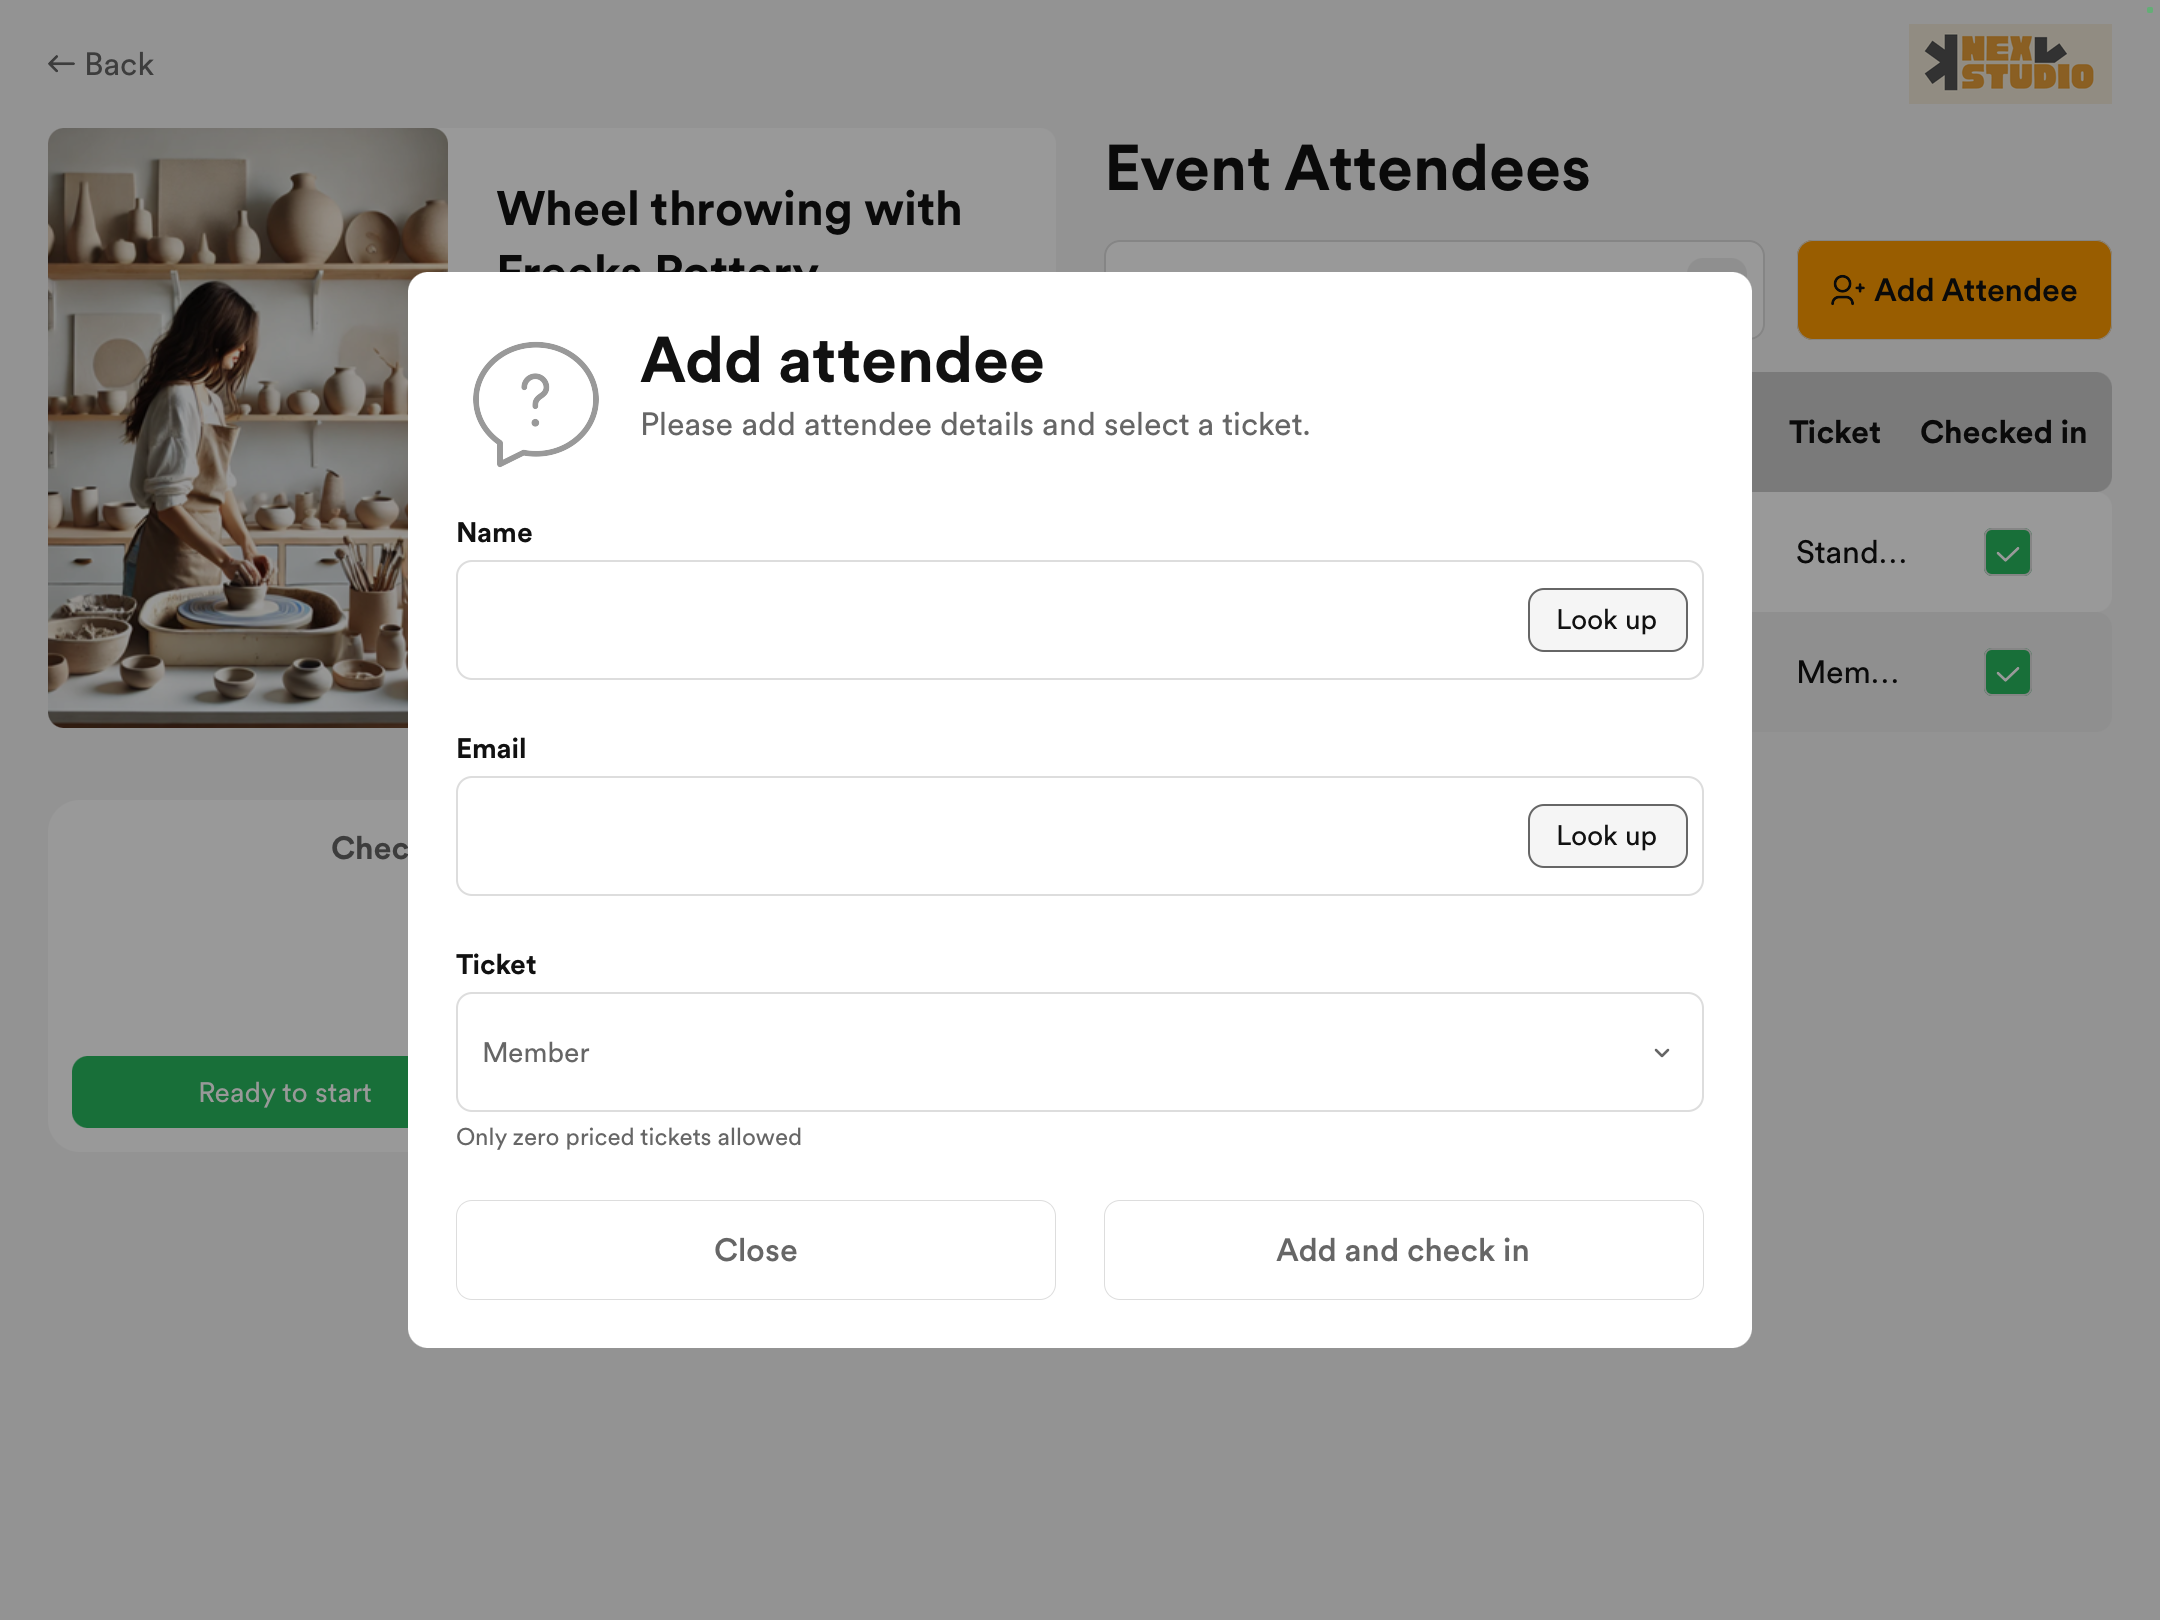
NexEvents is not a POS, which means it can only register last minute attendees using tickets that add no charge.
- Tap the Add attendee button.
- Add the attendee's Name and Email.
If the attendee is already a customer, you can tap the Look up button to find them. - Select a free or zero-priced Ticket.
- Tap Add and check in.
They should be checked in within a few seconds.