All your CRM boards settings can be accessed by clicking on the pencil icon next to their name.
| Number | Setting Name | Details |
|---|---|---|
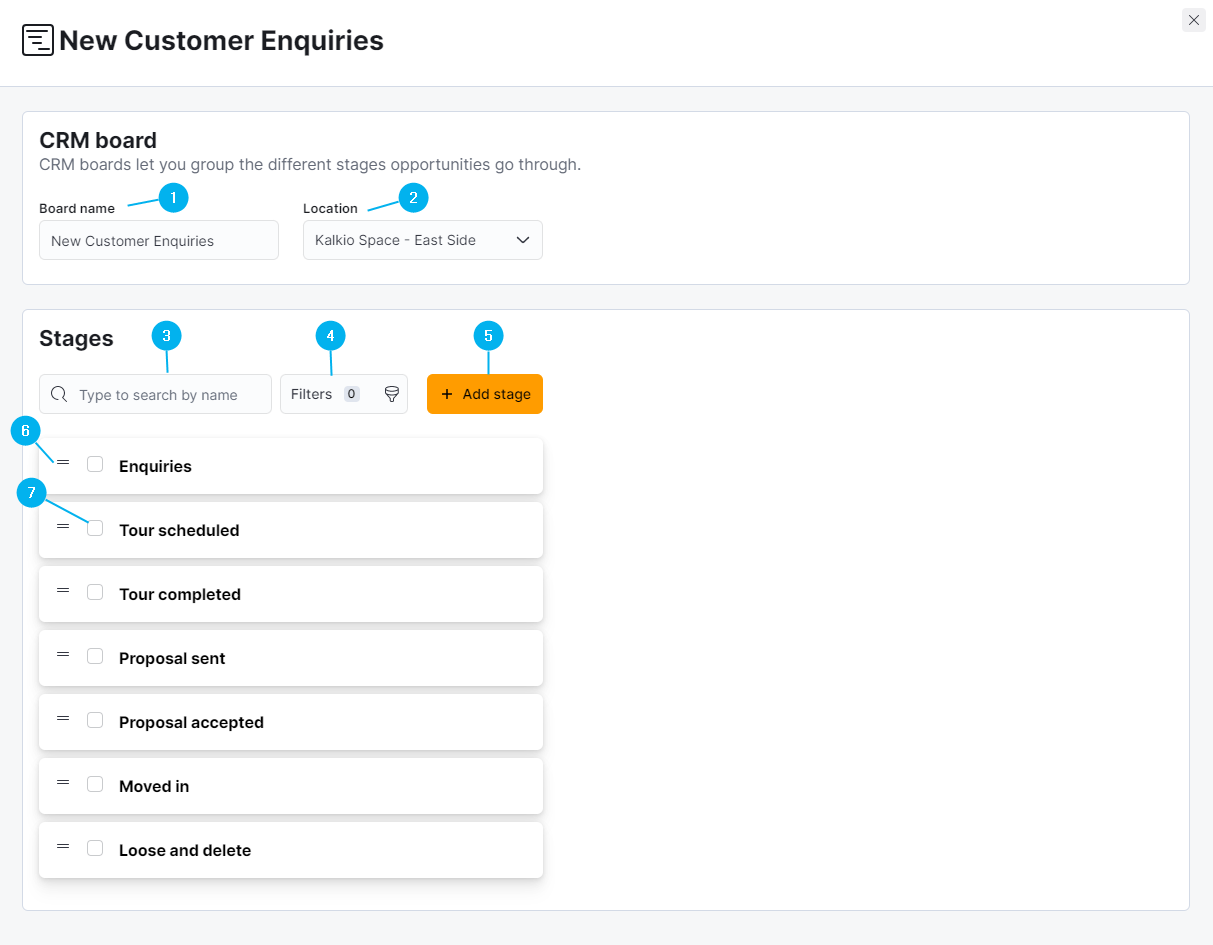
| 1 | Board Name | Field that lets you define the name of the CRM board. |
| 2 | Location | Click on the drop-down list to select the location where your CRM board and its opportunities in progress are. |
| 3 | Search bar | Field that lets you filter your CRM stages. |
| 4 | Filters | Click on the button to filter stages by name, creation date or last update date. |
| 5 | Add stage | Click on the button to add a new stage to your CRM board. |
| 6 | Stages Drag & Drop icons | Click on the icon while moving your mouse to reorder the different stages of your CRM board. |
| 7 | Stages Checkboxes | Click on one or multiple checkboxes to trigger one of the following Bulk actions: mark all opportunities within the selected stage as lost or delete the stage from the CRM board. You won't be able to delete stages if they still have opportunities. |
Want to learn more about stages or opportunities?
Check out our CRM Stages Settings and Opportunities Settings articles.