You can include the Swiss QR-bill on the invoices you issue in a few steps on the Admin Panel.
Step 1. Check your billing details
The first step is to ensure you've added all the relevant details to your location on the Admin Panel.
You need to fill out the following fields if you haven't already:
- Billing address and Country
- Tax ID number
- Account number with your IBAN
-
Log in to dashboard.nexudus.com if you aren't already.
-
Click Settings > Invoice and tax.
-
Add your Billing address and Tax ID number if you haven't already.
-
Under Bank details, add your IBAN under Account number if you haven't already.
✅Correct format
CH9300762011623852957
❌Incorrect format
CH93 0076 2011 6238 5295 7
Click the Save Changes button.
Now that you've checked your key billing details, you can move to the next step, editing your invoice template.
Step 2. Update your invoice template
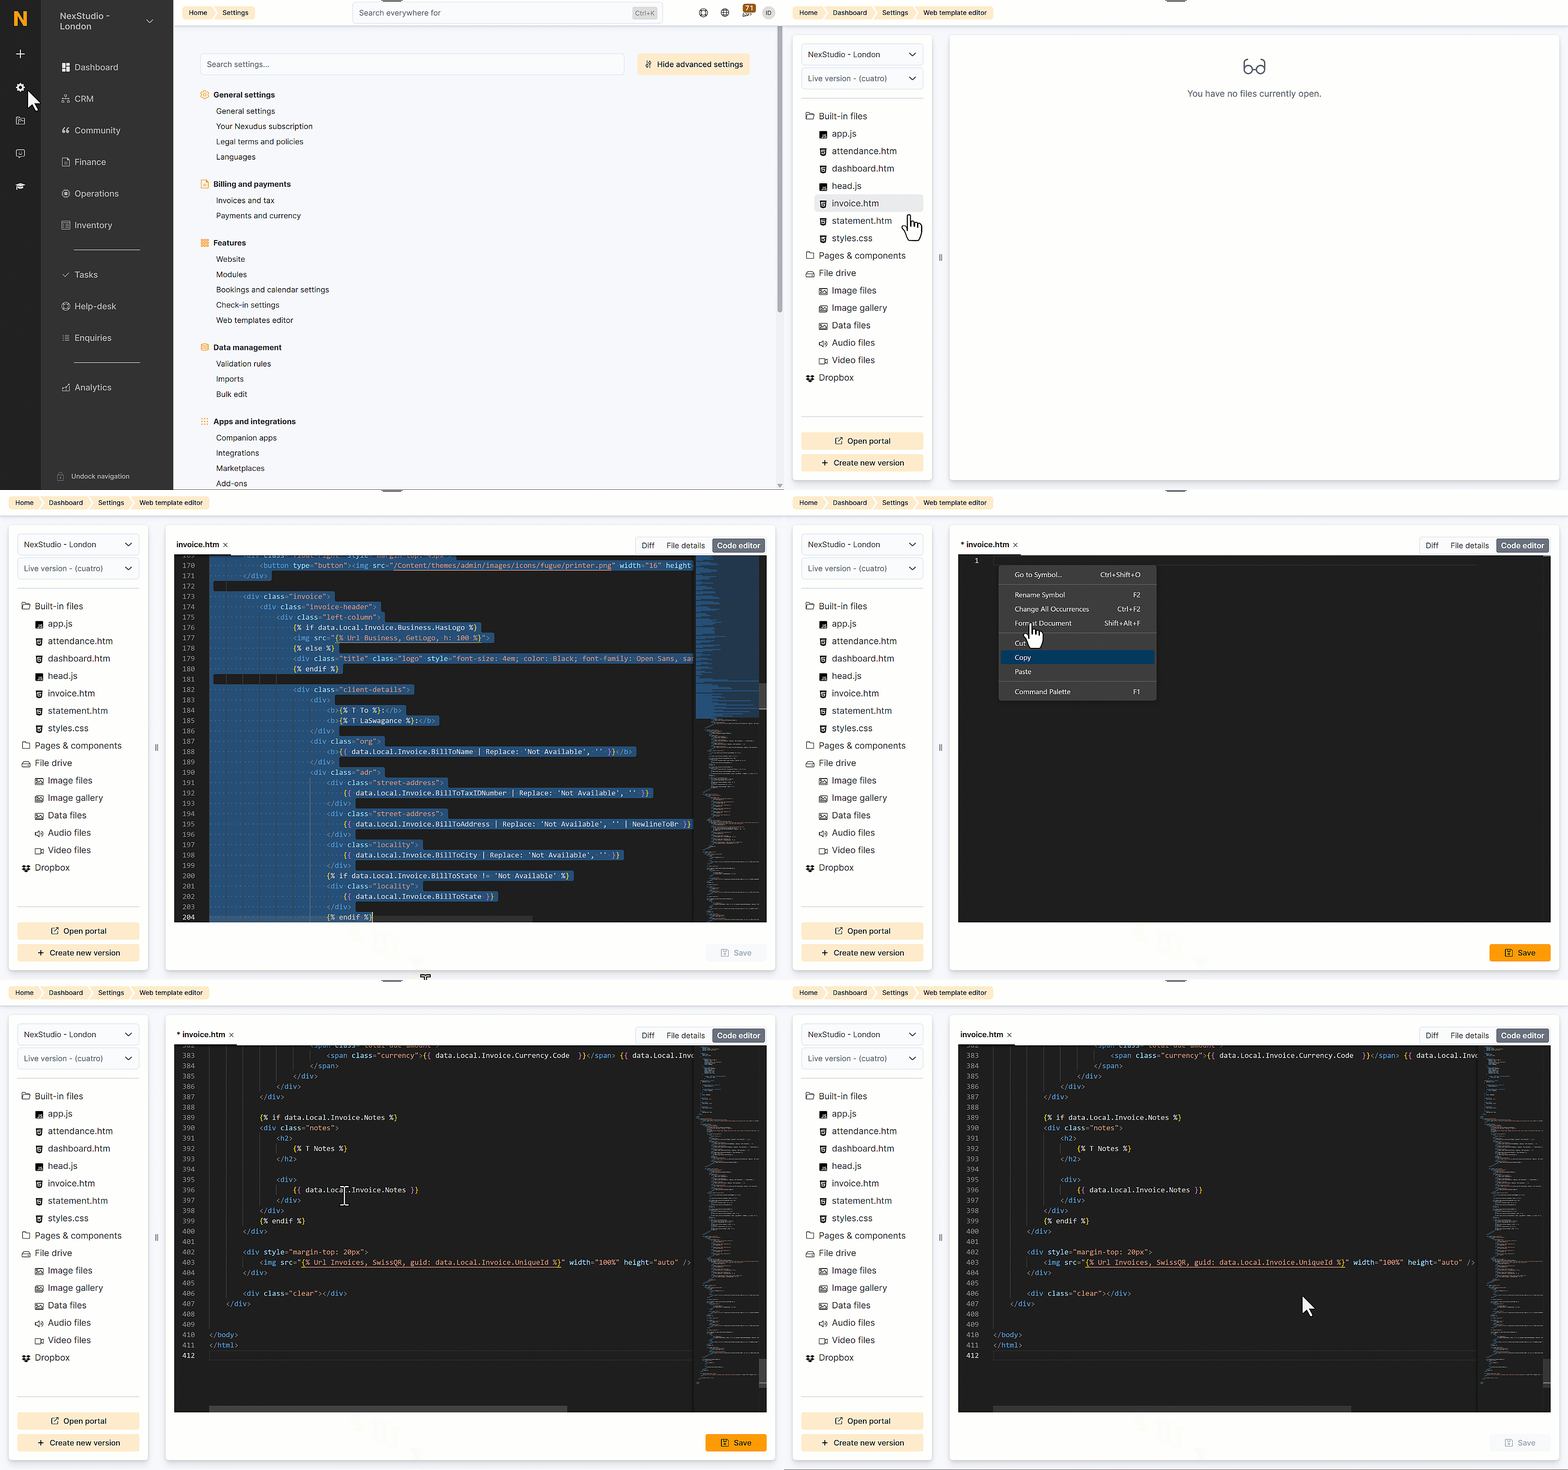
The next step is to replace the code in the invoice.htm file on the Admin Panel. This change to the template lets us generate and include QR-bill codes to invoices you issue to your customers.

- Download the invoice.htm file that supports QR-bill below.
- Open the file and copy the entirety of the code.
- Head over to Settings > Web templates editor.
- Click on Built-in files.
- Click on invoice.htm.
- Remove all the code in the file.
- Paste the code you copied in the second step.
Click the Save button.
You're now ready for the last step of the process, generating a test invoice to ensure QR-bill is correctly included in invoices.
Only invoices you issue from this step forward will include codes.
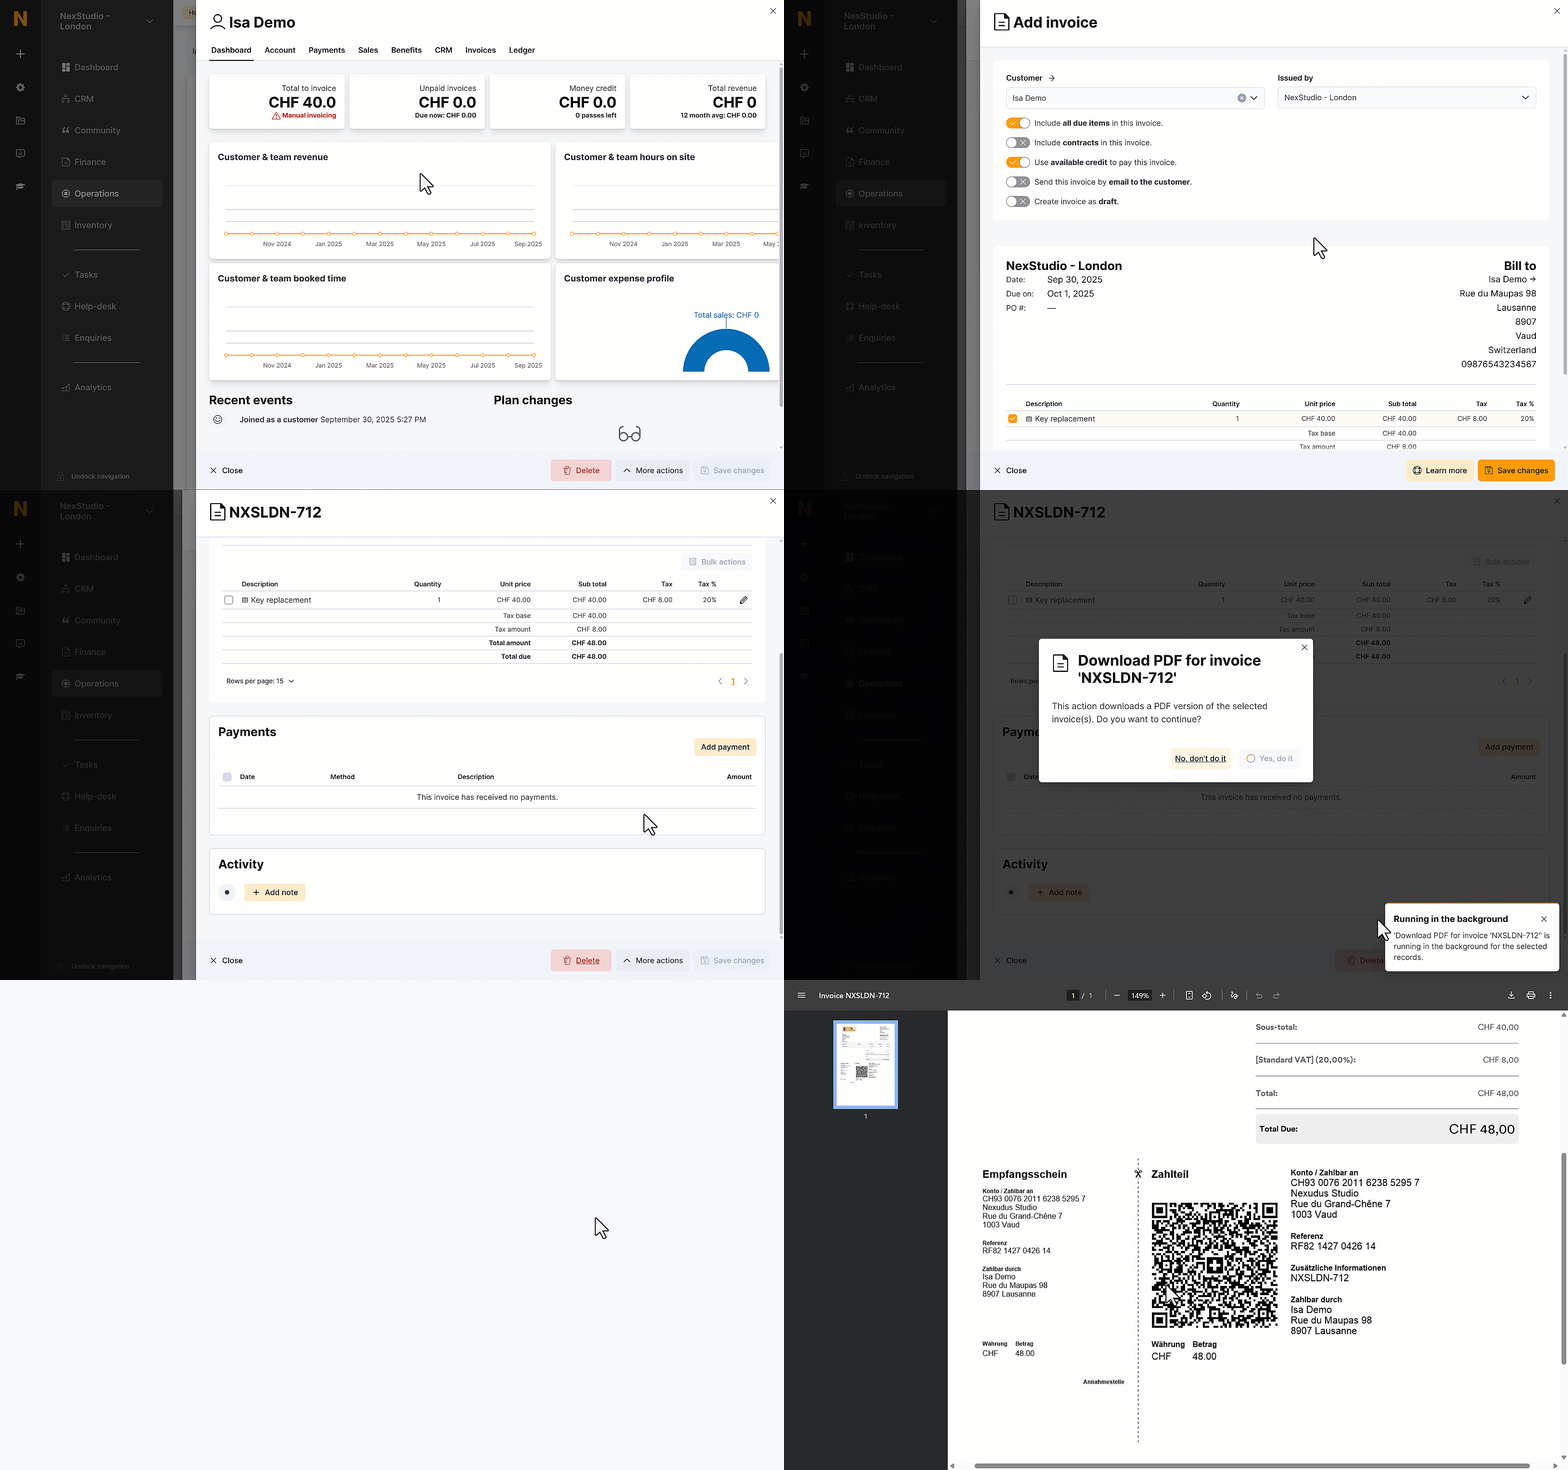
Step 3. Generate a test invoice
We recommend creating an invoice using the customer profile of one of your admins or a demo customer created solely for that purpose.
Simply sell that test customer any product and generate the invoice.

The QR-bill should be included at the bottom of the invoice. If the QR-bill is displayed correctly and works as expected, go ahead and cancel the invoice to remove the charge and complete the process.