What You Need to Integrate Okta
All you need to integrate Okta license and a developer account. You can open an Okta developer account from https://developer.okta.com.
Step 1. Adding Your Okta Application
-
Log in to your Okta developer account.
-
Click Applications > Add Application.

- Select the Web application type.

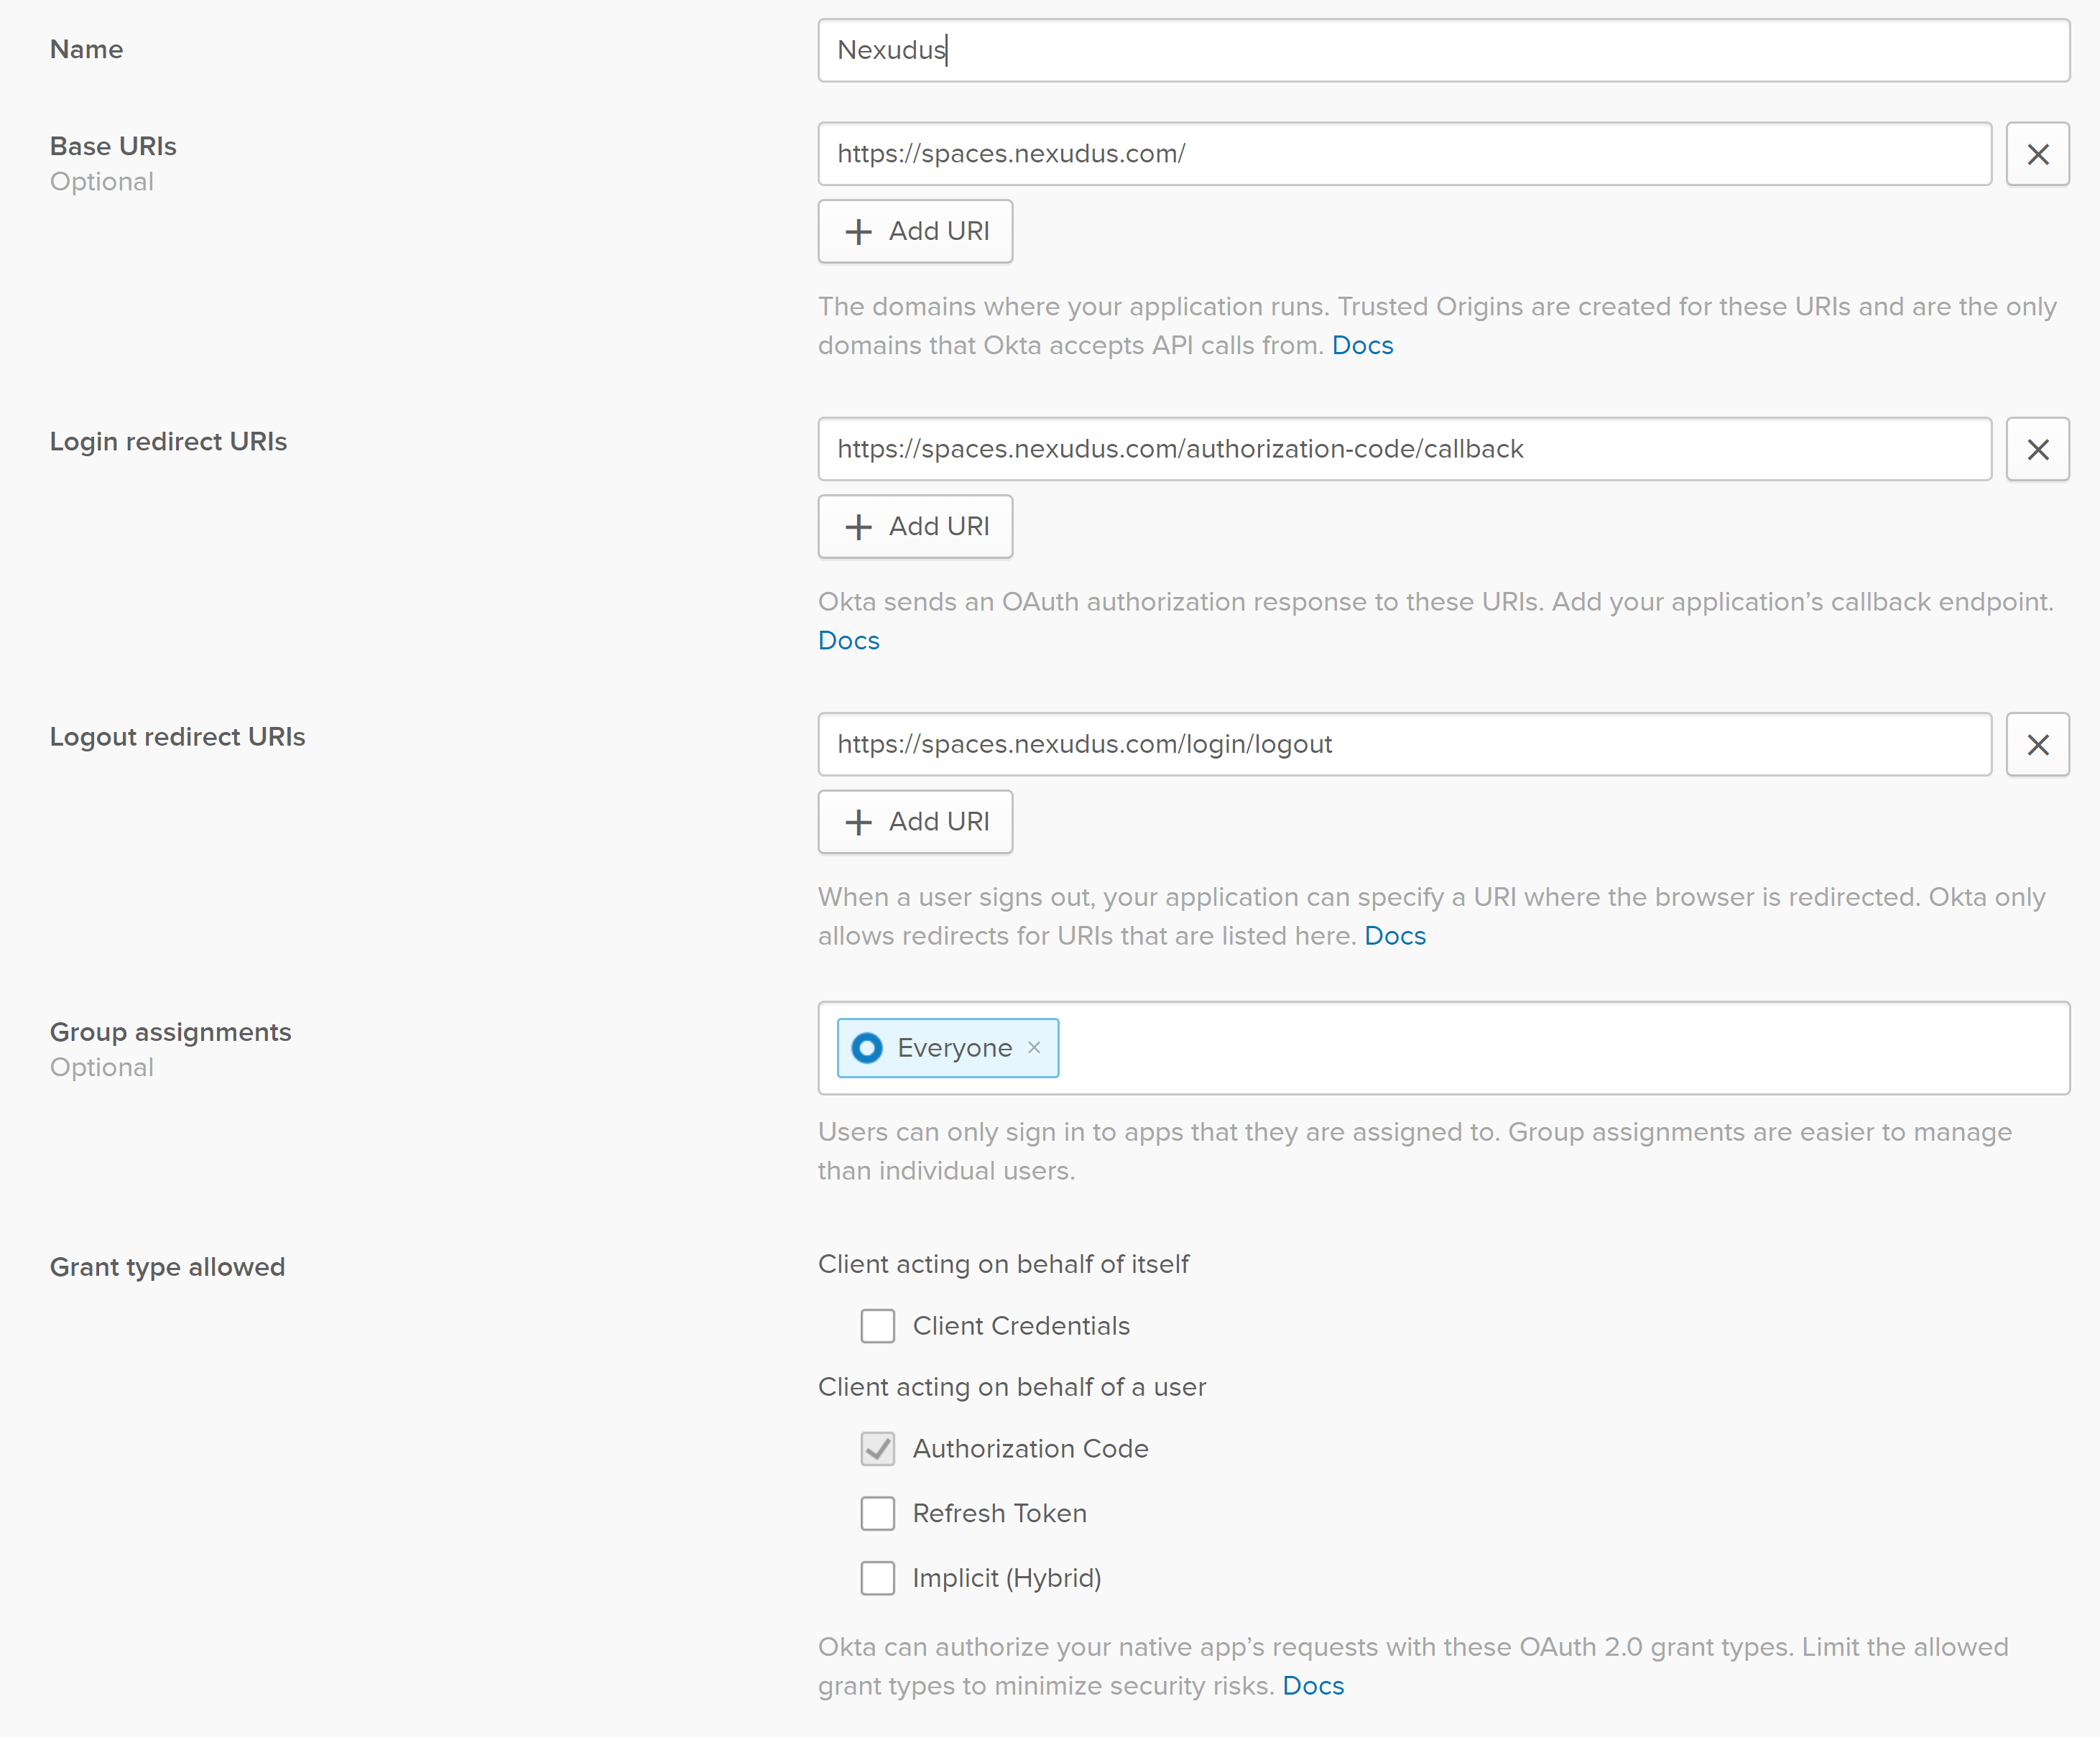
- Complete the Application details as shown below.
Make sure the you use the correct details:
Login Redirect URI - https://spaces.nexudus.com/authorization-code/callback
Base URI https://spaces.nexudus.com

Once saved, go back to the applications list and access the details of the application you've just created. Copy and save both the Client ID and the Client Secret. You'll need them to enable the Okta integration in Nexudus.

This Okta application will let users sign in to their Nexudus accounts as long as they are already a user in your Okta account.
You may also want to connect Okta with an identity providers, such as Microsoft or Google, to delegate the authentication process to the supported providers. You do this by adding a identity provider to your Okta developer account. Okta provides instructions for the different Identity Providers they support:
Once you have configured your identity provider, copy and save the identifier IdP ID Okta assigned to it.

You will need this ID along with the Client ID and Client Secret to enable the integration in Nexudus.
Step 2. Enabling the Okta Integration in Nexudus
The second step of the integration is to enable the Okta integration on the .
-
Log in to dashboard.nexudus.com if you aren't already.
-
Click Settings > Integrations > Okta.
-
Enable the Okta integration toggle.
-
Enable the Create new users in Nexudus if they don't exist toggle if you want to register directory users as contacts in Nexudus if they don't have an account yet.
-
Enable the Prevent users from using their Nexudus password to log in toggle if you want your occupiers to only be able to use Okta to log in to their Nexudus account.
- Add your Okta domain without https://.
You can also use your Okta custom domain if you have one.
-
Add your Identity Provider Id (IdP ID).
-
Add your Client ID.
-
Add your Client Secret.
-
Add text in the Sign in button label.
The default text is Sign in with Corporate Account.
Click the Save Changes button.
Okta is now integrated with Nexudus.
Your Nexudus login pages (User Portal & Passport App) will present users with an additional login option labelled as Sign in with Corporate Account or the custom text you've added in the Sign in button label field in step 11.
Clicking on the sign in link will redirect the user to the Okta sign in flow. If you added a custom Identity Provider (i.e. Microsoft AD), then the user will be asked to log in using that provider. If the login is successful, the user is redirected to the User Portal.
When the option Provision new users if they don't exist is enabled, if a user is successfully authenticated through Okta and they don't exist in your Nexudus occupier database, we will automatically register them. We pull their their email and full name from the data returned by the identity provider and register them in all locations in your network.
Okta and self-hosting User Portal
If you are self-hosting the User Portal, you will need handle the Okta callback to your own domain and redirect it to the Nexudus endpoint to handle the final step of the Okta authentication flow.
For example, when you receive a request to https://:your_custom_domaion.com/authorization-code/callback you should forward it to https://:yourdomain.spaces.nexudus.com/authorization-code/callback.
You can easily achieve this in NextJS using a redirect page located in /pages/authorization-code/callback.js
class OktaCallbackPage extends Component {}

OktaCallbackPage.getInitialProps = ({ asPath, query, res }) => {
  const your_nexudus_domain = "example";
  if (res) {
    res.writeHead(302, {
       Location: `https://${your_nexudus_domain}.spaces.nexudus.com/authorization-code/callback?code=${query.code}&state=${query.state}&error_description=${query.error_description ?? ''}`
    });
    res.end();
  }

  return {};
};

export default OktaCallbackPage;