You can easily add custom fields to the visitor registration form if you'd like to collect additional information from visitors to your space.
For example, you'd like all visitors have a registered date of birth.
You can choose whether these custom fields are shown on the NexIO self-registration form, the Members Portal and Passport app visitor registration form, or both. You can also choose whether or not to make the field required.
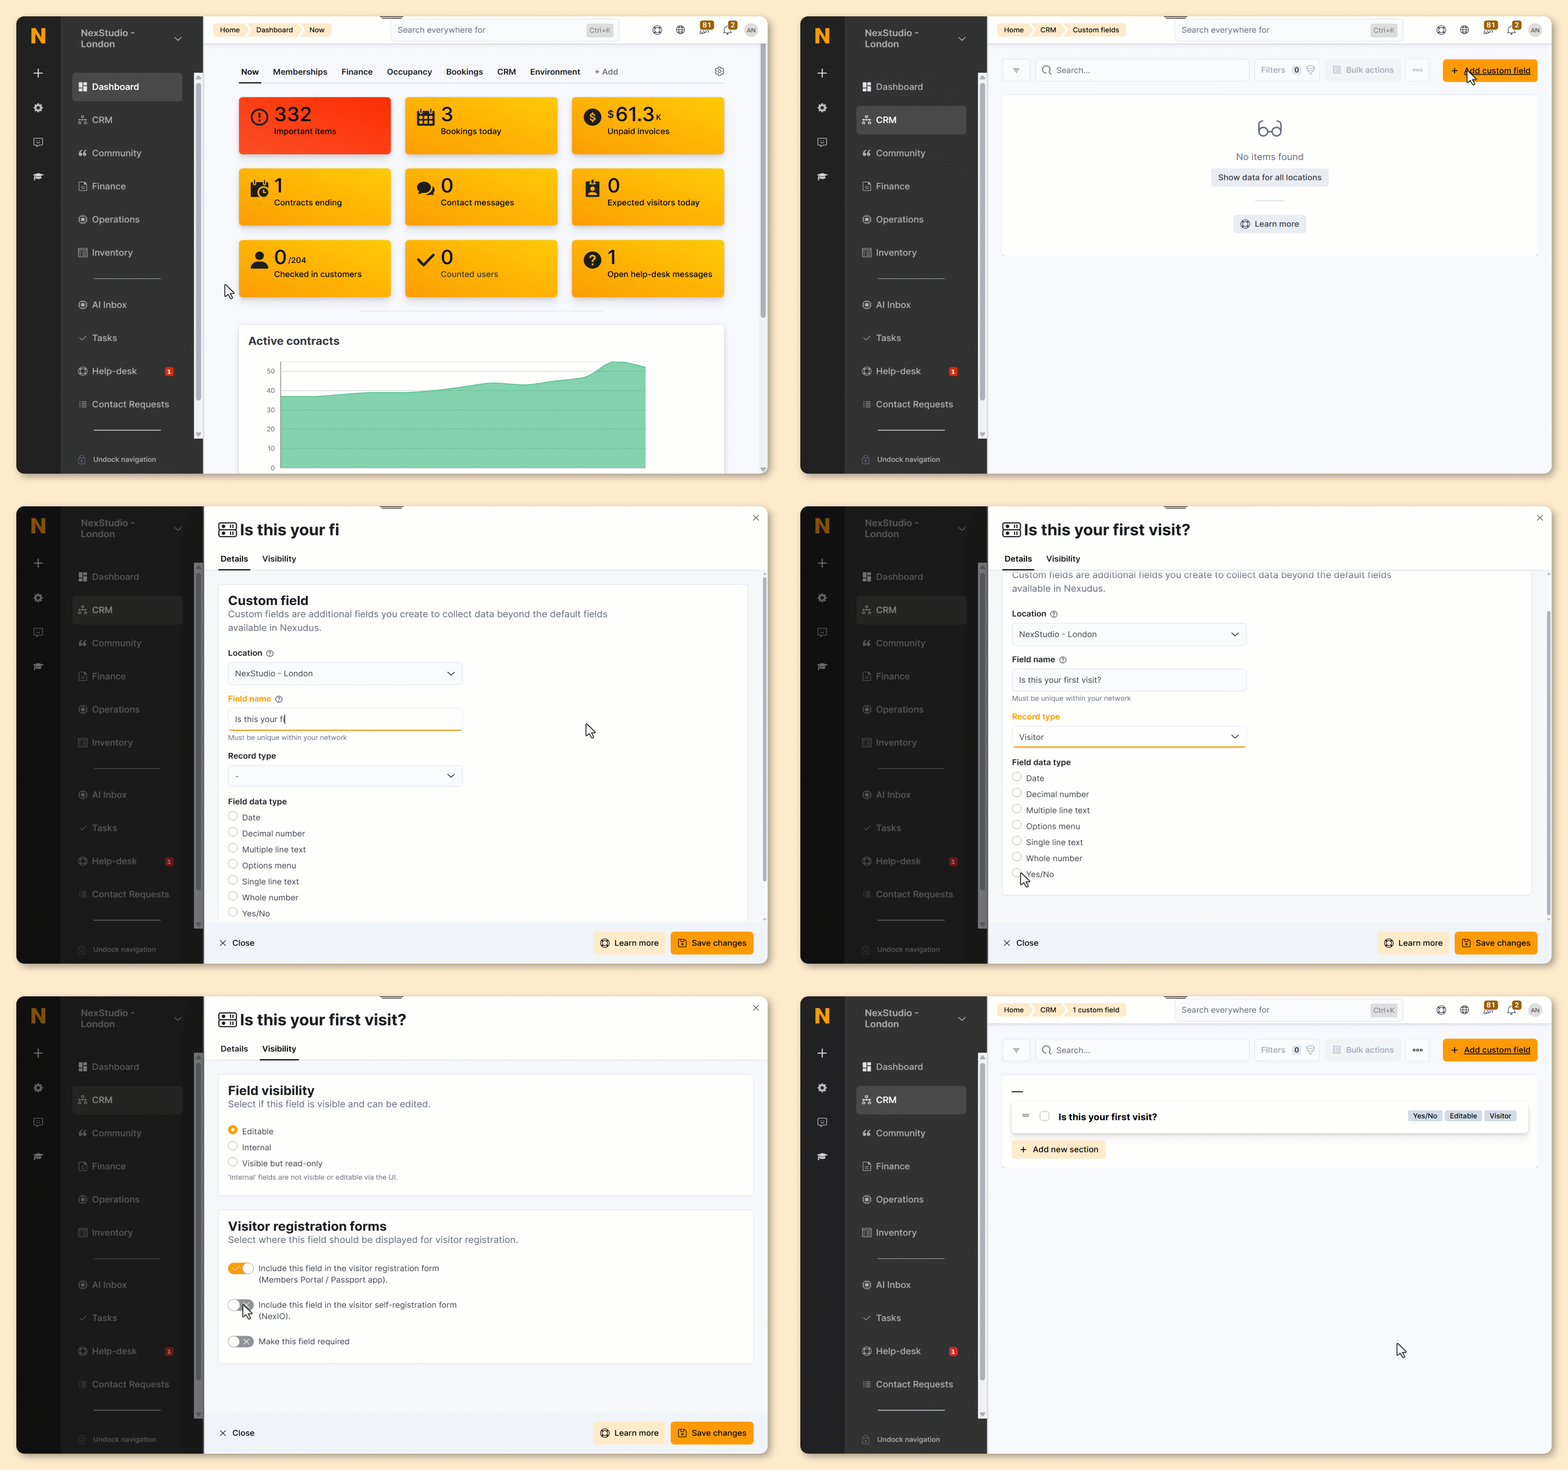
Log in to dashboard.nexudus.com if you aren't already.
- Go to CRM > Custom Fields.
- Click Add custom field.
- Add a Field name.
If you want this field to answer a question, the name of the field should be your question.
- Select Visitor as your Record type.
- Select a Field data type based on the information you want to collect.
You can check out field data types to see a list of available options.
- Click on the Visibility tab.
- Under Visitor registration forms, toggle on Include this field in the visitor registration form if you'd like customers to see this field when they register visitors on the Members Portal or Passport app.
- Toggle on Include this field in the visitor self-registration form if you'd like visitors to see this field when they self-register on the NexIO app.
- Toggle on Make this field required if you'd like to require this information.
Click the Save Changes button.
All set! The custom field will appear on your visitor self-registration form and visitor registration forms according to your settings.