Once you've created a floor plan and added furniture, you can add floor plan units to represent the different areas and furniture within your space.
For example, you can place furniture on your floor plan to represent your hot desks, then link each piece of furniture to its own hot desk unit. Or you can link an area of the floor plan, such as an office or meeting room, to a unit representing that part of your space.
For this reason, we recommend creating floor plan units directly from the Floor Plan itself rather than the Inventory screen.
You can link floor plan units such as desks and phone booths to furniture representing these units.
You can link rooms and other enclosed spaces such as offices and meeting rooms to discrete areas in your floor plan.
The type of floor plan unit you add depends on the area or furniture in your space it represents.
- Office
This unit is suitable for any type of office in your space.
- Dedicated desk
This unit is suitable for any desk that you assign to contracts.
- Hot-desk
This unit is suitable for any hot-desk that you assign to contracts or that can be booked through a resource.
- Room
This unit is suitable for any type of room that you make available to customers.
- Other
This unit is suitable for rooms or areas that don't match any other floor plan unit type.
Adding Floor Plan Units to Furniture
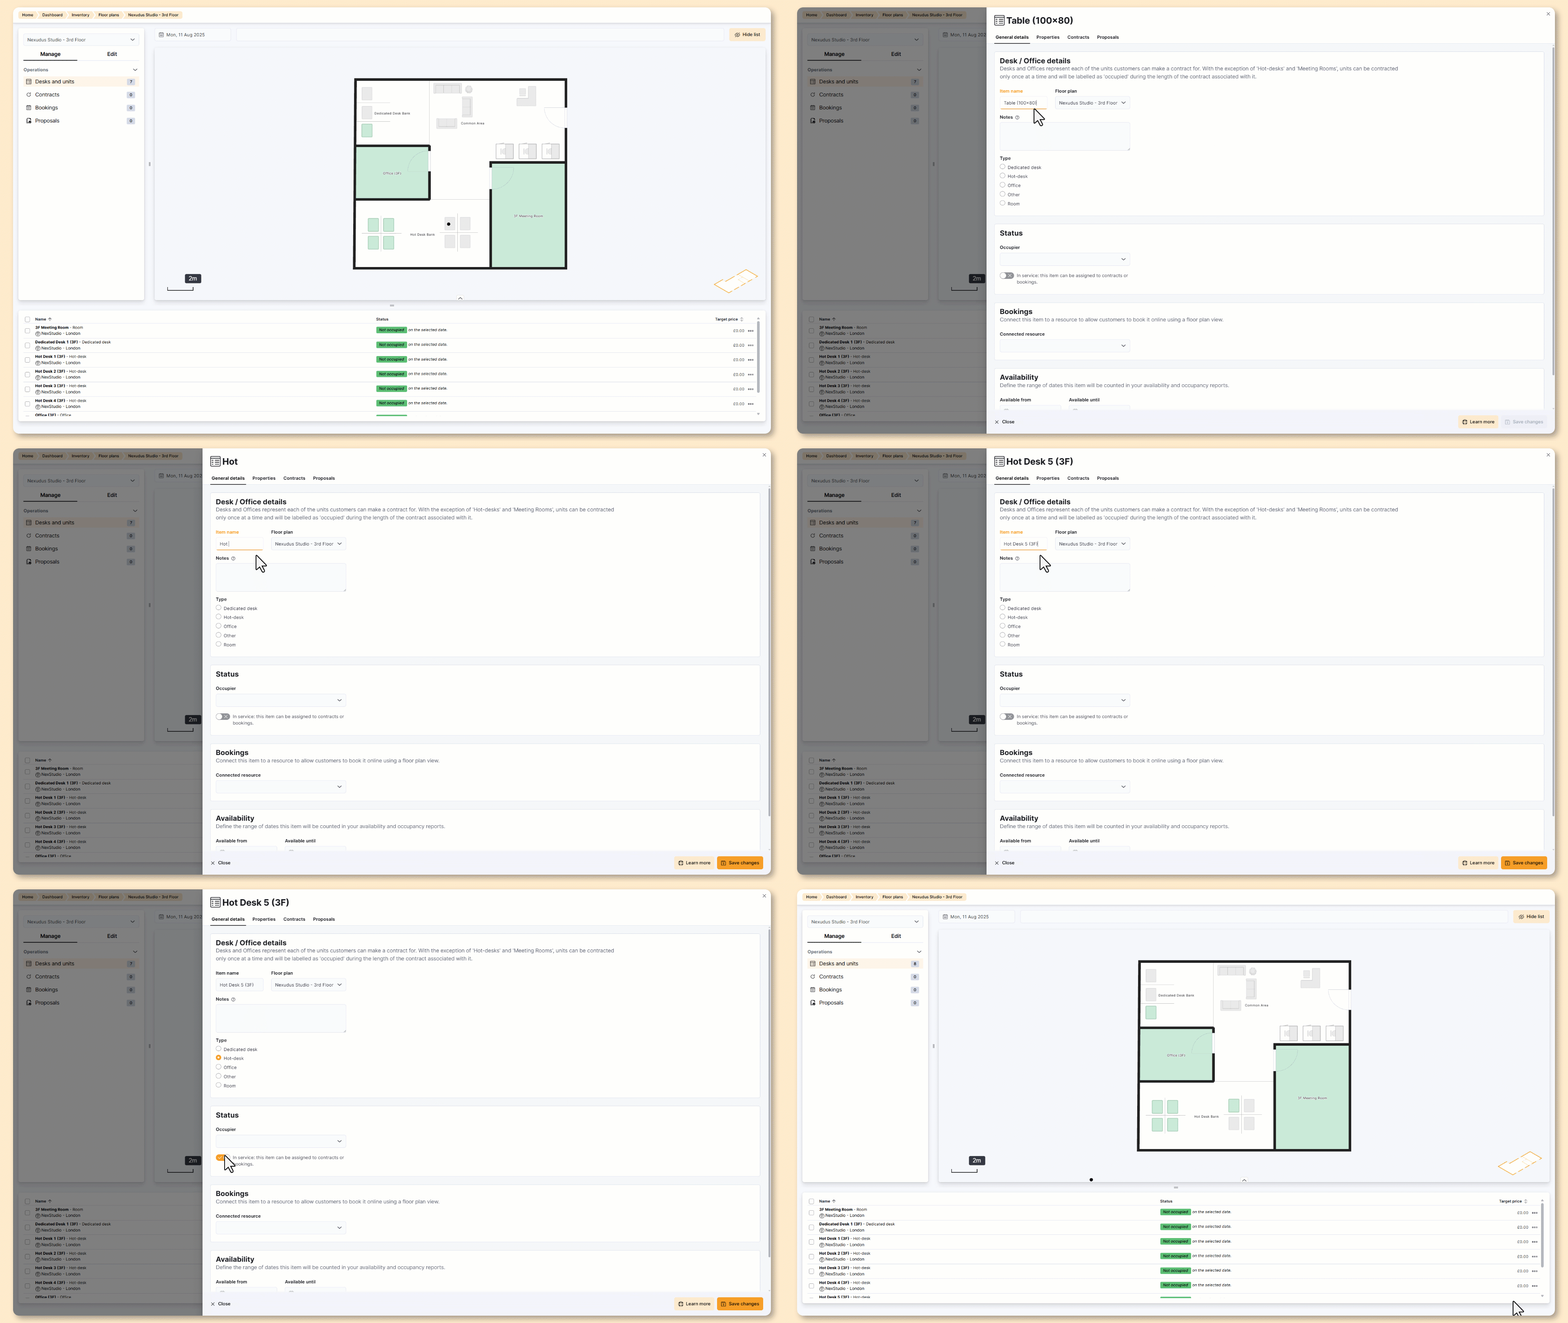
Add floor plan units to furniture when the unit represents bookable or contractable items such as desks and booths.

- Open the relevant floor plan from Inventory > Floor plans if you haven't already.
- Click on the Manage tab.
- On the floor plan, click on the furniture want to add to your floor plan unit inventory.
- Under Desk / Office details, click create a new unit.
- Name your unit.
- Select the unit type.
- Under Status, toggle on In service: this unit can be assigned to contracts or bookings.
- Click the Save changes button.
Repeat these steps for any other floor plan units you'd like to add to your inventory. You can access your floor plan units from the floor plan editor or the Inventory section of the Admin Panel.
Adding Floor Plan Units to Areas
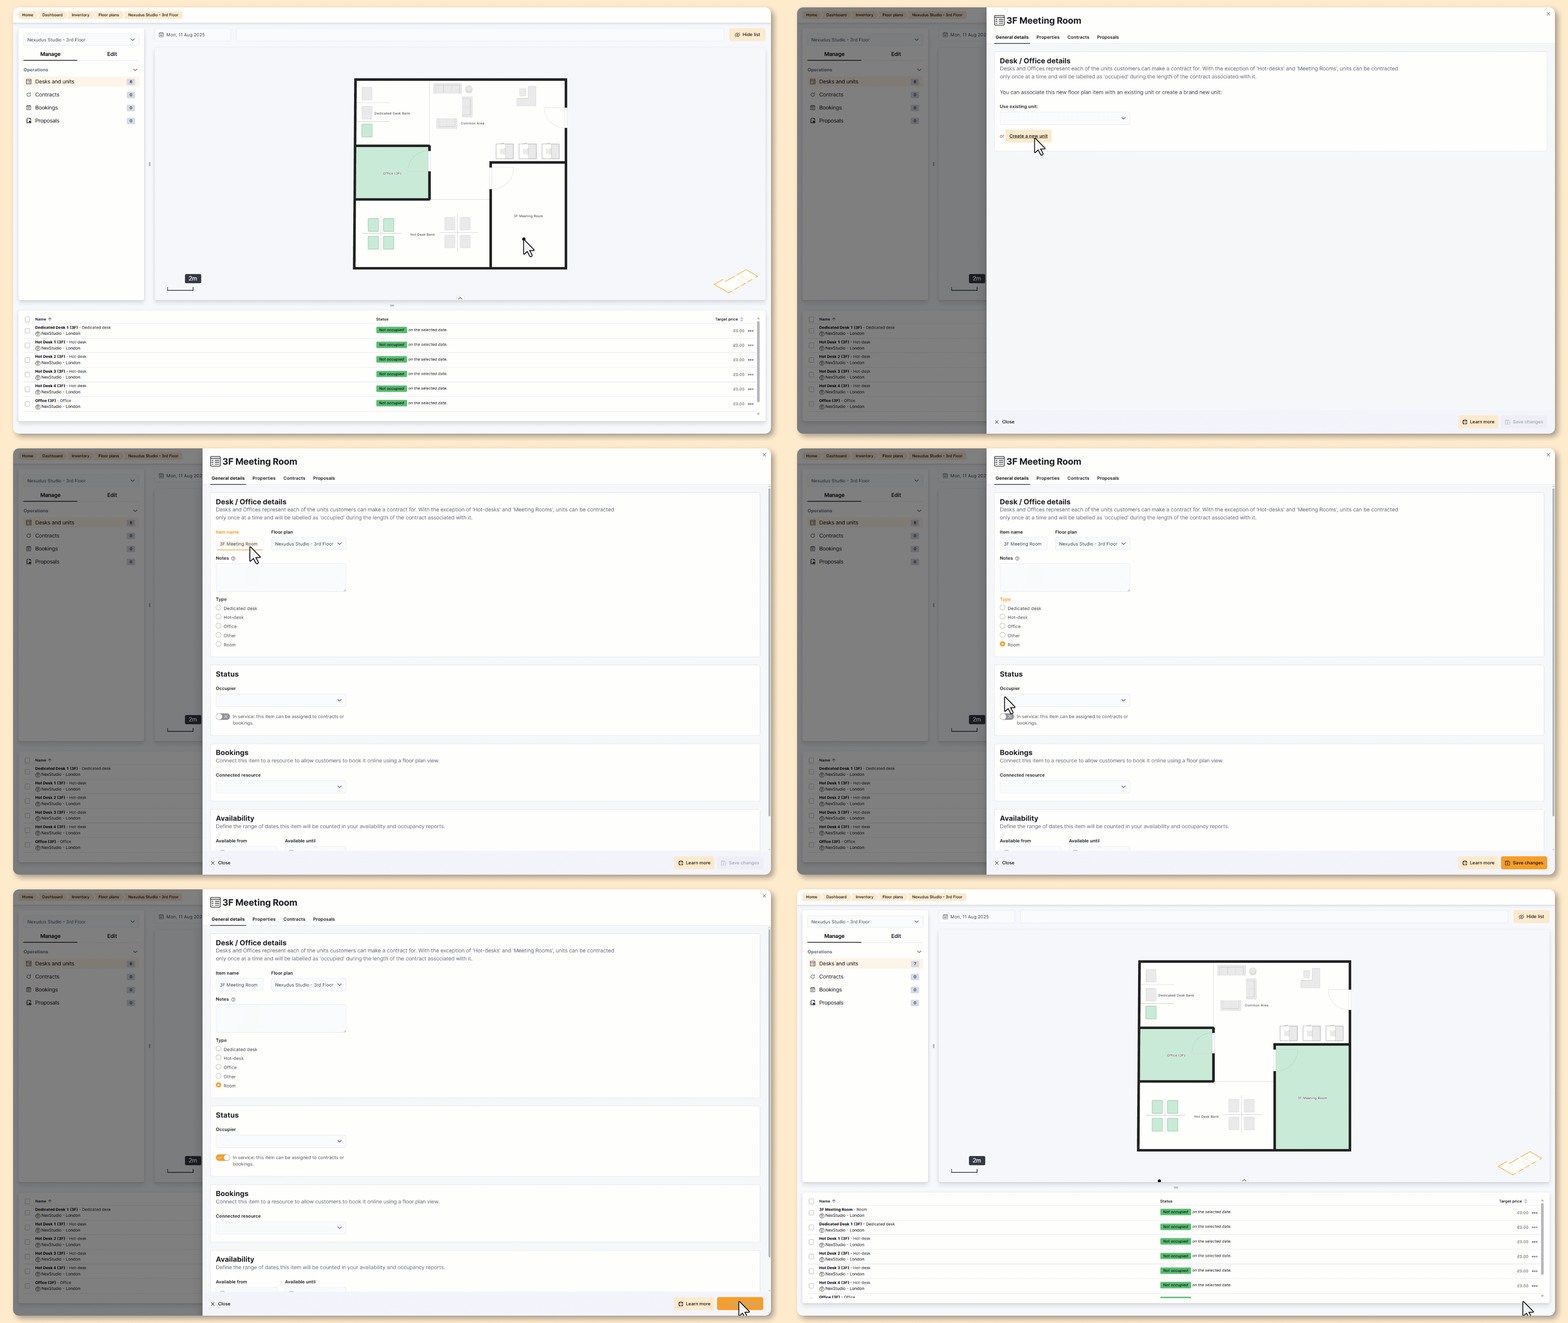
Add floor plan units to areas in your space when they represent bookable or contractable rooms such as offices and meeting rooms.

- Open the relevant floor plan from Inventory > Floor plans if you haven't already.
- Click on the Manage tab.
- On the floor plan, click on the area you want to add to your floor plan unit inventory.
Linking floor plan units representing rooms to furniture can easily result in double-booking or assigning the same space to multiple contracts.
- Under Desk / Office details, click create a new unit.
- Name your unit.
- Select the unit type.
- Under Status, toggle on In service: this unit can be assigned to contracts or bookings.
- Click the Save changes button.
Repeat these steps for any other floor plan units you'd like to add to your inventory. You can access your floor plan units from the floor plan editor or the Inventory section of the Admin Panel.