Enabling e-invoicing in your space is a quick and easy process.
All you need to get started are the tax and legal identifiers of your business. Depending on where your space is based, the number of identifiers and their format will vary.
You can reuse your tax identifiers and details if you use the same ones for multiple locations.
Log in to dashboard.nexudus.com if you aren't already.
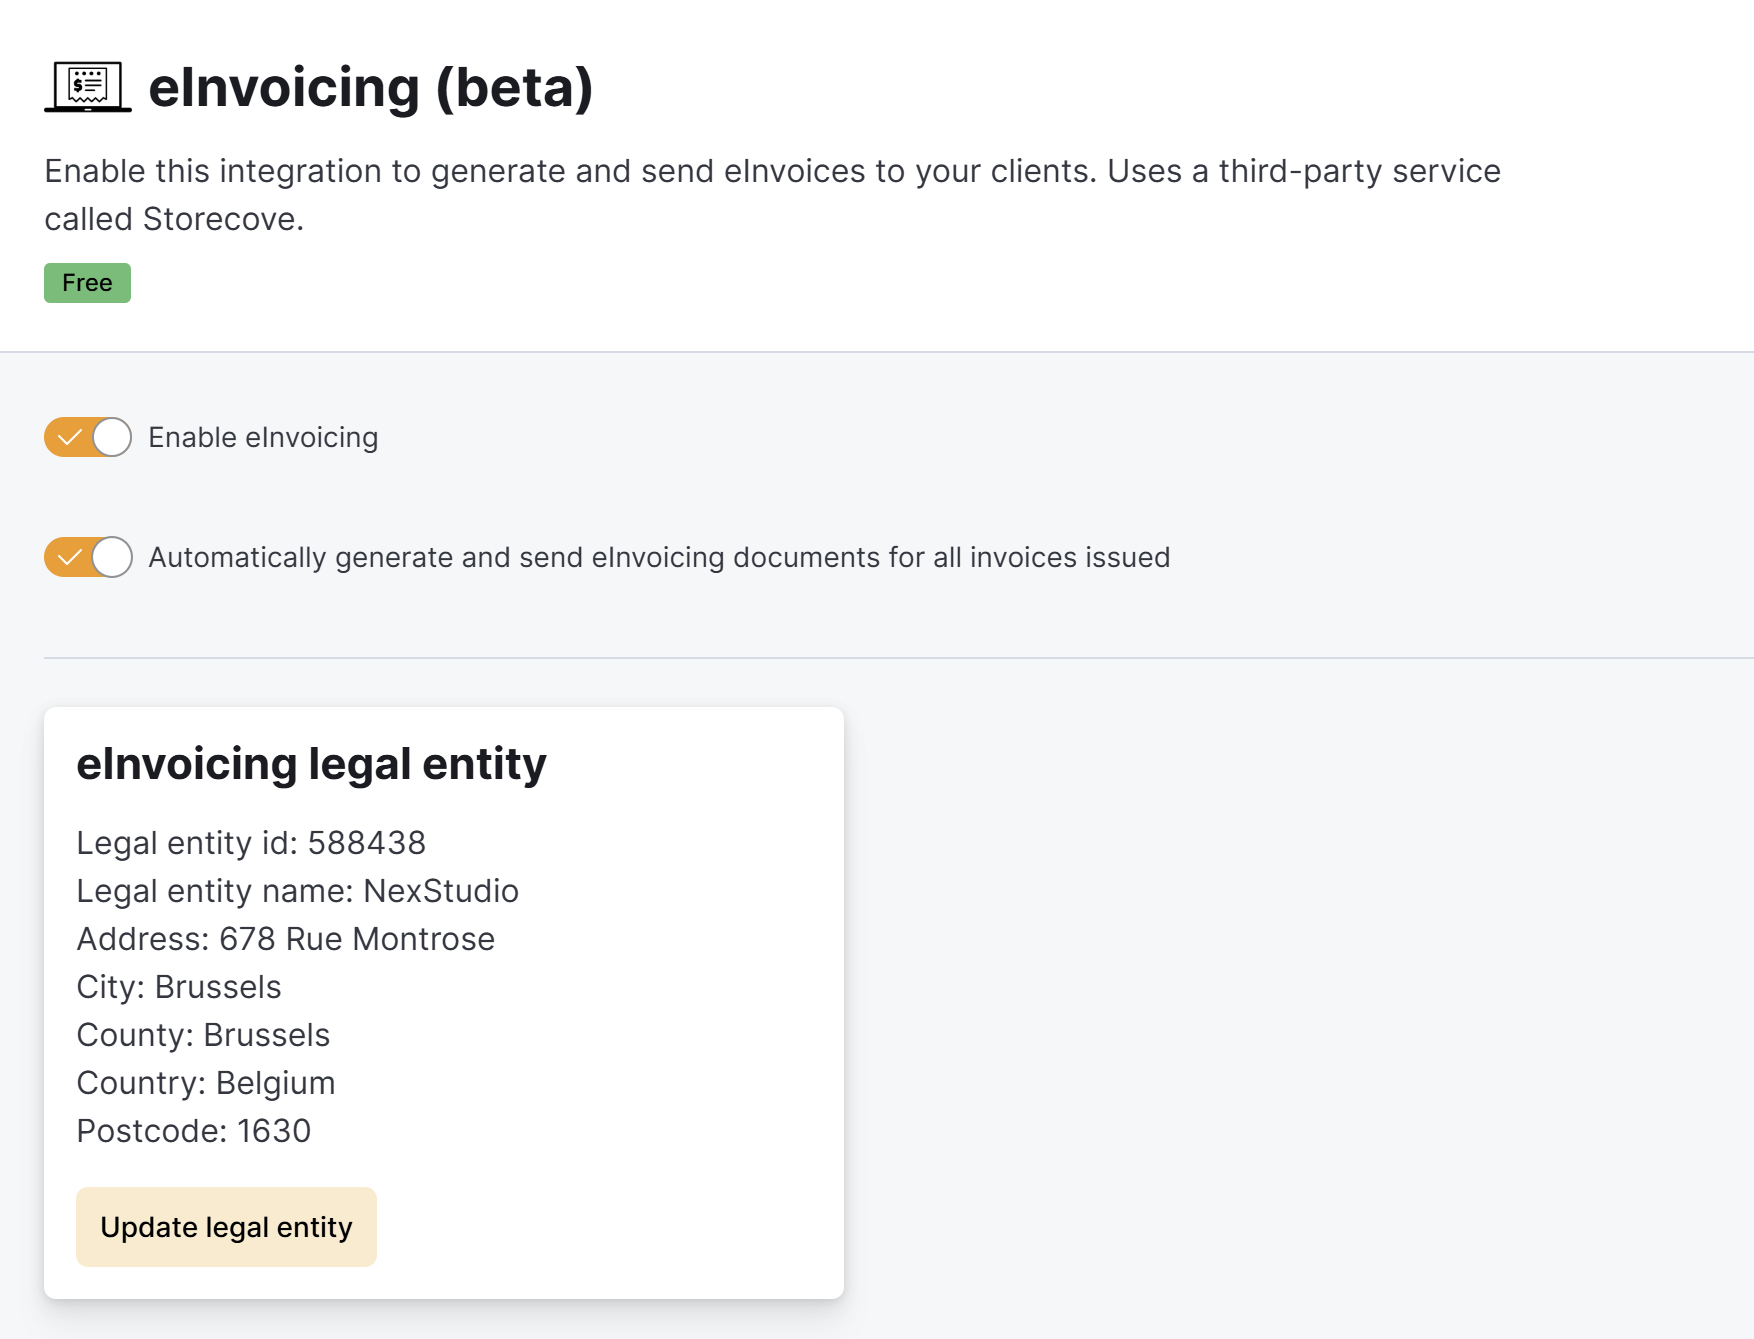
- Click Settings > Integrations > E-invoicing.
- Toggle on Enable.
- Toggle on Automatically generate and send eInvoicing documents for all invoices issued to automatically generate an e-invoice as soon as you issue a new invoice to your customers.
If you keep this toggle off, you will need to manually generate eInvoices to send to your local tax authorities.
- Check that the selected Country matches the country where your business is registered.
- Select your country's identifier type and add it without spaces, commas, or periods.
- Click on Add identifier.
For example, if you are required to add a legal and tax identifier, you must add both.
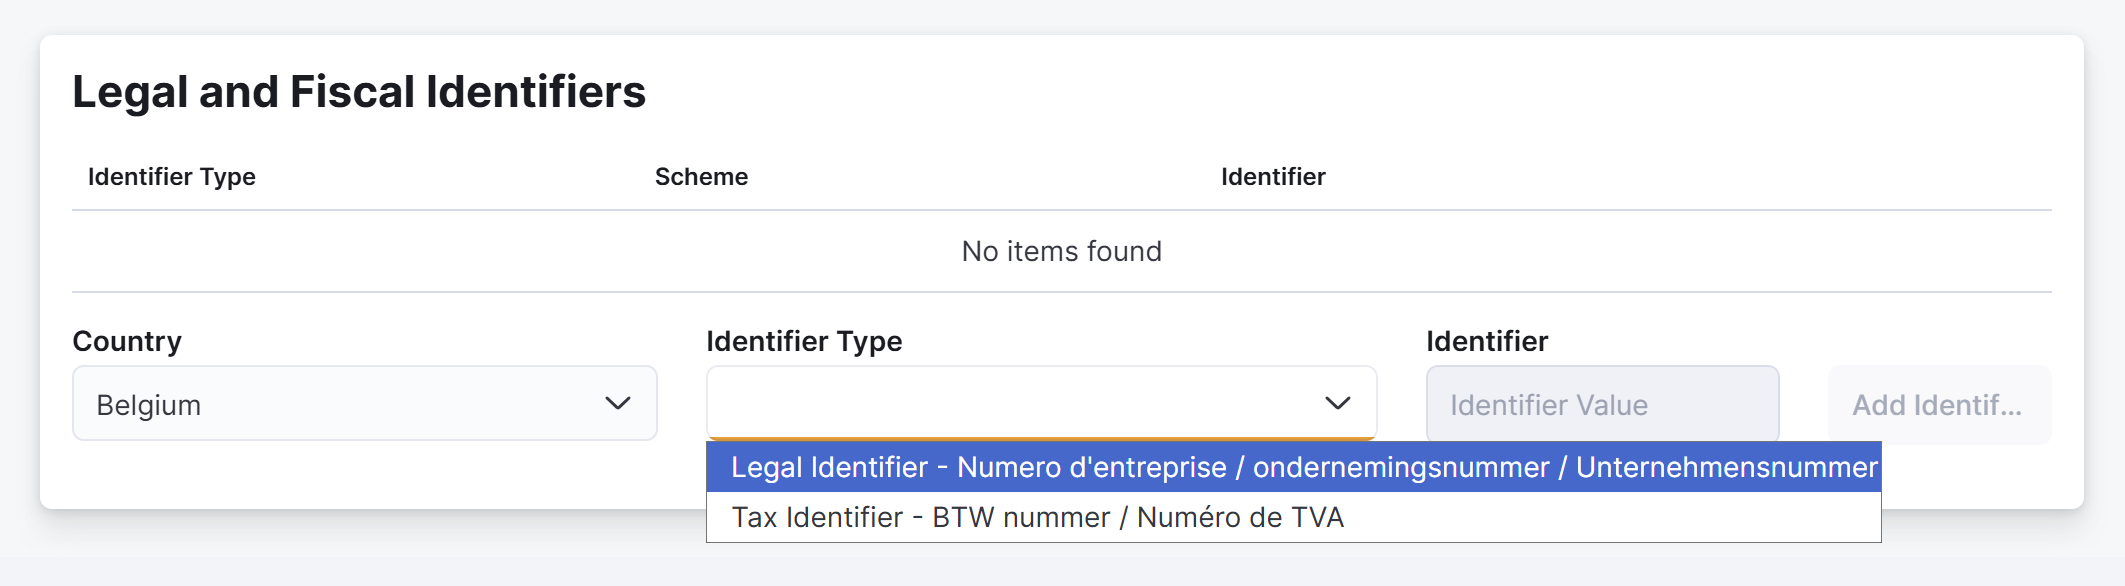
Adding only some of the required identifiers will result in failed transfers to your local tax authorities.
Click the Save Changes button.
All set! E-invoicing and e-reporting is now enabled for your business. Repeat the process for all of your other locations.
None of the invoices you previously issued will be transferred to your local tax authorities until you Generating E-invoices for all of them. Generating e-invoices for existing invoices won't charge your customer twice.