Check out Migrating to PaperCut Bridge instead.
Migrating to the new version of the PaperCut extender takes less than an hour and unlocks a host of game-changing benefits!
- More regular syncs
- Improved performance
- More detailed logs available on the Admin Panel
What you need to get started
➡️A laptop or desktop to run the extender
We recommend picking the one you run the old extender on to ensure a smooth migration.
➡️ Admin access to that laptop or desktop
You must be an admin on the laptop or desktop from which you run the extender. If you are not an admin, ask your IT department or someone with admin access to complete the first step of the migration for you.
➡️ Around 60 minutes
The migration shouldn't disturb your operations for more than an hour, but we recommend migrating outside of opening hours or at a quieter time of day to avoid any disruption.
Step 1. Download and run the new extender
The first step of this migration is downloading the new extender and running it for the first time.
Log in to dashboard.nexudus.com if you aren't already.
- Click Settings > Integrations > PaperCut.
- Under Download Papercut Extender, click on the extender you need based on your device.
Win-x64 if your device runs on Windows
Linux-x64 if your device runs on Linux
The download should only take a few seconds. Move the new extender out of your Downloads folder to the old extender folder on your device.
Move your new extender file to a directory such as C:\Program Files\Nexudus PaperCut Extender.
Once you've moved the extender, you can open and run it. Follow the instruction on the screen and make sure you copy the device ID created for your new extender.
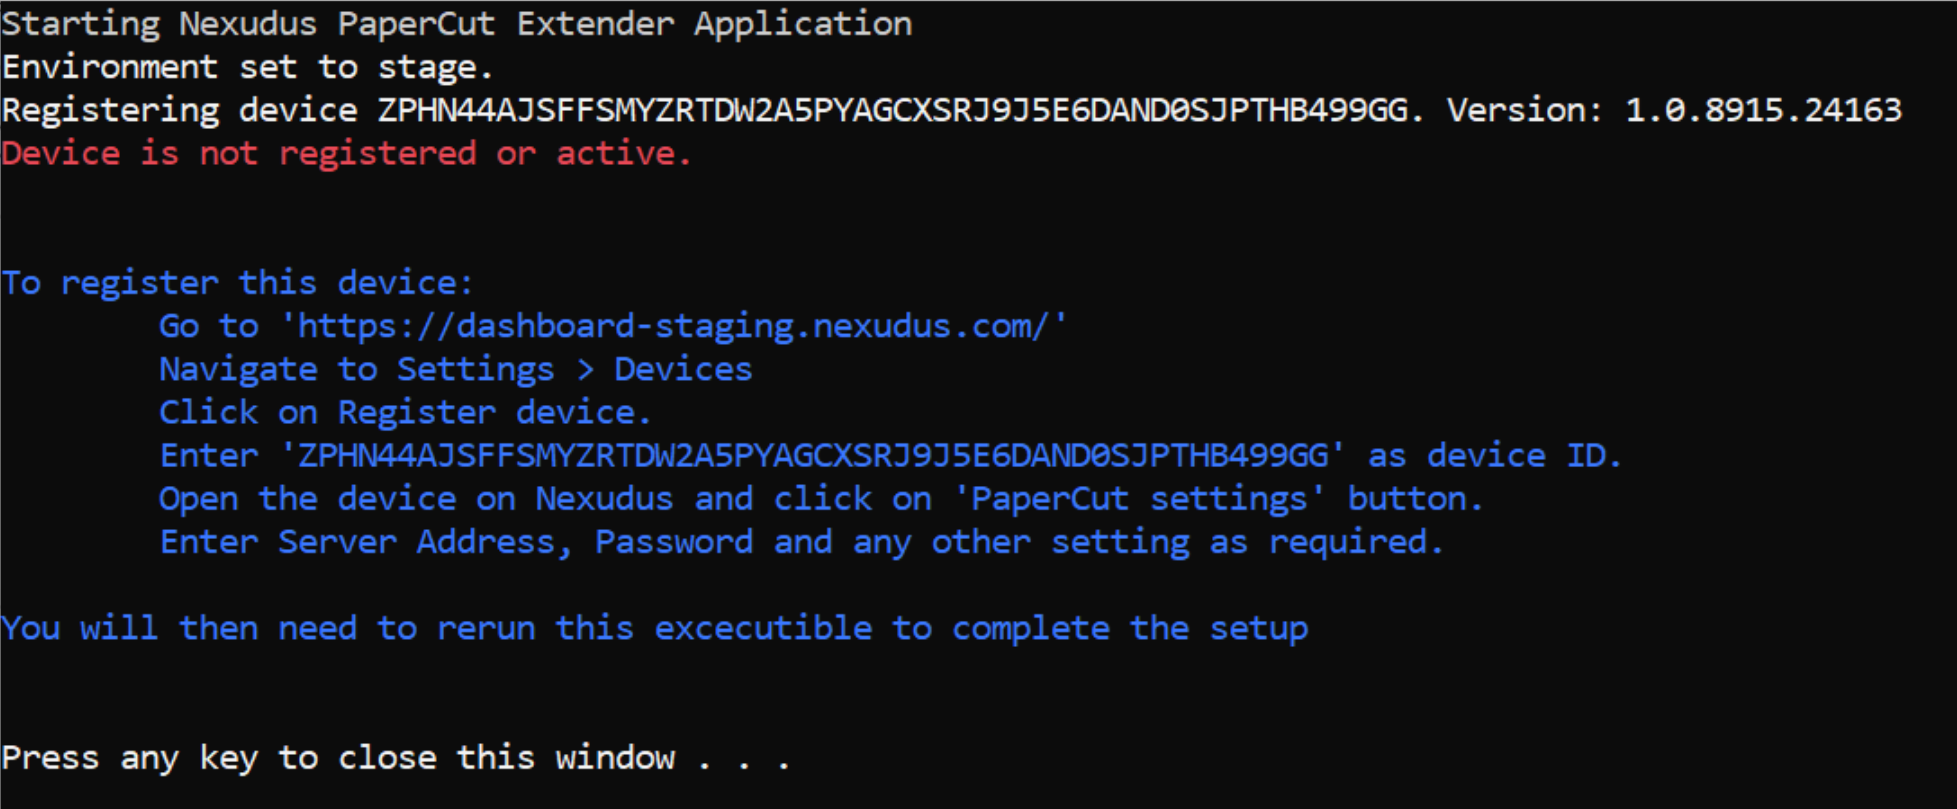
You need this device ID before moving to the next step.
Step 2. Register the device you use to run the extender
Log in to dashboard.nexudus.com if you aren't already.
- Click Settings > Devices.
- Click on Register device.
- Add the device ID you copied from the new extender.
- Click on Register device.
Now that you've registered the new extender and its device, you can move to the last step of the process.
Step 3. Check your PaperCut settings on the Admin Panel
The last step of the process is to make sure all your settings and details have been updated on the Admin Panel.
- Go to Settings > Integrations > PaperCut.
- Check the settings of your new extender are accurate and match the settings of the old extender.
- Adjust any settings that need to be changed or haven't been synced.
Click the Save Changes button.
All done! The old extender is automatically switched off once the migration is complete. We recommend waiting 15 to 30 minutes and checking the logs to make sure the new extender is syncing as expected.
Once you've made sure syncs are working as expected, you can opt to delete the old extender. While this is not a requirement, it can be helpful to avoid any confusion.