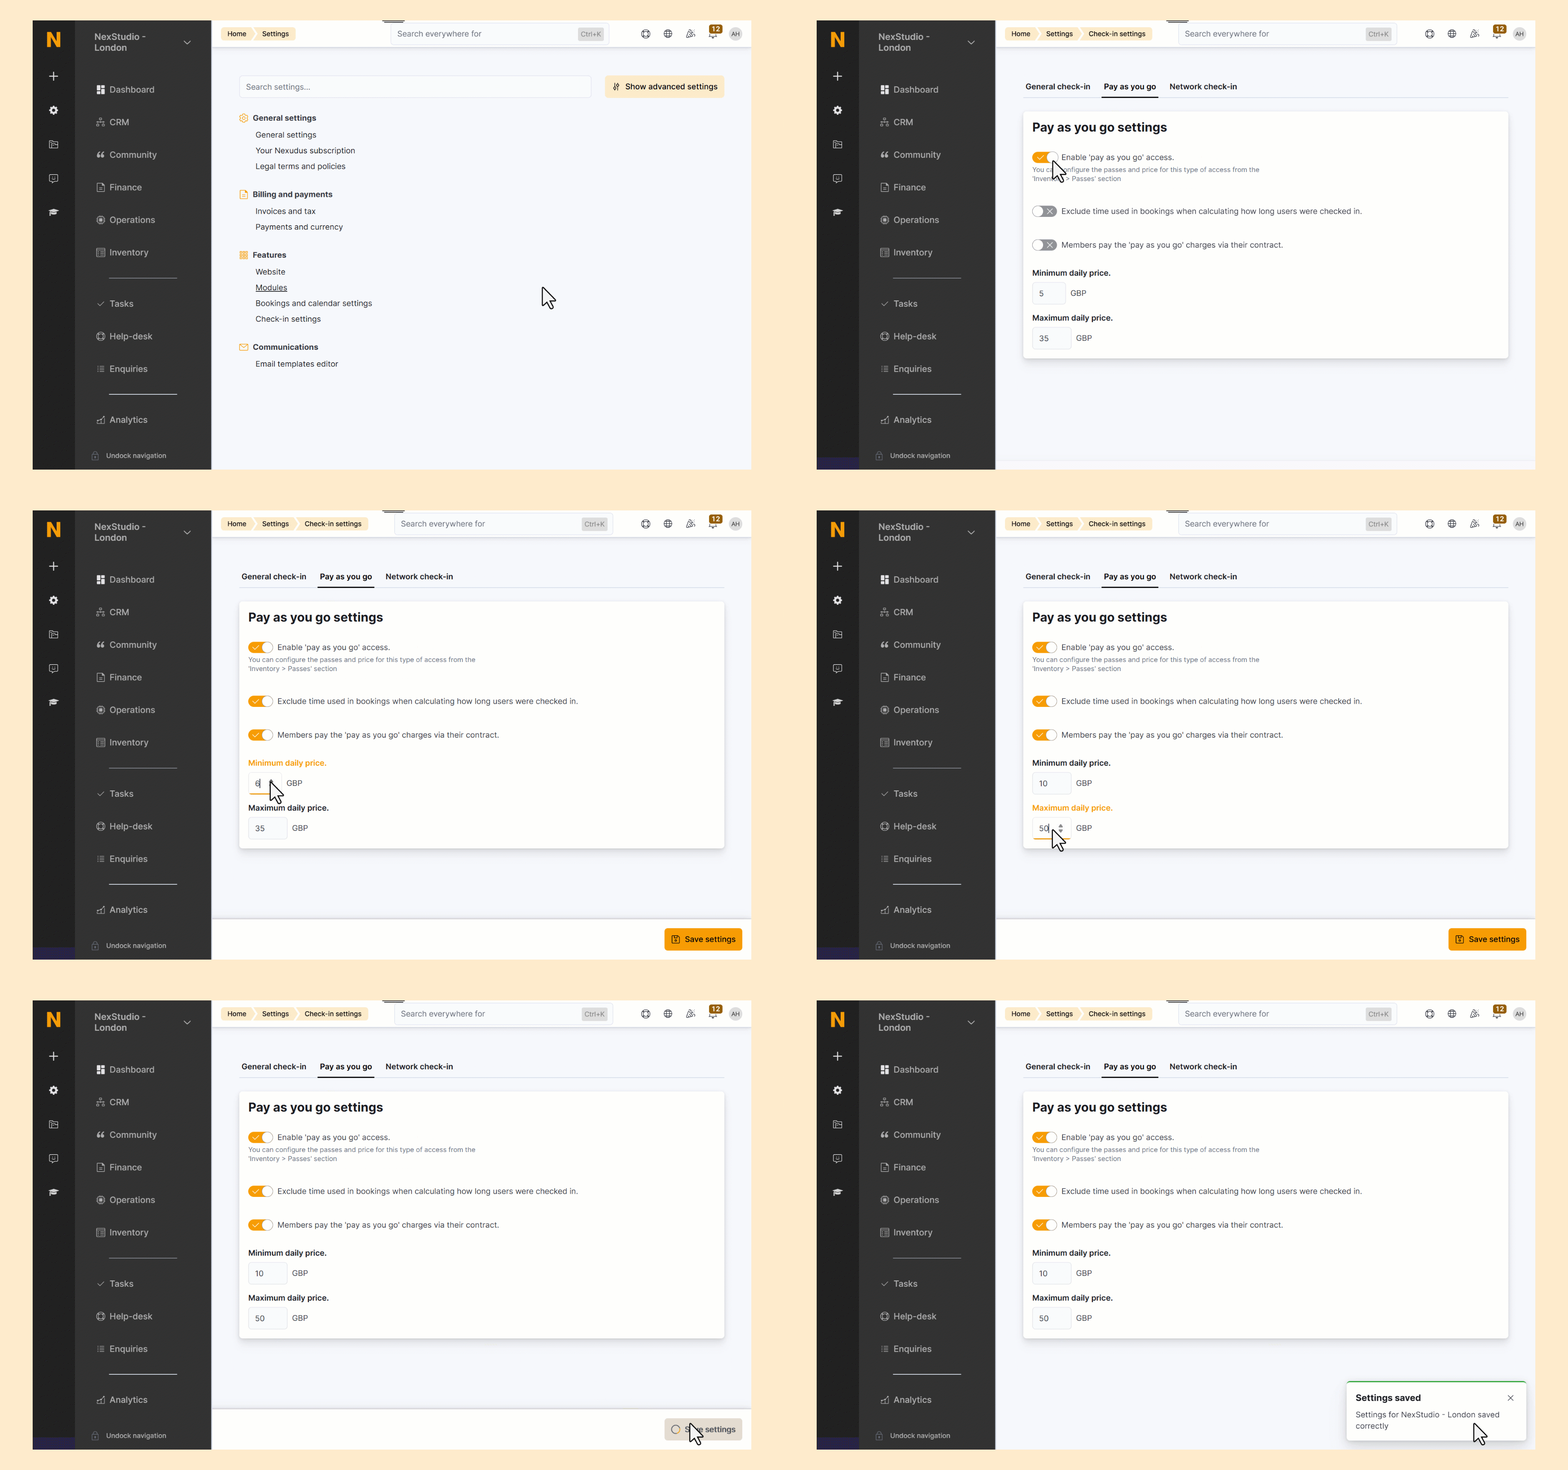
Before creating a PAYG pass, you must first enable PAYG access in your Check-in settings.

Log in to dashboard.nexudus.com if you aren't already.
- Go to Settings > Check-in settings and click on the Pay as you go tab.
- Toggle on Enable 'pay as you go' access.
- Toggle on Exclude time used in booking when calculating how long users were checked in if you want to ignore booking times in the PAYG calculations.
- Toggle on Members pay the 'pay as you go' charges via their contract if you want PAYG charges to be invoiced alongside the member's plan instead of immediately after check-out.
- Define a minimum daily price if you want customers to be charged a minimum amount when checking in using PAYG.
For example, let's say your PAYG hourly price is $20 and your minimum daily price is $50. Customers will always pay at least $50 when checking in with PAYG, even if they only stay for an hour or less.
- Define a maximum daily price if you want to cap PAYG charges for your customers.
For example, let's say your PAYG pricing is only $20/hour and your maxmimum daily price is $100. Customers will never pay more than $100 when checking in with PAYG, even if they stay for more than five hours.
For example, if you offer low PAYG rates of $1/hour to members of certain plans, they would still pay $50 for the day when checking in with PAYG if you have set your minimum daily price to $50.
Click Save settings.
Now that you have enabled PAYG access, you can create a PAYG pass.