Managing Help Desk Departments
  • 09 May 2023
  • 2 Minutes to read

Managing Help Desk Departments


Article Summary

Help-desk departments help you categorize the different help-desk messages you receive to simplify your day-to-day operations. Each department can have its own manager who's notified via email whenever a new request linked to the department is sent by a customer or another admin.

All admins with access to the help-desk can also check any of the open, critical or closed requests by clicking on the Help-desk section of the Admin Panel.

Any admin with access to the help-desk can also see all the open, critial or closed requests.

For example, you can create a category to handle IT queries, another one to handle event requests, and a third one to handle cancellation requests.
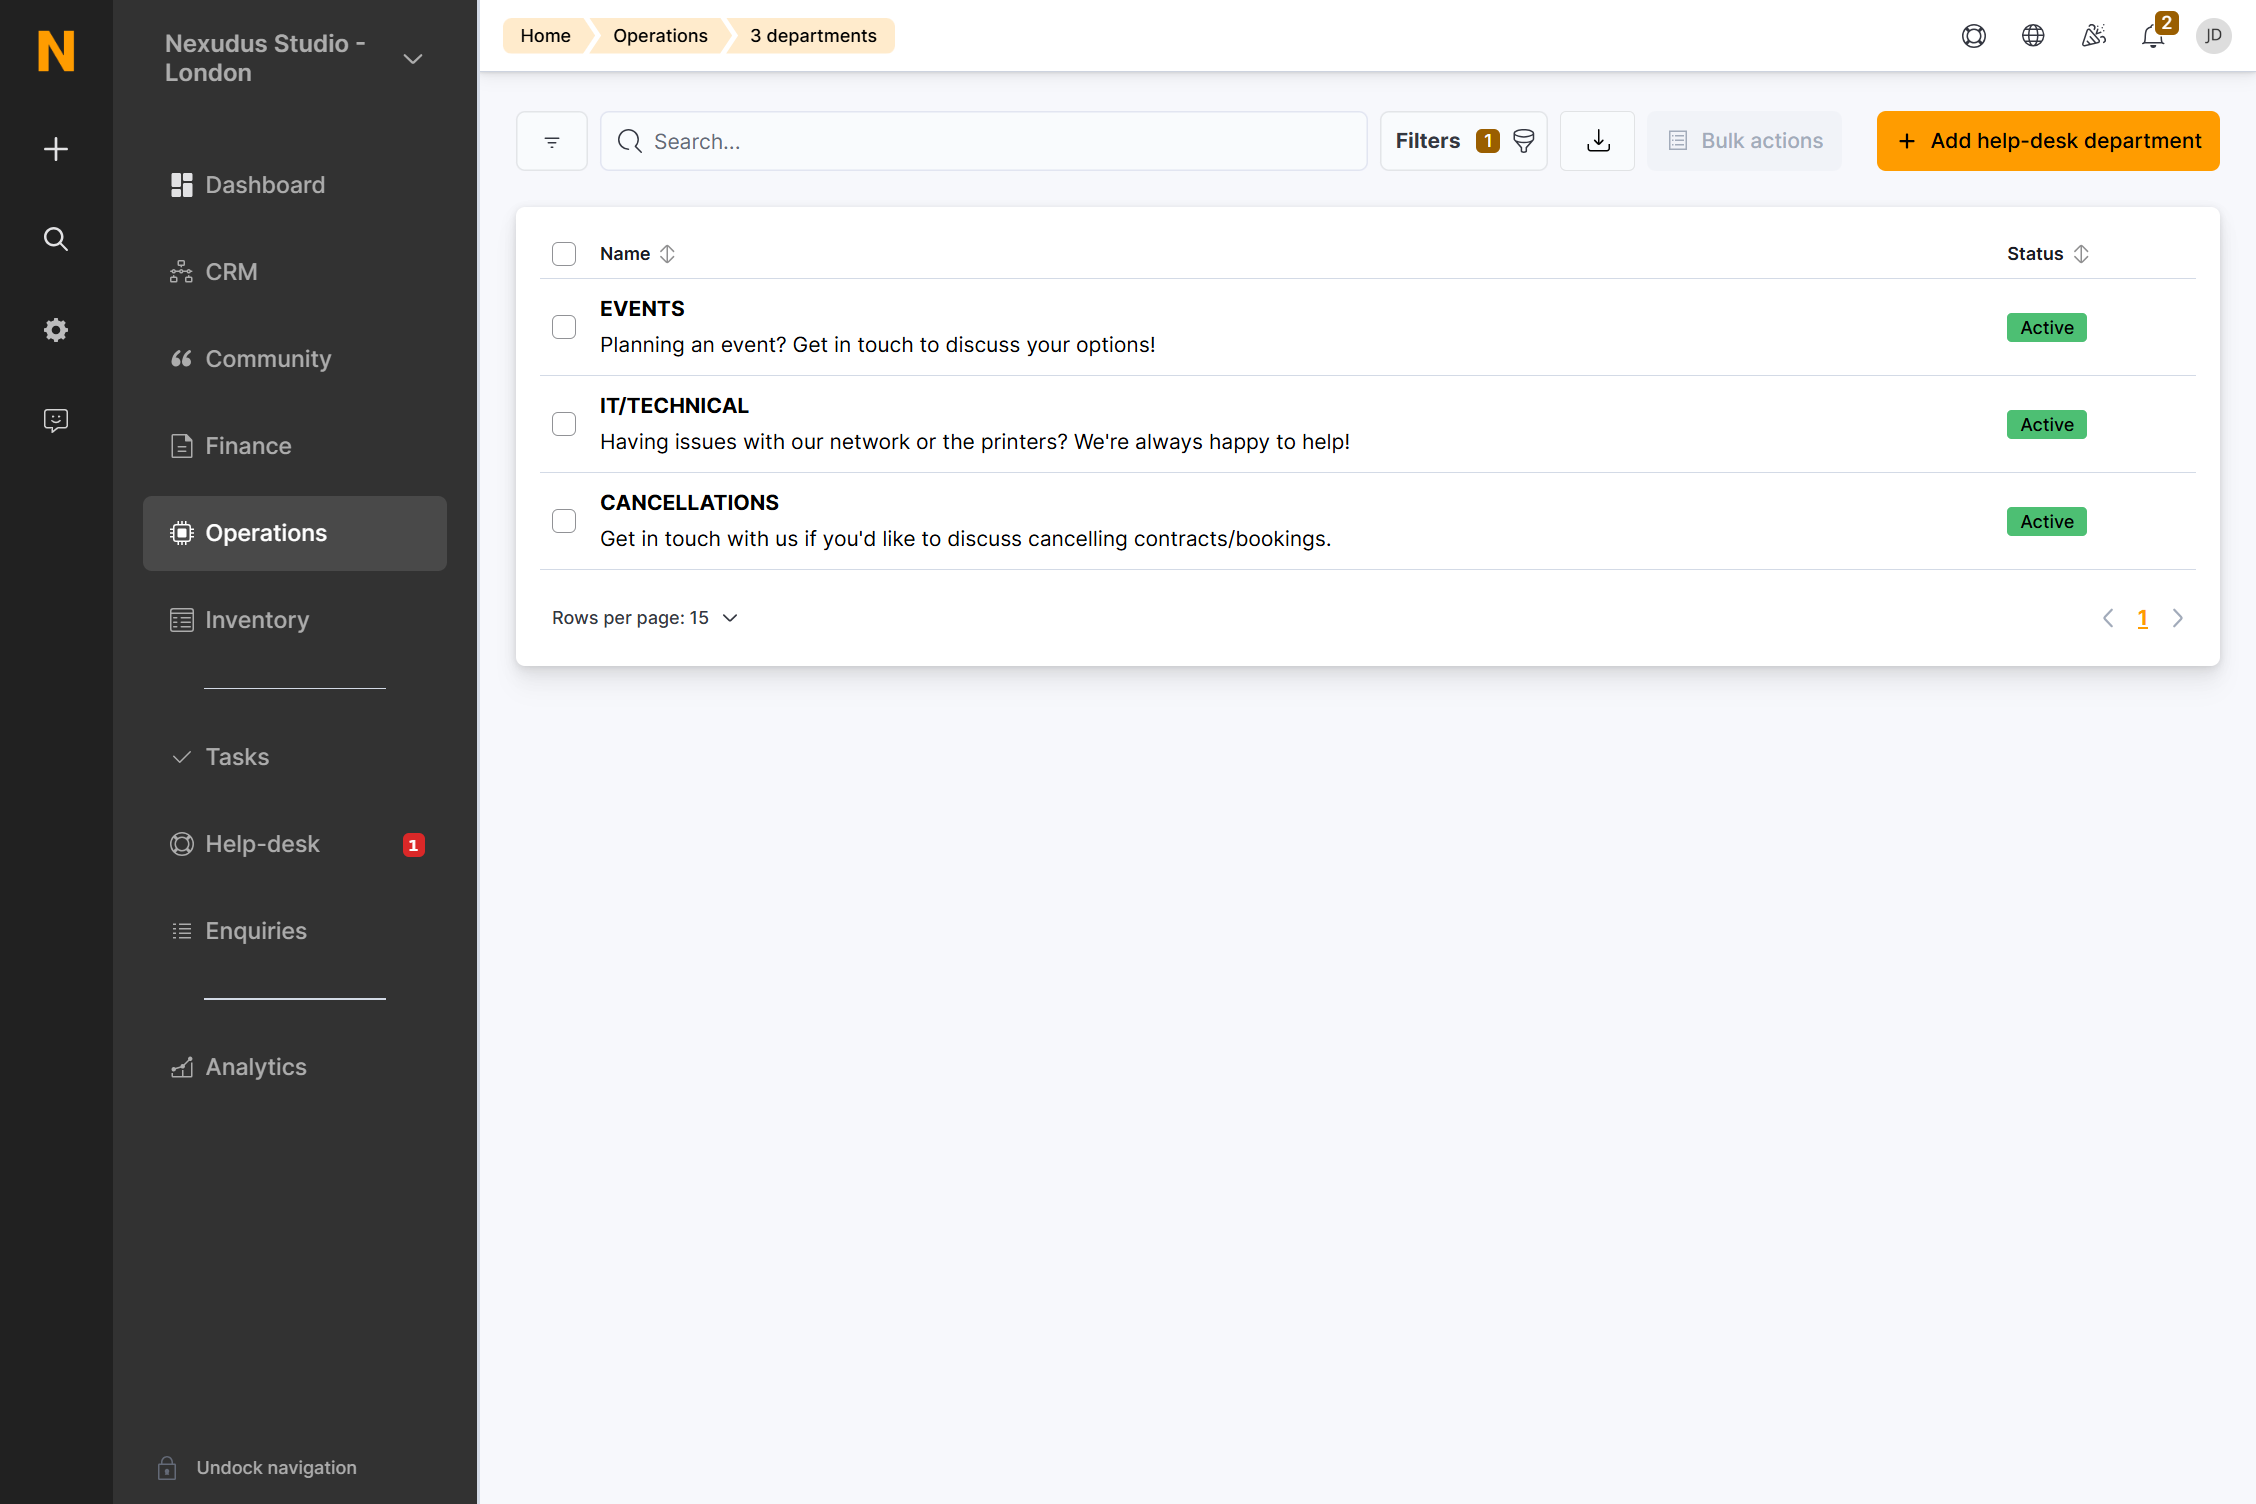
HelpDeskDep_Example.png

This list will be available when customers send a help-desk request from the Members Portal.
HelpDeskDep_ExampleMP.png


Adding Help-desk Departments

Help-desk departments are individual to each location.

If you want to add the same departments to all your locations, you'll need to manually create the same departments in each location.

  1. Log in to dashboard.nexudus.com if you aren't already.

  2. Click Operations > Departments.

HelpDeskDep_Path.png

  1. Click Add help-desk department.

  2. Name your new department.

  3. Add a few words about the purpose of your department in the Description field.

This description is displayed under the department's name on the Members Portal to help your customers understand what the department does.

HelpDeskDep_MPexample.png

  1. Enable the Active toggle.

  2. Select one or multiple admins as Department managers if you want them to be notified via email when your space receives a new request linked to your department.

  3. Select a task list in the Start this task list when an enquiry is received in this department drop-down list if you want to to trigger a task list when your department receives a new request.

You need to create the task list before adding it to your department.
  1. Click the Save Changes button.

Your help-desk department is now available on the Admin Panel and the Members Portal.


Editing Your Help-desk Department

You can edit any of your existing help-desk departments at any point.

For example, you have a department dedicated to Events requests but you don't plan on hosting live events for some time. You can simply set the Active toggle in the department's record to NO to hide it on the Members Portal instead of deleting the department altogether. You will be able to activate it again once your live event programming resumes.

Editing details such as the department's name or description will automatically be updated in each open or closed request linked to the department.
  1. Log in to dashboard.nexudus.com if you aren't already.

  2. Click Operations > Departments.

HelpDeskDep_Path.png

  1. Click on the relevant department.

  2. Edit the department's details as needed.

  3. Click the Save Changes button.


Deleting Help-desk Departments

You cannot recover deleted records in Nexudus.

You cannot delete help-desk departments that are still linked to open or closed requests.

If you really want to delete the department, you will need to manually change the department of every open and closed request that currently uses the department you want to delete.

If your help-desk department is linked to a large number of requests, we recommend you simply disable the department's Active toggle to hide it from customers and add a mention in its name to let admins know they shouldn't use it.

HelpdeskDep_DisabledExample.png

  1. Log in to dashboard.nexudus.com if you aren't already.

    1. Click Operations > Departments.

HelpDeskDep_Path.png

  1. Tick the checkbox next to every record you want to delete.

  2. Click Delete xx record(s) in the Bulk actions menu.

  3. Click Yes, do it to confirm.


Was this article helpful?

Changing your password will log you out immediately. Use the new password to log back in.
First name must have atleast 2 characters. Numbers and special characters are not allowed.
Last name must have atleast 1 characters. Numbers and special characters are not allowed.
Enter a valid email
Enter a valid password
Your profile has been successfully updated.