Virtual offices are plans you can sell to customers who want a registered address service, mail handling, parcel collection and storage, or any combination of these.
You can build any number of virtual office plans in three simple steps:
Step 1. Create a virtual office plan
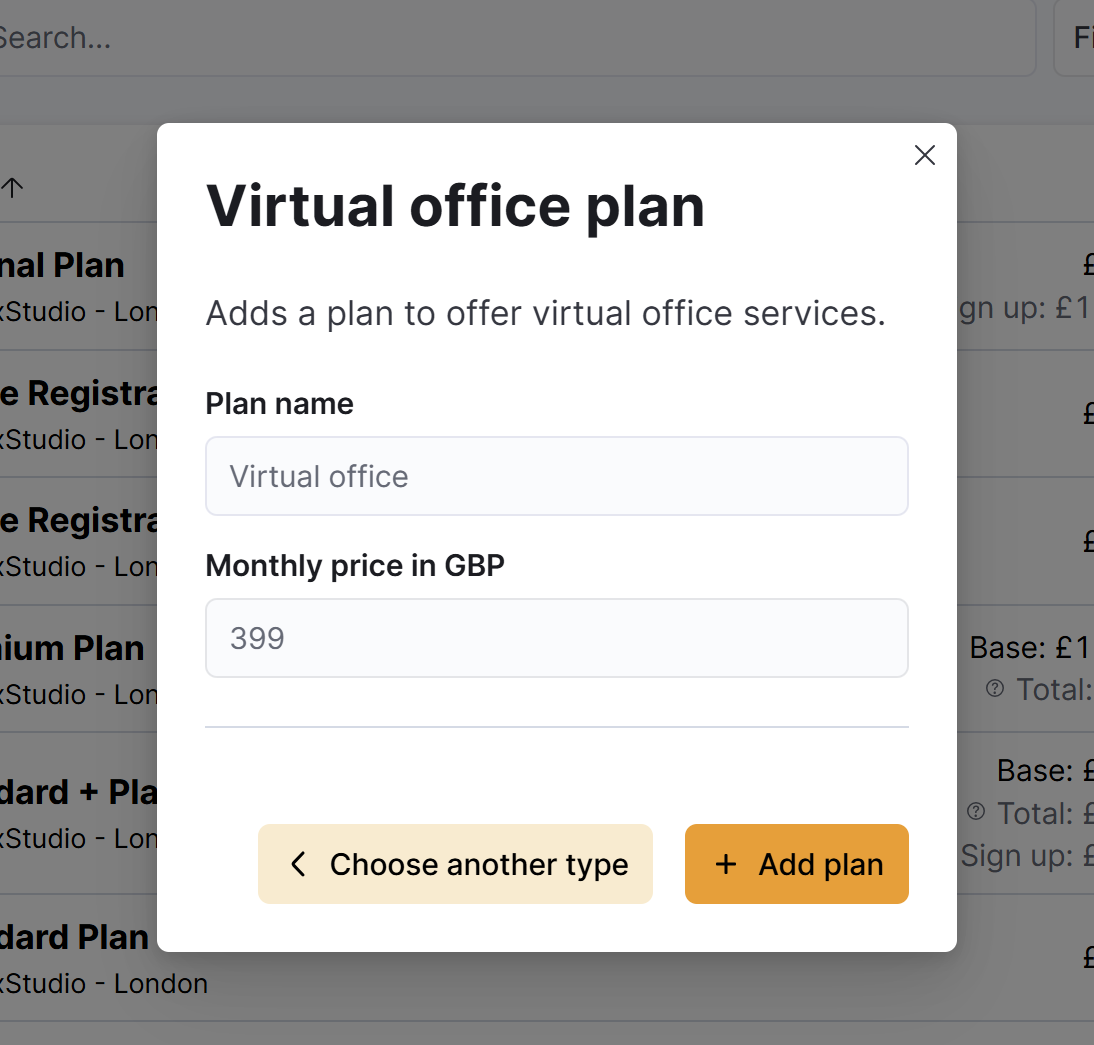
Log in to dashboard.nexudus.com if you aren't already.
- Click Inventory > Plans.
- Click on Add plan.
- Click on Virtual office plan.
- Name your plan and define a monthly price.
- Click on Add plan.
Your new plan opens automatically and you can move to the next steps.
Step 2. Define onboarding identity checks
This step is broken down into 2 elements: address and identity checks. We strongly recommend implementing at least the identity check and ideally both identity and address checks.
Address check
Address checks are a manual process that requires any customer signing up to this plan to upload a document to prove their address. You define which documents you accept and can schedule additional checks at regular intervals.
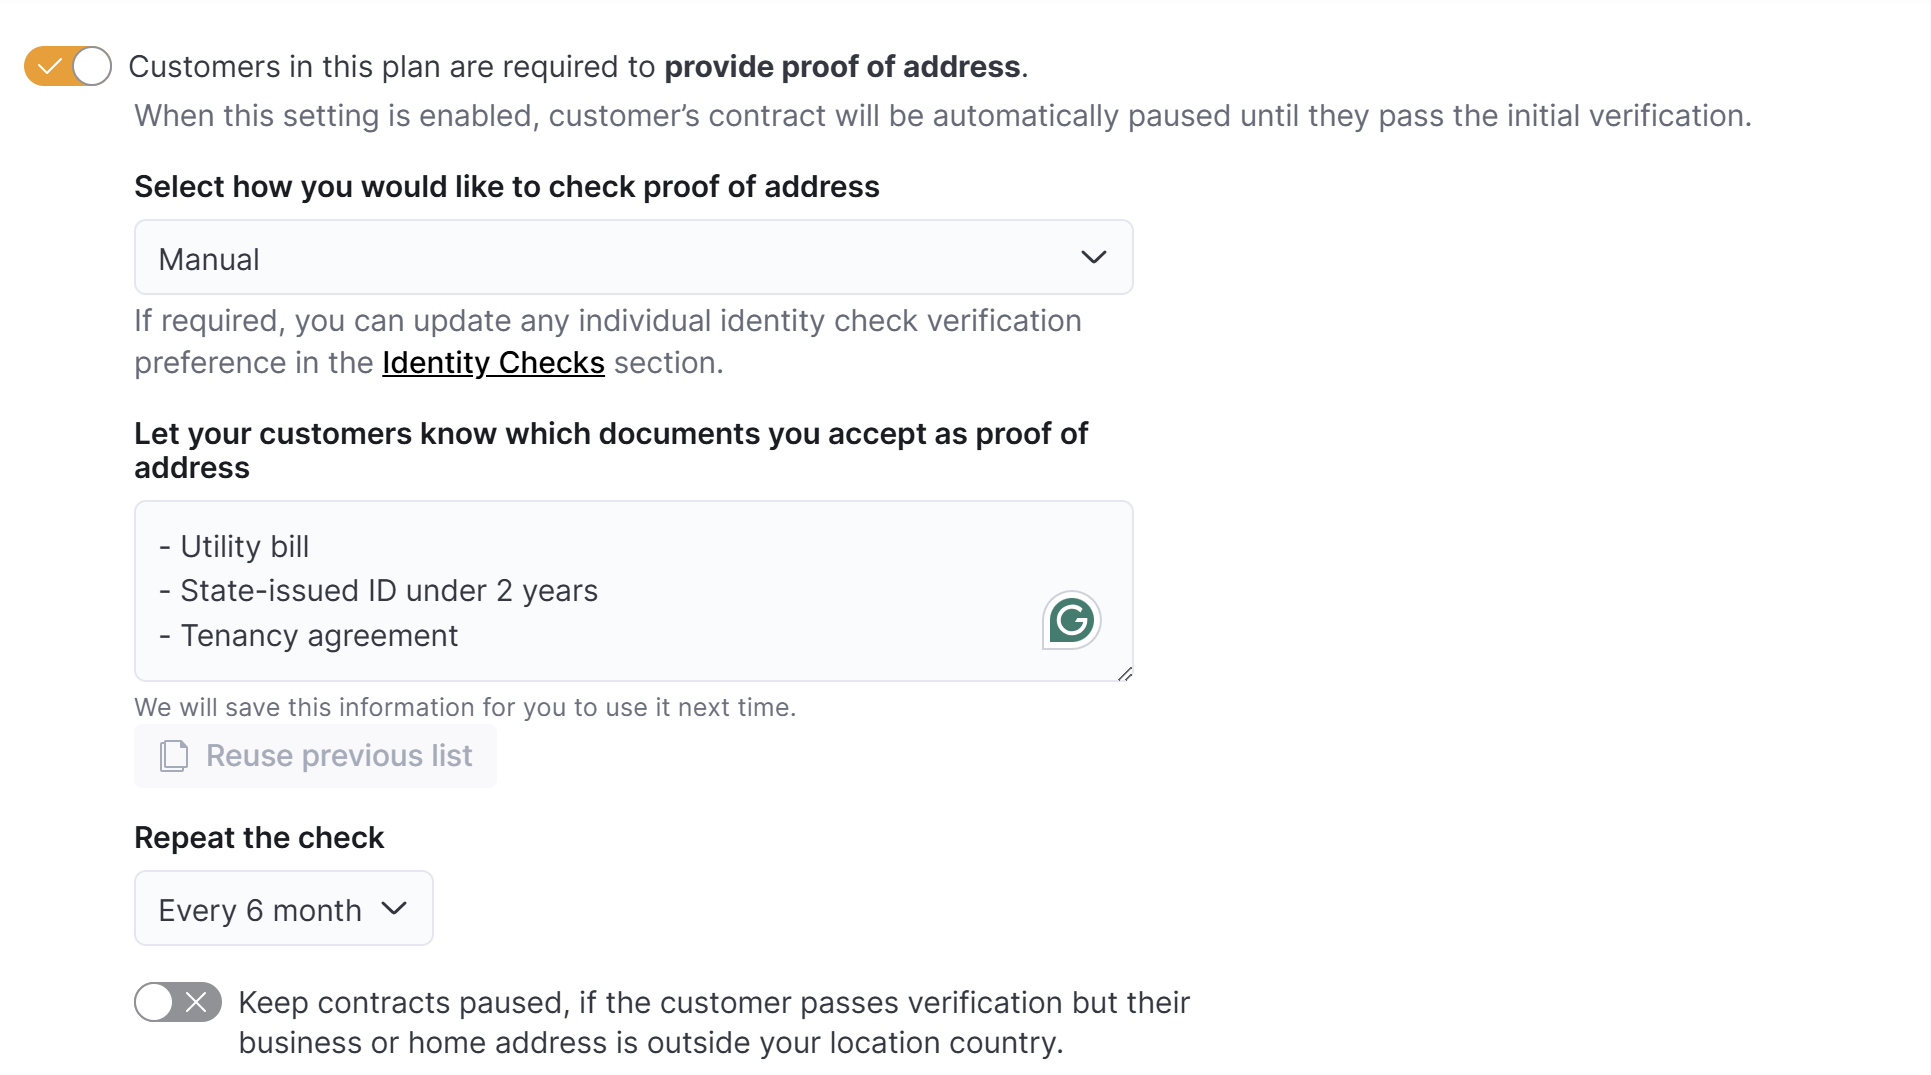
- Click on the Virtual office tab.
- Toggle on Customers in this plan are required to provide proof of address to require customers to provide a proof of address.
- Specify which documents customers can use as proof of address under Let your customers know which documents you accept as proof of address.
- Select how often to Repeat the check of the customer's address.
- If you don't offer international services or have specific terms for them, you can toggle on
Keep contracts paused, if the customer passes verification but their business or home address is outside your location country.
Identity check
Identity checks, whether manual or handled via Stripe Identity, require any customer signing up to this plan to upload a valid proof of ID. You define which documents you accept if using a manual check and schedule additional checks at regular intervals.

- Toggle on Customers in this plan are required to provide proof of ID to require customers to provide a proof of identity.
- Select how you would like to check proof of ID from Manual or with Stripe Identity.
- If using a Manual check, specify which documents customers can use as proof of ID under Let your customers know which documents you accept as proof of ID.
If using Stripe Identity, please refer to their accepted forms of ID. - Select how often to Repeat the check of the customer's ID.
- If you'd like to collect additional details from customers, toggle on
Send custom onboarding form to any customers purchasing this plan. to send them a form. Click the Save Changes button.
All set! You're now ready to move to the last step of the process.
Step 3. Specify delivery handling options
This step helps you define how you'll handle the mail and deliveries customers have sent to your space. You can offer an array of options, from forwarding the mail to opening and storing mail and deliveries for collection.
You can also opt to offer mail collection but not deliveries and vice versa.

- Select a delivery handling option for Mail from the list of options.
Click the Save Changes button.
You can click on the trash icon if you do not offer mail handling services for this plan.
Parcels
- Select a delivery handling option for Parcels from the list of options.
Click the Save Changes button.
You can click on the trash icon if you do not offer parcel handling services for this plan.
Additionally, you can specify how to handle Publicity and Checks by clicking on Add delivery options.

If you wish to charge customers for handling their mail and parcels, you can create a dedicated product for each charge and then select it from the drop-down menus.

All set! You can create more plans if you're offering different types of services or levels for virtual offices. Once you're happy with your virtual office plans, it's time to onboard customers!