Customers can sign up to plans on the Members Portal in five simple steps.
Step 1. Select a plan
If you've customized your portal, the steps for your customers may be different.
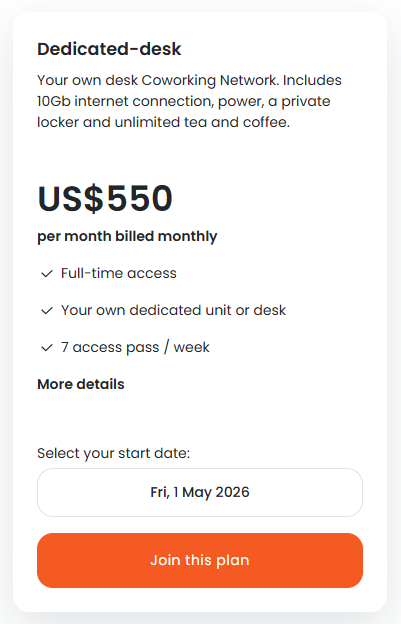
- From the Members Portal landing page, click on the Memberships tab.
- Select a plan kind.
If your space doesn't offer a specific kind of plan, it won't be available as an option.
- Select your start date.
- Click Join this plan.
Customers will need to click I accept these terms to proceed.
The next step is to add products.
Step 2. Add on products
Once they've selected their plan, customers have the option to add recurring products.
Examples of common recurring products include parking passes or locker rentals.
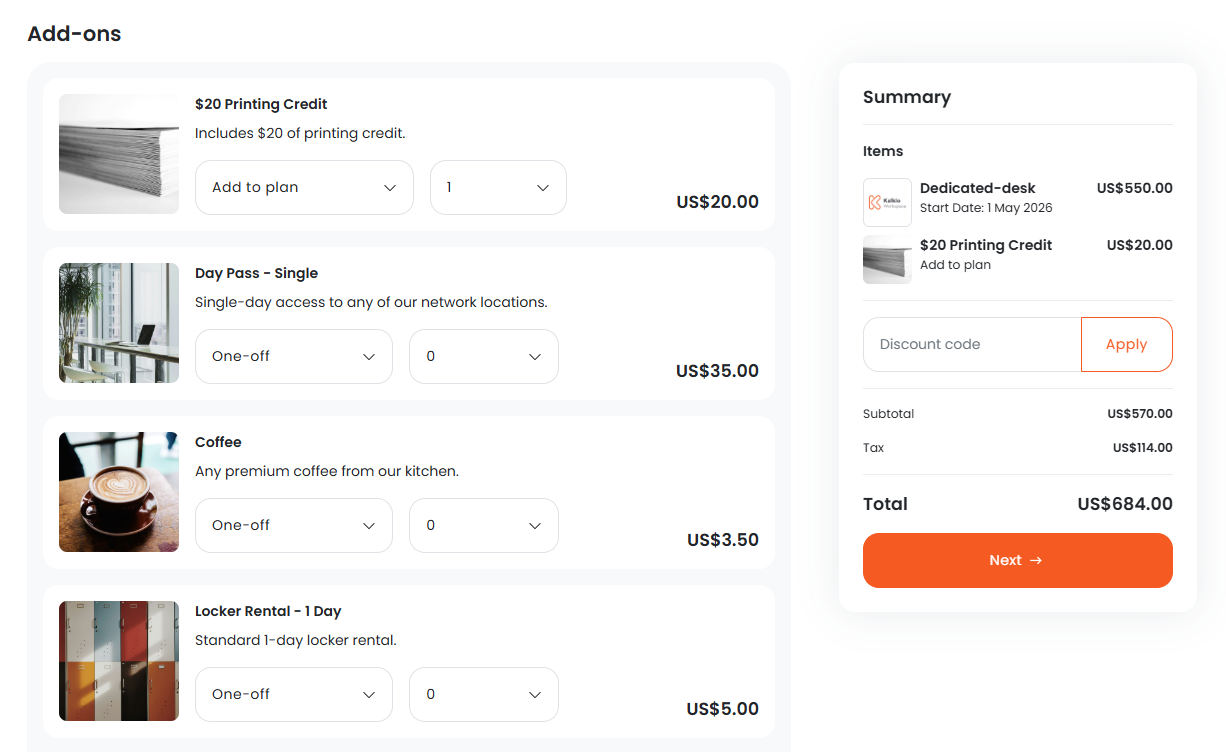
- Under the product you'd like to add, select one-off or add to plan.
- Select the quantity you'd like to purchase.
- Repeat as necessary for every product you'd like to purchase.
Once you've added products, the next step is to create an account.
Step 3. Create an Account
Customers will need to provide the information you've asked for in your default sign-up form.
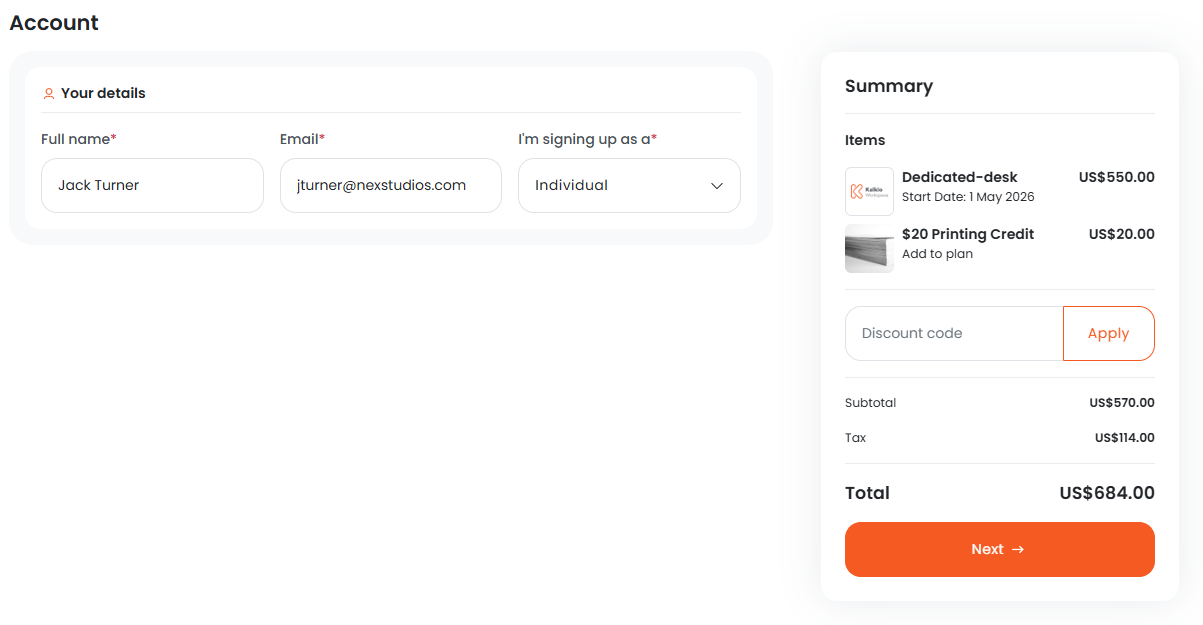
- Add your Full name.
- Add your Email.
- Under I'm signing up as a, select your customer type.
You can disable this field if you'd like all customers to sign up as individuals from the Members Portal.
The next step is to add any additional details.
Step 4. Add additional details
Customers will need to add any additional details you've requested as part of the plan extended form.
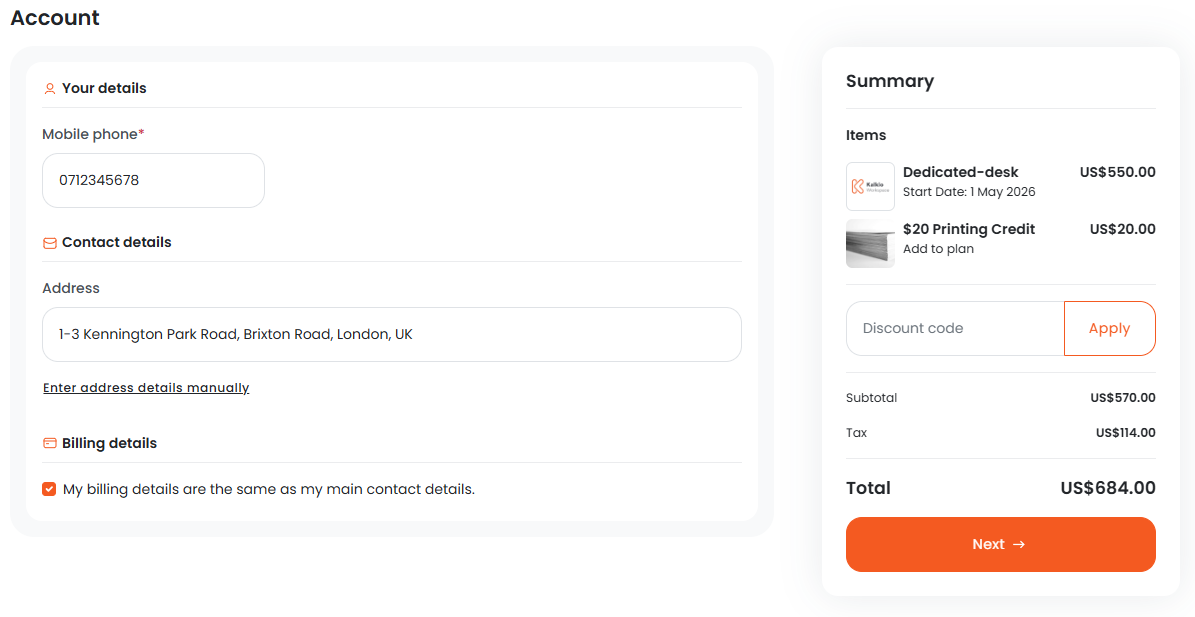
For example, you may want customers to provide their address, contact details, and billing details.
Once customers have filled in any additional details, click Next.
The final step is to complete payment.
Step 5. Complete payment
How customers pay for their plans depends on your space's individual payment methods.
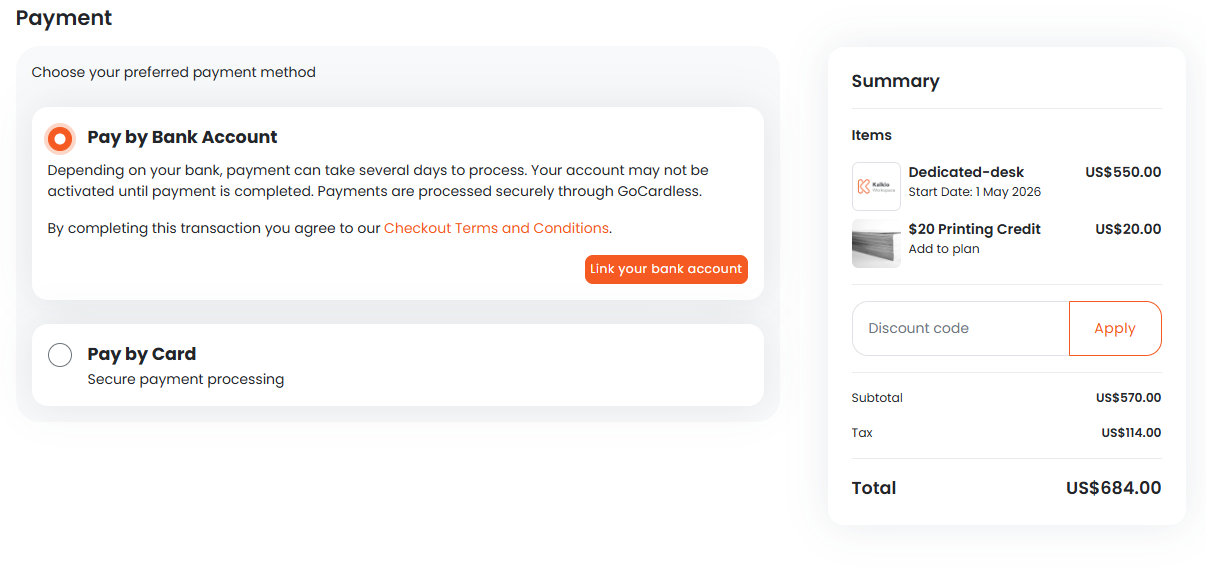
For example, you may allow customers to pay by adding their credit card details, linking their bank account, or both.
Once you've entered your payment details, click Submit Payment.
All set! You'll receive a notification letting you know a customer has signed up to a plan.