Customers can easily sign up and onboard themselves in the Passport app.
- Sign up for a virtual office plan.
- Fill in company, organization, or individual details.
- Define beneficiaries.
- Define nominated recipients and forwarding addresses.
- Complete identity checks.
It's important to complete every step of the process. Virtual office plans aren't activated until identity checks are approved.
Step 1. Signing up to a virtual office plan
As a customer, you can quickly sign up to a virtual office plan from the Passport app.
- Sign in to the Passport app if you haven't already.
- Click on the shopping basket icon to access the store.
- Click Join a plan.
- Choose a virtual office plan.
- Choose your start date.
- Click Join.
The new contract is automatically paused until you add all beneficiaries' details and complete identity checks. The Passport app will automatically prompt you to begin onboarding.
Step 2. Filling in company, organization, or individual details
How you fill in your initial details depends on whether you're signing up for virtual offices on behalf of a company or organization or as an individual.
For a company or organization
Before filling in your company or organization's details, make sure you have the following information:
- Company or organization name
- Registration number
- Address
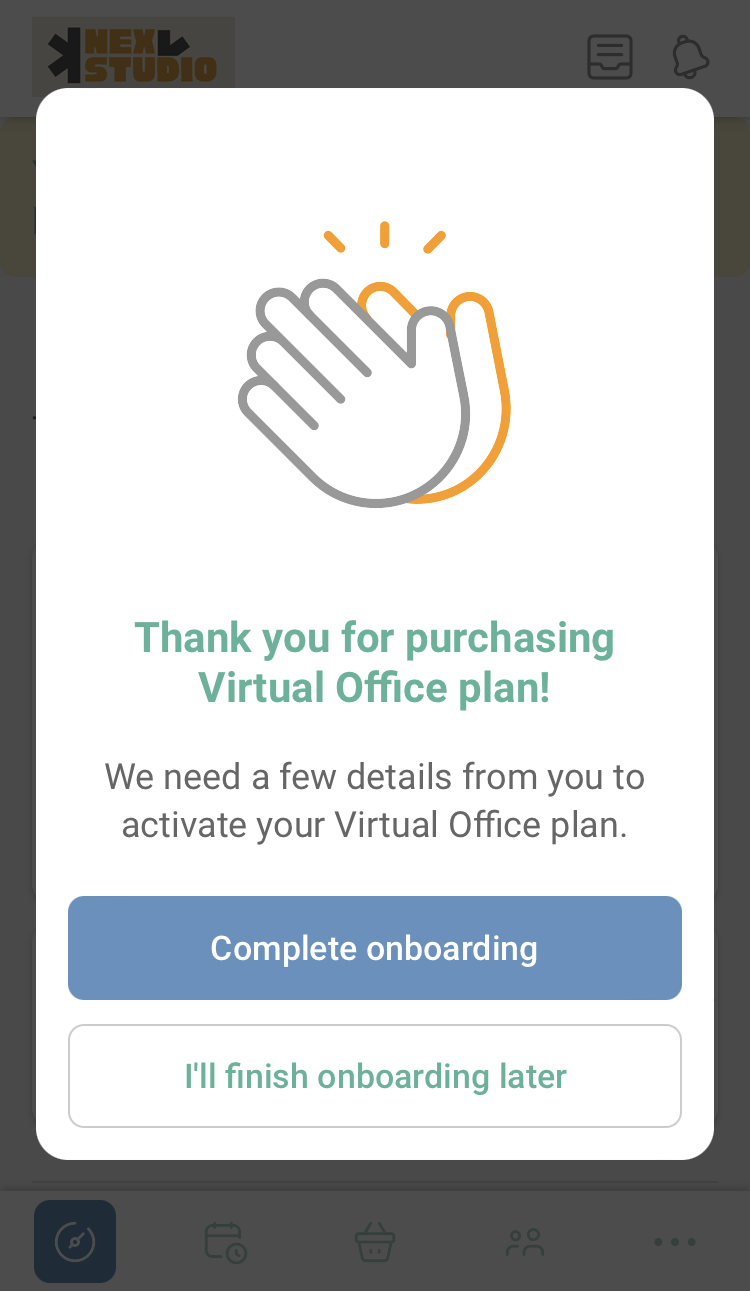
- On your Passport app dashboard, click Complete onboarding when prompted.
- Select Yes under Are you setting up a Virtual Plan on behalf of a company?
- Click Continue to company details.
- Fill in the company or organization's details.
- Click Continue to additional details.
All set! The next step is to define your beneficiaries.
As an individual
Make sure you have the following details for the individual signing up for virtual offices:
- Name
- Address
- On your Passport app dashboard, click Complete onboarding when prompted.
- Select No under Are you setting up a Virtual Plan on behalf of a company?
- Click Continue to onboarding details
- Fill in the individual's details.
- Click Continue to additional details.
All set! The next step is to define your beneficiaries.
Step 3. Defining beneficiaries
Adding beneficiaries is a critical step of onboarding. Beneficiaries are usually the individuals that own the business or people with significant decision-making power within the company registering its address.
Before defining beneficiaries, make sure you have the following details for all beneficiaries:
- Full name
- Date of birth
- Address
- Phone number
- Click the drop-down menu next to Beneficiary #1.
- Fill in the beneficiary's details.
- Click Save details.
Repeat the process for every beneficiary you want to add by clicking Add beneficiary before moving on to the next step.
Your space may have limits on how many beneficiaries you can add to a virtual office plan.
Once you start the identity check process, you can't add or remove beneficiaries until your space requests another identity check.
Step 4. Defining nominated recipients and forwarding addresses
Nominated recipients can receive mail on your behalf through your virtual office membership.
Make sure you have the full name and address of every nominated recipient.
- Click Add recipient/forwarding address.
- Fill in the recipient's details.
- Click Save details.
Repeat the process for every nominated recipient you want to add by clicking Add recipient/forwarding address before moving on to the next step.
Your space may have limits on how many recipients and forwarding addresses you can add to a virtual office plan.
Step 5. Completing identity checks
Identity checks will look slightly different depending on whether your space verifies identity manually or via Stripe Identity.
Once you start the identity check process, you can't add or remove beneficiaries until your space triggers another identity check.
- Under Compliance checks, click Complete checks.
- When prompted, click Yes, complete identity checks.
- Under Identity Checks, click Verify identity.
For manual checks, follow the instructions to fill in the information and upload your documents.
For Stripe Identity checks, you'll be redirected to Stripe to verify your identity.
- Click Verify address.
- Follow the instructions to fill in your details and upload your documents.
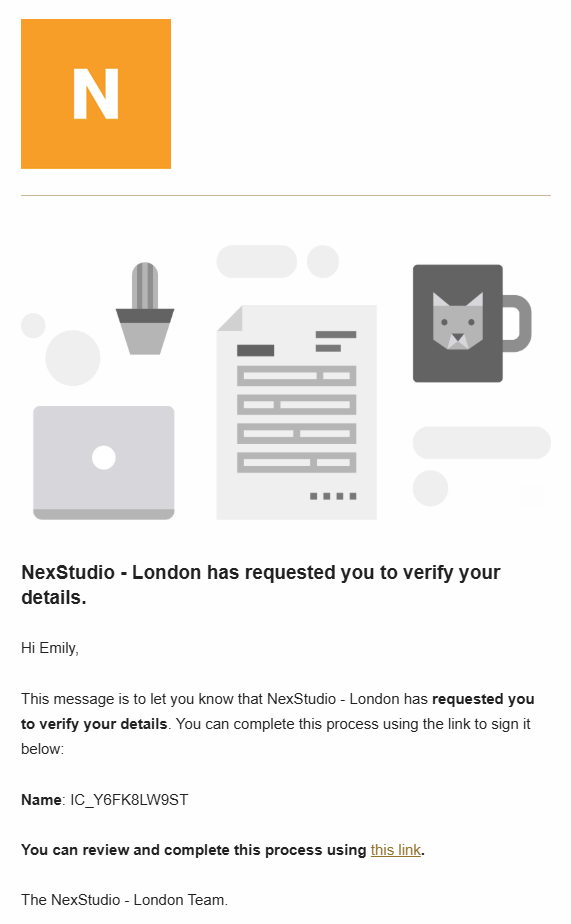
All beneficiaries will be automatically prompted to complete the identity and/or address checks via email.
For Stripe Identity checks, you don't need to action anything. As soon as the listed beneficiaries upload their identity document, the check is automatically triggered and approved within a few minutes.
For all address checks and manual identity checks, you'll need to wait until an admin manually reviews the documents and approves them.
Once all the beneficiaries have their identity and/or address checks verified, the contract will automatically activate. If the start date on the contract is set to a future date, it will start on that date.
You can download the form after your identity checks are approved, fill in any additional information, and submit it to USPS.