Checkout Migrating to PaperCut Bridge if you're migrating from the extender.
Skipping even one step could cause the integration to fail.
Log in to dashboard.nexudus.com if you aren't already.
- Go to Settings > Integrations > PaperCut Bridge.
- Toggle on Enable PaperCut Bridge integration.
- Click Download Nexudus Bridge Agent.
Your file may take a few moments to download.
- In your device's C: drive, create a folder with the name Nexudus PaperCut Bridge.
- Move the file from your Downloads folder to the Nexudus Bridge folder.
Make sure each agent is in a separate folder.
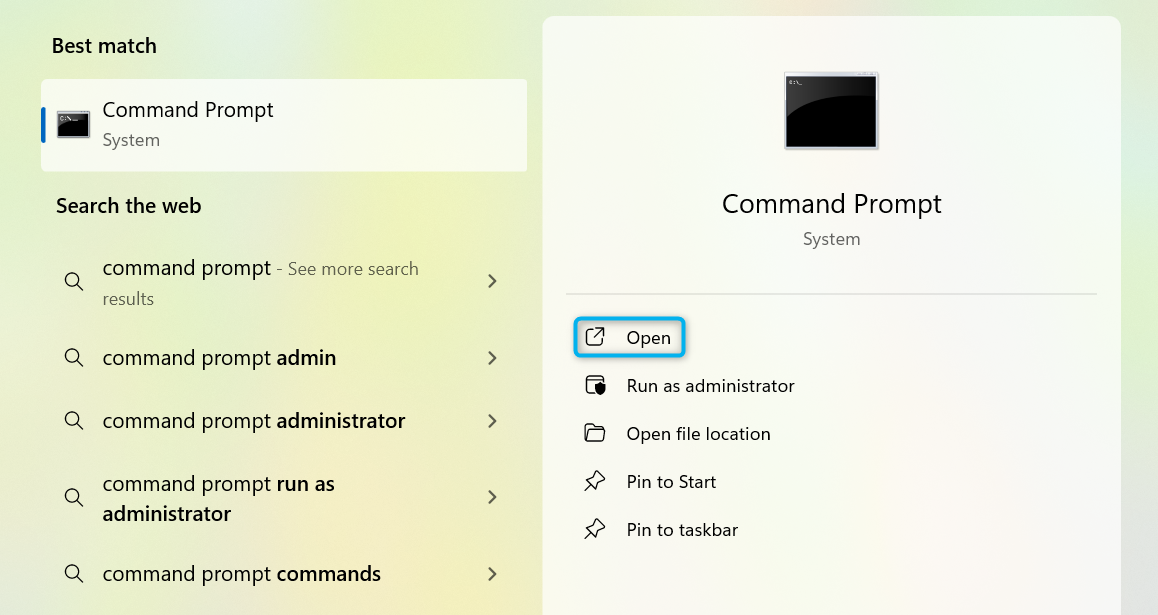
- Open Command Prompt on your device.
- Look for Command Prompt using Windows Search.
- Select Open.
- Add the file path to the location where you stored the bridge agent.
- Go to where the agent is stored on your device.
- Right-click and select Copy as Path.
- Paste the path directly into the command prompt using Ctrl + V.

- Tap Enter.
You should get an output similar to the one shown below

- Copy the device ID after Register device with ID.
Close the command prompt window and return to the Nexudus Admin Panel.
- Go to Settings > Devices.
- Click Register device.
- Enter your device ID.
- Click Register device.
- Click on the device you've just registered.
- Rename your device to PaperCut Bridge Agent.
- Under Configuration data > host, enter http:// followed by your IP address followed by :9191
- Use HTTP protocol
- Leave no spaces or slashes after your address
| ✅ Correct Format | ❌ Incorrect Format |
|---|---|
 |
  |
Click the Save Changes button.
Open a new command prompt as administrator.
- Enter the file path to the location where you stored the bridge agent followed by --install.

- Tap Enter.
You should get an output similar to this:

Close the command prompt and open the services console on your device.
- Use Windows Search to find Services.
- Click Open.
- Scroll down to the Nexudus Bridge Agent.
- Right-click on the agent and select Start.
Return to the Nexudus Admin Panel.
- Go to Settings > Integrations > PaperCut Bridge.
- Enter your authorization token from PaperCut.
You can find your authorization token in your PaperCut admin panel under Options > Config Editor > auth.webservices.auth-token.
- Enter your Nexudus bridge device ID.
You can also find this ID in your device's services console by clicking on Nexudus Bridge Agent.
- Enable the following toggles based on your PaperCut pricing model.
- Pay-per-print Only or Credits & Pay-per-print
Enable New members should be set as unrestricted users in PaperCut by default and New contacts should be set as unrestricted users in PaperCut by default.
- Credits Only
Make sure all four toggles are disabled.
- Free unlimited printing
Enable New contacts registered can print for free by default and New members registered can print for free by default.
- Toggle on Use Pincode as Access Card ID if you'd like customers to be able to use their PIN code to release PaperCut prints.
- Under Printing Credit Type, add your printing credit if you're using the Credits Only or Credits & Pay-per-print pricing model.
- Under Print Usage Product, add your product dedicated to printing if you're using the Pay-per-print Only or Credits & Pay-per-print pricing model.
- Select the locations where you'd like to enable the integration.
- Click Save changes.
All set! You've successfully set up the PaperCut bridge integration.
If you're using the Pay-per-print Only, Credits & Pay-per-print, or Free Unlimited Printing pricing models, the next step is to transfer your users to PaperCut.
If you're using the Credits Only pricing model, the next step is to give your customers printing credits.