Check out Preparing your PaperCut Bridge Integration instead.
What You Need to Integrate PaperCut
Make sure you have the following before starting the integration process.
A PaperCut License
You need a PaperCut license with a user limit that matches the number of customers who will print in your space. We recommend choosing a slightly higher limit to allow for growth and prevent printing being denied to new customers.
For example, if you have 100 customers who use printing, your PaperCut license should include at the very least 100 users.
For more details, check out Papercut NG or PaperCut MF pricing.
A desktop or laptop running on Windows or Linux
While PaperCut MF and NG are available on all operating systems, including MacOS, the PaperCut extender required to complete the integration is currently only available on Windows or Linux laptops and desktops.
We recommend installing both the PaperCut driver and our PaperCut Extender on the same Windows device.
Your device must also have .NET Runtime 8.0 installed to allow the extender to be installed and run.
The extender cannot regularly sync print jobs and users when you turn off the device.
A Resource Type Dedicated to Printing in Nexudus
Regardless of how you plan on charging customers for their prints using credits, you need to create a credit and type dedicated to printing. This lets you to give customers printing credits as benefits through plans, products, or directly to their account. You can also find out about our latest pricing and find the information you needs
For more details, check out Printing Credits.
A Product Dedicated to Printing in Nexudus
Regardless of how you want to charge customers for their printing, you need to create a product dedicated to printing.
The price of this printing product should always be set to 1 cent to give you flexibility when pricing both in credits and pay-per-print.
For more details, check out Adding Products.
A Rate Dedicated to Printing
This rate multiplies all print jobs by 1 to let you charge customers both in credits and pay-per-print.
-
Log in to dashboard.nexudus.com if you aren't already.
-
Click Inventory > Prices.
-
Click Add rate.
-
Name your printing rate.
-
Select your resource type dedicated to printing under This rate applies to the following resource types.
-
Set the rate Price to 1 for every use.
-
Click the Save Changes button.
You should now see your printing rate in the Rates list.
Printing Pricing Set up in PaperCut
The price of each print is defined in PaperCut. You need to define the price of each print type and each printer. Nexudus will charge customers based on the prices you've defined in PaperCut.
If you want to charge B&W prints
For more details, check out PaperCut's charging tutorial.
Once you have your license, prepared your device, and set up all the pricing elements, you're ready to start the integration process.
Step 1. Defining Your PaperCut Settings
The first step of the integration is making sure your PaperCut settings are defined properly for the integration.
Disabling Sync Sources and Enabling Internal Users
You don't need a sync source in PaperCut since Nexudus handles the creation and sync of users in PaperCut once the integration is complete.
-
Go to Options > User/Group Sync on the PaperCut Admin Panel.
-
Make sure the Primary sync source field is blank.

- Tick the Enable internal users checkbox at the bottom of the page.

- Disable Also email confirmation message to user.
- Click Apply.
Defining a Custom Currency
-
Go to Options > General > Display Options on the PaperCut admin panel.
-
Tick the Display currency sign and Use custom currency sign checkboxes.
-
Add Credits in the Custom sign field.
-
Select Display after number in the Display drop-down list.

Making All Printers Unauthenticated
All the printers Nexudus users can print from must be unauthenticated in PaperCut. This will automatically require user authentication to release print jobs and let Nexudus deduct credits from their account or charge them the relevant amount for their print jobs.
-
Click on Printers in the navigation menu of the PaperCut admin panel.
-
Click on the relevant printer.
-
Scroll down to Advanced configuration.
-
Tick the Unauthenticated printer checkbox.

- Save your changes.
Repeat the process for every printer that Nexudus users should be able to use.
Once all the printer are set up, you're ready to move to Step 2.
Step 2. Installing the Nexudus PaperCut Extender
The next step of the integration process is installing the Extender and set it up on your PC. Nexudus PaperCut Extender links the Nexudus servers to your PaperCut installation. We recommend installing the extender on the same device where you installed your PaperCut driver for ease of management, but it is not a requirement.
The extender cannot regularly sync print jobs and users when you turn off the device.
- Under Download Papercut Extender, click on the extender you need based on your device.
Win-x64 if your device runs on Windows
Linux-x64 if your device runs on Linux
The extender's download only takes a few seconds.
- Move the extender file out of your Downloads folder and place it in a location where it won’t be accidentally deleted
You can store it in the same folder as your PaperCut driver or in any other location your device where it won’t be accidentally deleted.
-
Open the extender on your PC.
-
Follow the instructions on the screen and complete the installation.
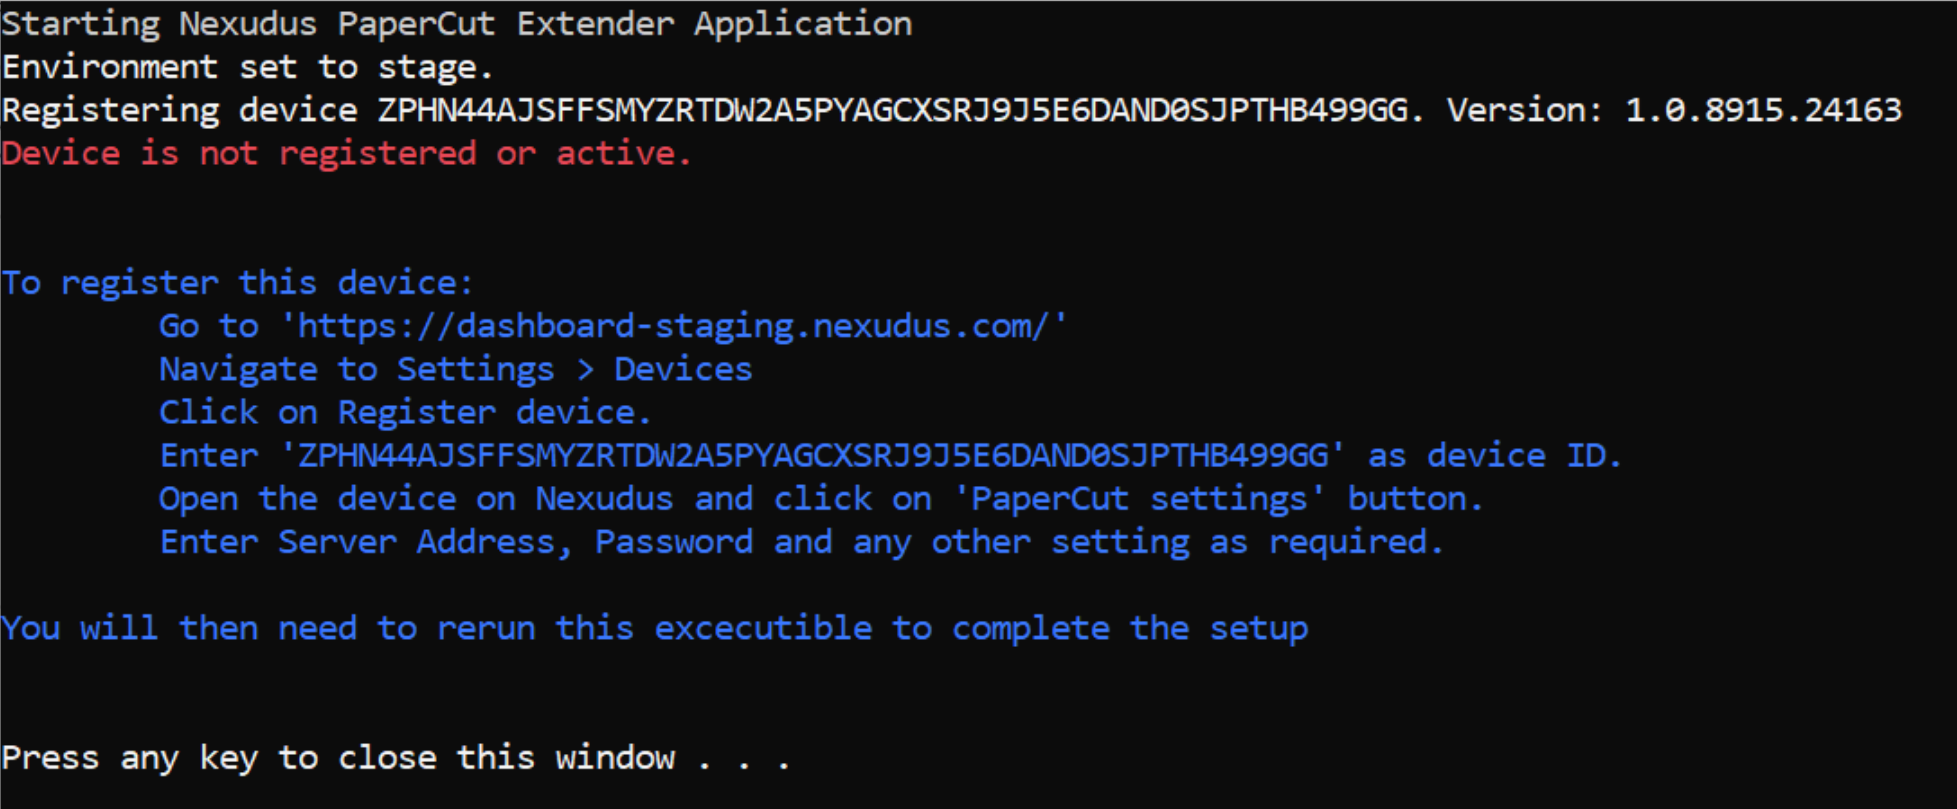
Once the installation is complete, the Extender will automatically show you the device ID you'll need to add to the Admin Panel in the next step.
Step 3. Enabling PaperCut
The next step of the integration process is enabling the integration on the Admin Panel.
Registering your device
Log in to dashboard.nexudus.com if you aren't already.
- Click Settings > Devices.
- Click on Add device.
- Paste the device ID you've saved from the previous step.
- Click on Register device.
Once you've registered your device, you can enable the integration.
Enabling the integration
-
Toggle on PaperCut toggle.
-
Toggle on Elatec print release readers if you have an Elatec reader set up to allow the release prints using the Passport app.
-
Enable the following toggles based on the access you'd like to give new members and contacts:
- New members registered can print for free by default
- New members should be set as unrestricted users in PaperCut by default
- New contacts registered can print for free by default
- New contacts should be set as unrestricted users in PaperCut by default
Unrestricted user options are only suitable if you use a combination of credits and pay-per-print or pay-per-print only. If you only use credits, do not use any of the unrestricted user options.
-
Select the Printing Credit Type and Print Usage Product you've created in previous steps.
-
Under Server Address and Password, your details should already be keep localhost unless you run the extender on a separate server and device.
-
Under Password, add the password that you used to idenitfextender to identify yourself as an admin of your device.
Do not use your Nexudus admin password, as that won't work. -
Select your current Location.
-
Toggle on Use Pincode as Access Card ID if you'd like customers to be able to use their PIN code to release PaperCut prints.
-
Toggle on Send PaperCut Welcome Email or choose to Send Custom Welcome Email.
If you'd like to use the same template across all locations, click on the Use in all locations button.
-
Select the Audit level you'd like to implement.
-
Click the Save Changes button.
Now that you've completed the extender setup, all you need to do is click on the Sync all customers button. This will automatically add all the customers in your location to PaperCut so that they can print. They will receive an email notification that lets them know they've been added to PaperCut and include their credentials.
If you only want to invite a select number of customers, head over to the customers list on the Admin Panel.