Email server settings are a key component of your email notifications. They define how you appear in customer inboxes, which email address sends all your notifications, and which email address receives customer replies.
Head over to Settings > Email server on the Admin Panel and change your settings as detailed below.
Email server settings are the default in your location. You can override them and set different email recipient settings for each email notification.
For example, you can use your finance team's details for your invoice notifications. This can make it easier to respond to invoice queries from your customers.
Sender Information
Sender information lets you define the sender's name and email address for customer replies.
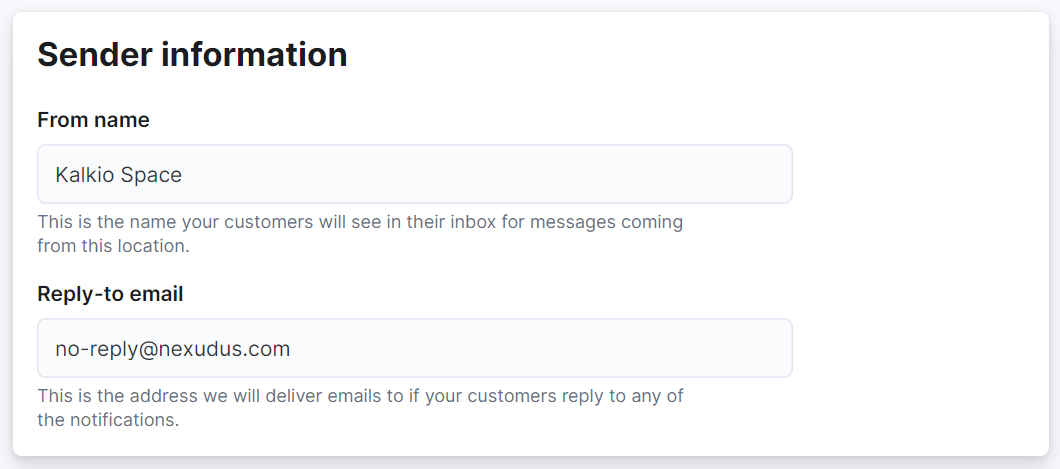
From name
Customers will see the From name as the sender's name when they receive an email notification.

You can edit this name at any point, but it won't affect notifications already sent to customers.
Reply-to email
The email you add as Reply-to email receives all the replies customers send by replying directly to your email notifications.
For example, if a customer replies to a new invoice notification, the email you've added as your Reply-to email automatically receives their reply.
If you'd like to change the email address that sends all customer notifications on your behalf, scroll down to Advanced Settings.
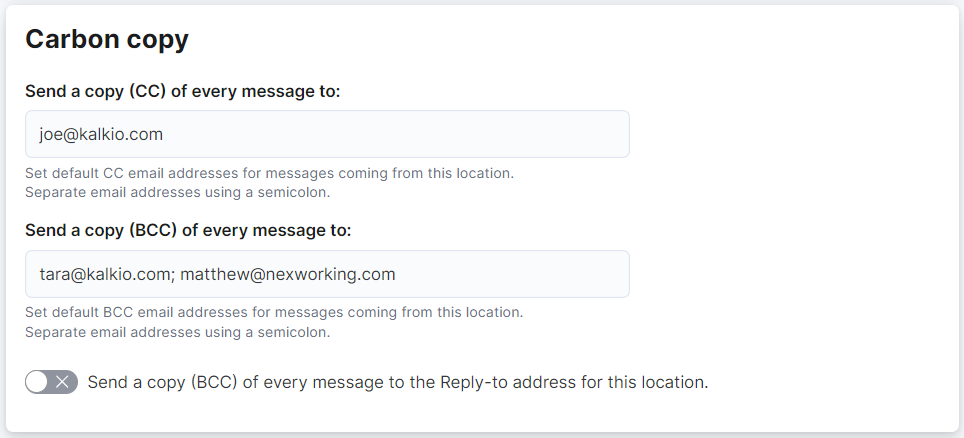
Carbon Copy
You can add email addresses to receive CC and BCC copies of all email notifications sent to customers.
Advanced Settings
All email notifications your customers receive from your space are sent using no-reply@nexudus.com by default.

If you are ok with this email address as the sender, then you're all set!
You can edit your notifications templates or move onto other tasks.
You can also easily change this default sender address on the Admin Panel if you prefer to use your own.
For example, you want all notifications customers receive to be sent from info@nexstudio.com or kate@outlook.com.
All you need to set it up is:
- The address and password of the email you want to use
- Your email provider (Gmail, Outlook, etc.)
Log in to dashboard.nexudus.com if you aren't already.
Click Settings > Email server.
- Toggle off Use Nexudus servers to deliver email.
- Add your email provider's Email server host details.
Gmail
smtp.gmail.com
Office 365, Outlook, Hotmail, Live.com
smtp.office365.com
iCloud
smtp.mail.me.com
AOL
smtp.aol.com
Yahoo
smtp.mail.yahoo.com
- Add your email provider's Email server port details.
Gmail, Office 365, Outlook, Hotmail, Live.com, iCloud, Yahoo
587
AOL
465
- Toggle on Connect using SSL.
- Add the address of the email account you want to connect in the SMTP username field.
- Add the password of the email account you want to connect in the SMTP password field.
Click Save settings.
All set! All new notifications will now be sent through the email account you've just connected. Any notification already sent to customers remains unchanged.