The Bookings section of the Members Portal is available by default. You can't disable the Bookings section, but you can control who has access.
Once you've defined your access settings, you'll also need to define other settings that apply to all the resources you make available on the Members Portal. These include how customers pay for bookings and whether bookings need admin approval.
Finally, you can make resources available on the Members Portal.
We recommend treating these steps as an audit for your space. You can also make sure you're taking advantage of all the new features added in Version 5.
Defining Access Settings
You can define which customer groups have access to the Bookings section under Settings > Website > Access on the Admin Panel.
You can restrict the Bookings section to the following customer groups:
- the public: anyone visiting your portal
- logged-in users: customers with an account
- members only: customers with an active contract in Nexudus
- contacts only: customers who don't currently have an active contract in Nexudus
You'll need to enable guest checkout if you want customers to be able to make bookings without creating an account.
Once you've configured your access settings, you'll need to decide how customers pay for bookings.
Defining Payment Settings
You'll need to define the following settings in order to determine how customers pay for bookings in your space.
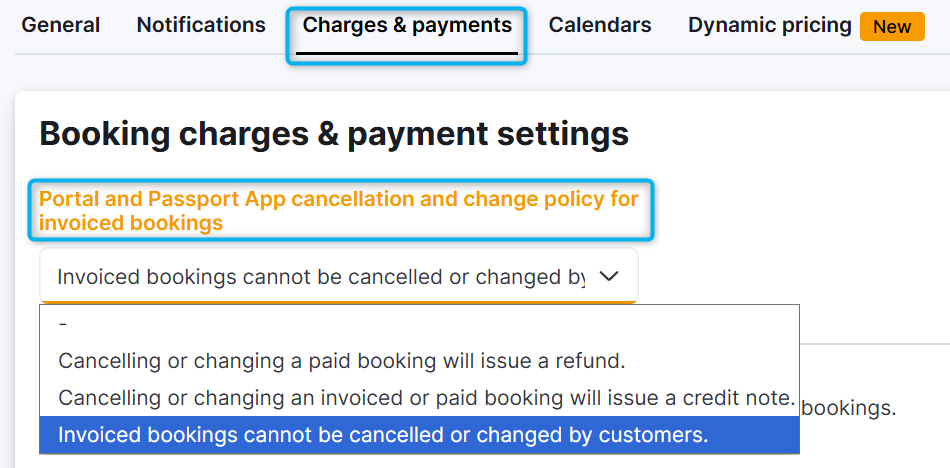
Defining booking cancellation settings
Booking cancellation settings control whether invoiced bookings can be edited or cancelled. They also control how customers are issued a refund.
You can find these settings at Settings > Bookings and calendar settings > Charges & payments on the Admin Panel.
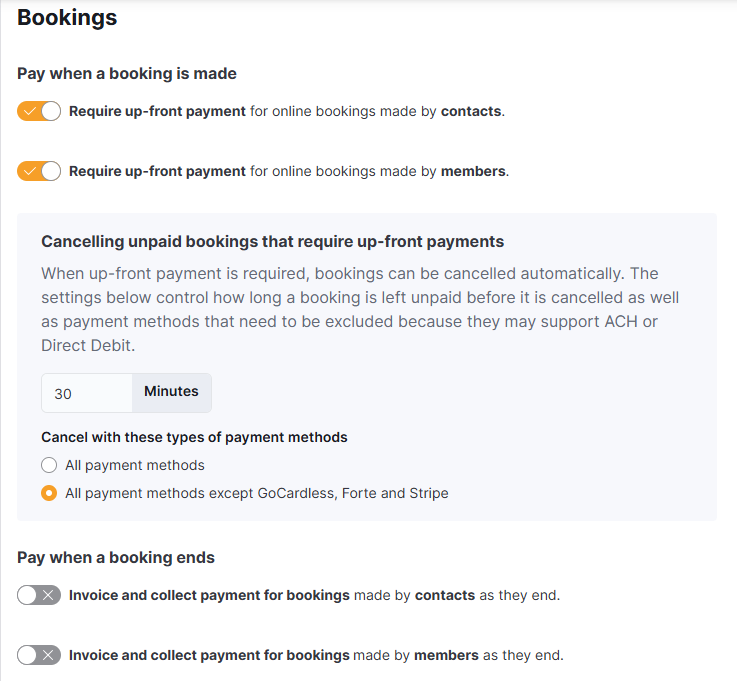
Defining when customers pay for bookings
You can define whether you want to require customers to pay upfront or invoice them when the booking ends.
You can find these settings at Settings > Sign-up and checkout on the Admin Panel under the Checkout tab.
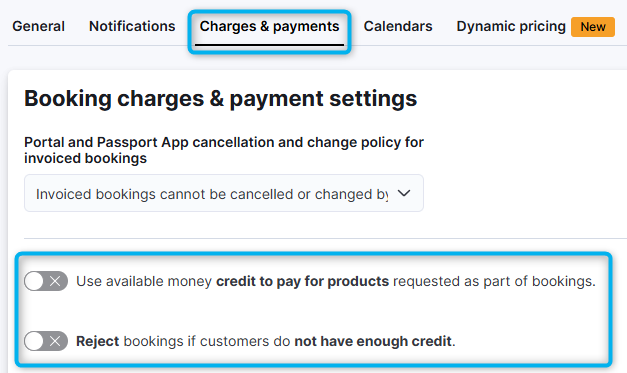
Defining how customers pay with credit
If you let customers use credits to pay for bookings, you'll need to define the following settings.
You can find these settings under Settings > Bookings and calendar settings > Charges & payments on the Admin Panel.
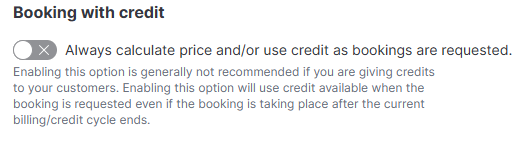
You'll also need to define when credit is used to pay for bookings.
You can find these settings under Settings > Sign-up and checkout on the Admin Panel under the Checkout tab.
Defining how customers pay for add-on products
You can define how members pay for add-on products.
You can find these settings under Settings > Bookings and calendar settings > Charges & payments on the Admin Panel.

Once you've configured your payment settings, you'll need to decide if bookings need admin approval.
Defining Approval Settings
You can define whether bookings need admin approval before they're confirmed.
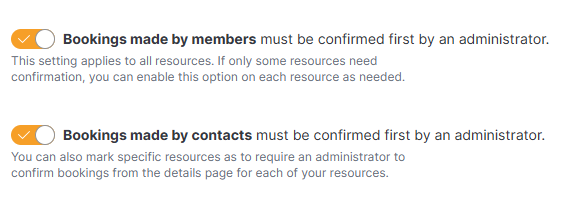
Simply go to Settings > Bookings and calendar settings on the Admin Panel and click on the General tab.
You can require admin approval for bookings made by contacts and bookings made by members. Enable both toggles if you'd like to require admin approval for all bookings.
Once you've configured your approval settings, you'll need to decide what notifications customers receive about bookings.
Defining Notification Settings
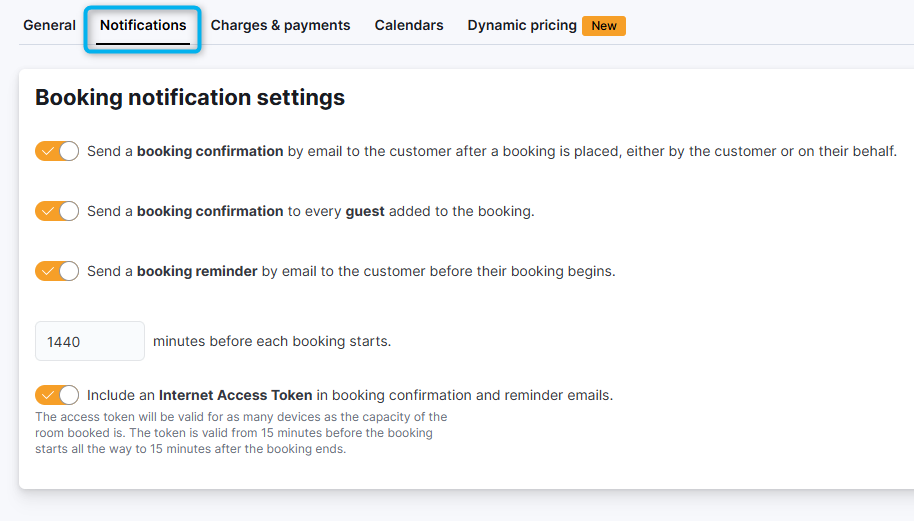
You can define what notifications customers and their guests receive about their bookings.
You can find these settings at Settings > Bookings and calendar settings on the Admin Panel under the Notifications tab.
Once you've defined your notification settings, you'll need to define your registration settings.
Defining Registration Settings
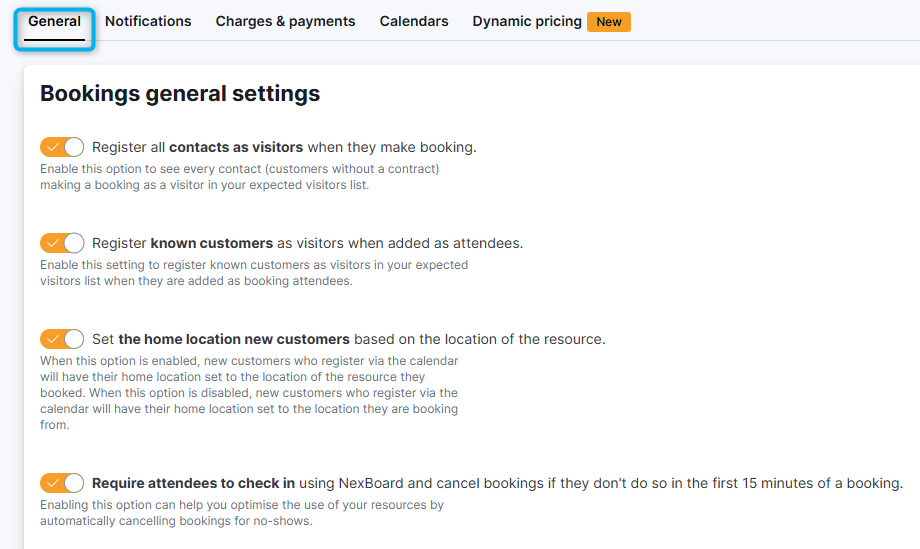
Registration settings let you define how customers are registered in your space when they make bookings.
You can find these settings at Settings > Bookings and calendar settings on the Admin Panel under the General tab.
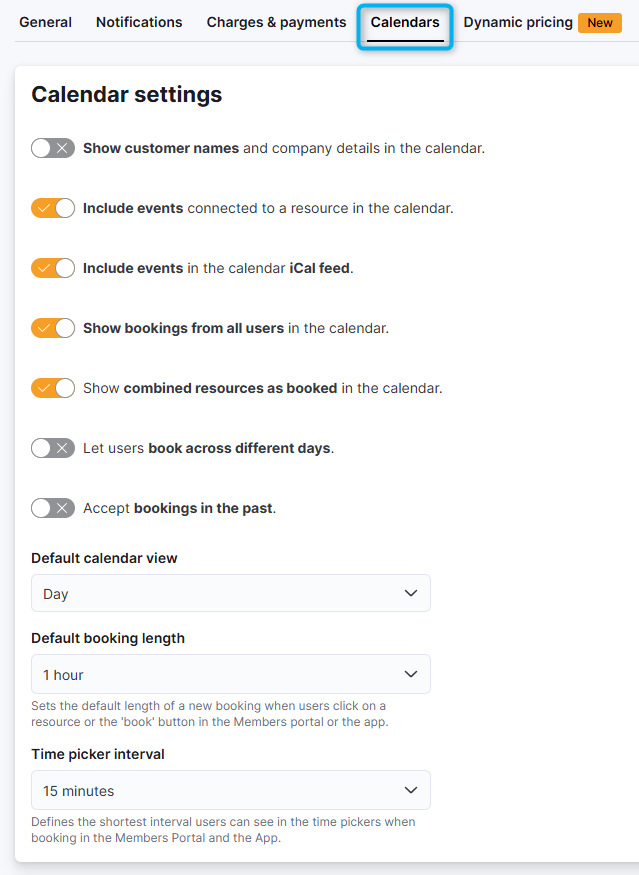
Defining Calendar Settings
Calendar settings let you control what information is displayed on the calendar on the Members Portal.
Enabling Dynamic Pricing
You can choose to enable dynamic pricing for bookings. Dynamic pricing lets you automatically adjust your rates based on booking demand.
For more information, check out Dynamic Pricing.
Once you've defined your Bookings section settings, you can make resources available on the Members Portal.
Making Resources Available on the Members Portal
Resources aren't available on the Members Portal by default, but you can easily define their settings and publish them from the Admin Panel.
You can define resource settings when you add resources or by editing them later.
Make sure you define a resource kind for any resources available on the Members Portal.
Resource kinds define where resources are grouped in your Members Portal navigation.
This was previously controlled by Categories in Versions 4 and before.
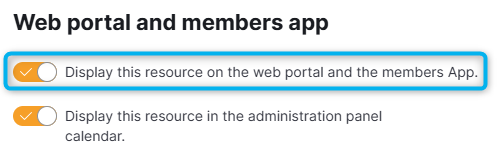
You can easily publish any resource from the Admin Panel by opening its record under Inventory > Resources. Under Resource details > Portal and apps, toggle on Display this resource on the website and the App.
Once you've defined your settings and published resources, customers can make bookings on the Members Portal.